Manually uploading data for each partner and product can be a time-consuming task. To simplify this process, Agentcis provides a Bulk Import feature that allows you to upload all your partner, branch, and product information at once using a structured Excel/CSV template.
This article provides a step-by-step guide on how to use the bulk import feature efficiently.
Ensure that your user profile has the necessary permissions enabled to access the Data Import functionality. Without the required access, the import option may not be available. The following permission mentioned in the screenshot below is required to access the data import:

Click on the Settings button in the Agentcis dashboard.
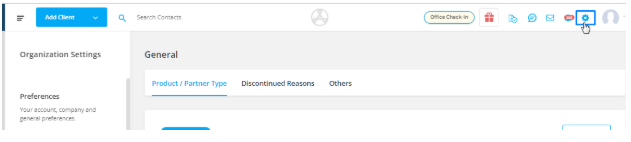
From the left-side menu, choose the Data Import section.

Click on the Import Partner & Product button to begin the process.

Download the template file provided. This template ensures your data is formatted correctly for the system to process.
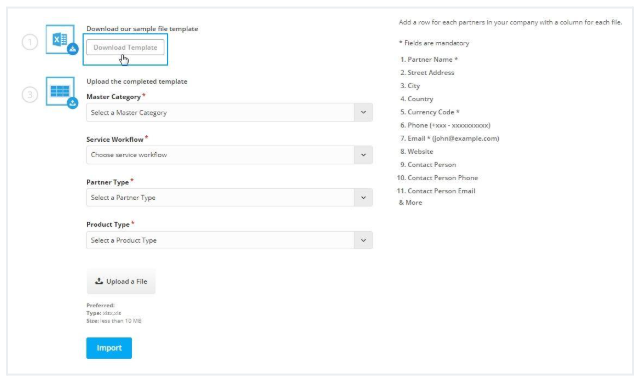
Before uploading the data, select the following values from the system:
Master Category:This refers to the primary classification of the partner organization.
Example:
Education Provider
Migration Agent
Health Insurance Provider
Workflow: This refers to the process you follow to provide the service.
Partner Type (e.g., University, College, Service Provider)
Product Type (e.g., Course, Program, Service)

Open the downloaded template and enter the necessary details about your Partners, Branches, and Products.
Fields marked with an asterisk (*) are mandatory and must be completed.

|
| FieldFormatExample |
*Partner Name | Text | ABC University |
Partner Email | Valid email | |
Registration Number | Numbers only | 12345678 |
Currency Code | From dropdown list | AUD |
Street | Text | 123 Main Street |
City | Text | Sydney |
State | Text | New South Wales |
Zip Code | Numbers only | 2000 |
Country | From dropdown list | Australia |
Phone Number Country Code | From dropdown list | +61 |
Phone Number | Numbers only | 412345678 |
Website | URL |
|
| FieldFormatExample |
Partner Email | Email of the partner | |
Branch Name | Text | Melbourne Campus |
Branch Email | ||
Phone Number Country Code | From dropdown | +61 |
Phone Number | Numbers only | 398765432 |
Street | Text | 456 Queen Street |
City | From dropdown | Melbourne |
State | Text | Victoria |
Zip Code | Numbers | 3000 |
Country | From dropdown | Australia |
Head Office | Text | Main Campus |
Contact Person Name | Text | Jane Doe |
Contact Person Email | Valid email | |
Contact Person Phone Country Code | From dropdown | +61 |
Contact Person Phone | Numbers only | 423456789 |
|
| Field Format Example |
Partner Email | Must match a partner record | |
Product Name | Text | Bachelor of Science |
Revenue Type | Text (e.g., Commission, Fixed) | Commission |
Branch Name | Text | Melbourne Campus |
Once the template is filled out correctly, upload the file back into the system through the Import Partner & Product section.
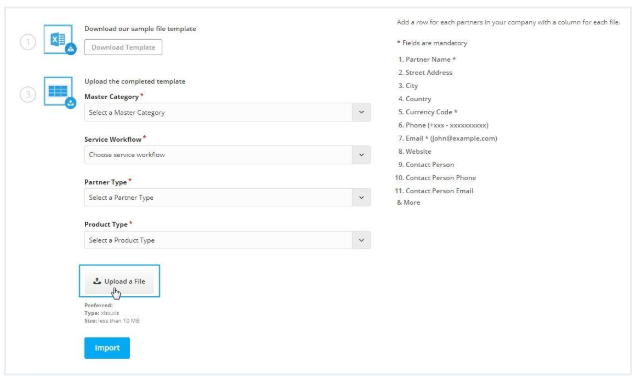
Click the Import button to begin the bulk upload process.

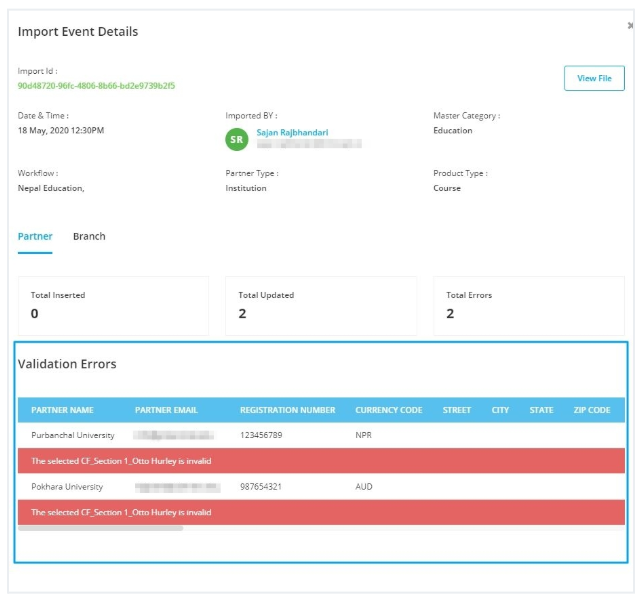
After the import, click on the Details button to view a summary of your data import from the list of the import. This will show:
Number of records Inserted
Number of records Updated
Number of records that Failed

If any records fail to import, Agentcis will provide a list of Validation Errors. This allows you to quickly identify and correct issues in your data (e.g., missing mandatory fields, incorrect formats, invalid dropdown values).
Example:
Error – Currency Code "AUDD" is invalid
Fix – Update to correct code: AUD
After correcting any errors and successfully importing all data, the import status will update to "Completed".

Avoid changing or deleting column headers.
Ensure all mandatory fields are filled in correctly.
Use values from dropdown lists where applicable (e.g., Country, Currency Code).
Keep phone numbers in numeric format only.
By using the bulk import feature in Agentcis, you can save time and reduce manual errors—making it easier to set up and manage your partner and product data efficiently.
