Maintaining a standardized and well-structured system is essential for smooth business operations. In Agentcis, you can add multiple and unlimited branch offices, helping you manage different locations and assign users accordingly. Correctly setting up your offices also ensures accurate information appears on important documents like invoices.
Before you begin, please ensure you have the necessary permissions to add an office. If not, reach out to your system administrator.

Why It’s Important
Keeps your team structure organized
Ensures invoices reflect correct office contact details
Allows users to be assigned to specific locations
Supports performance tracking by office
From the left-hand navigation bar, click on "Teams" to access the team management section.

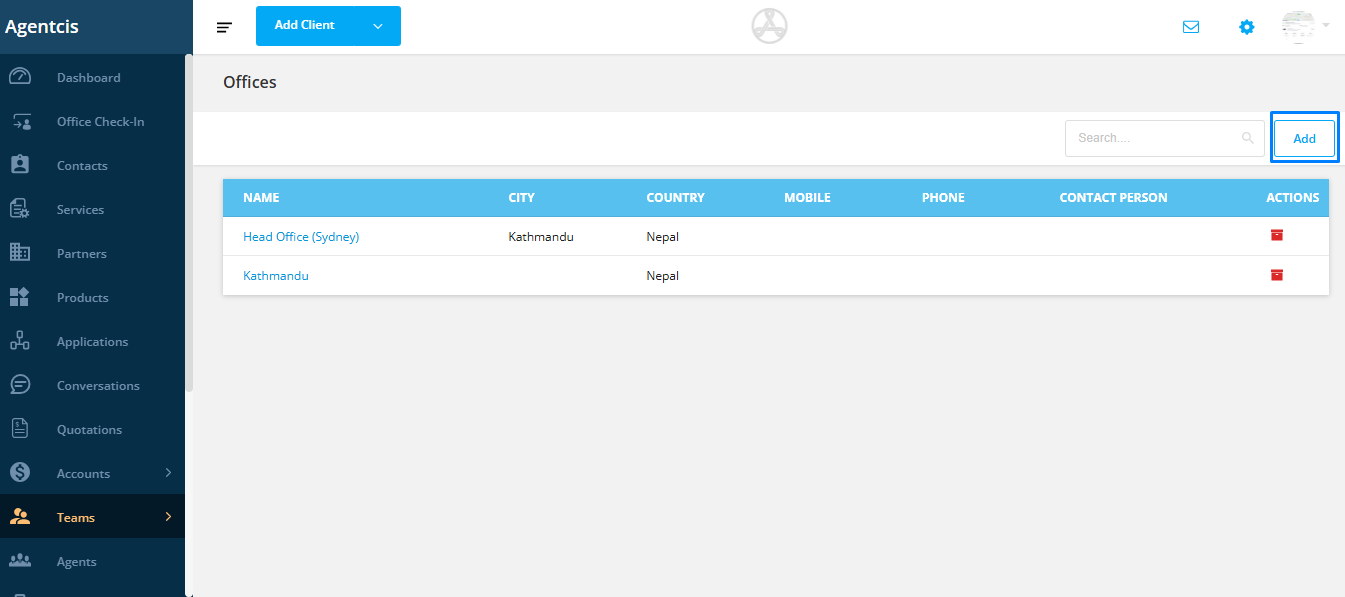
Within the Teams module, click on "Offices". This is where all your existing branch offices are listed.

In the top-right corner of the Offices page, click the "Add" button to open the office creation form.
Complete the office form with the required information. Fields marked with an asterisk (*) are mandatory.
Required Fields:
Office Name
Country
Email Address
Optional Fields:
Phone number
Address
City/State
Website
Notes
Tip: Use consistent naming for each office to keep your records clear (e.g., Kathmandu Office, Sydney Branch).
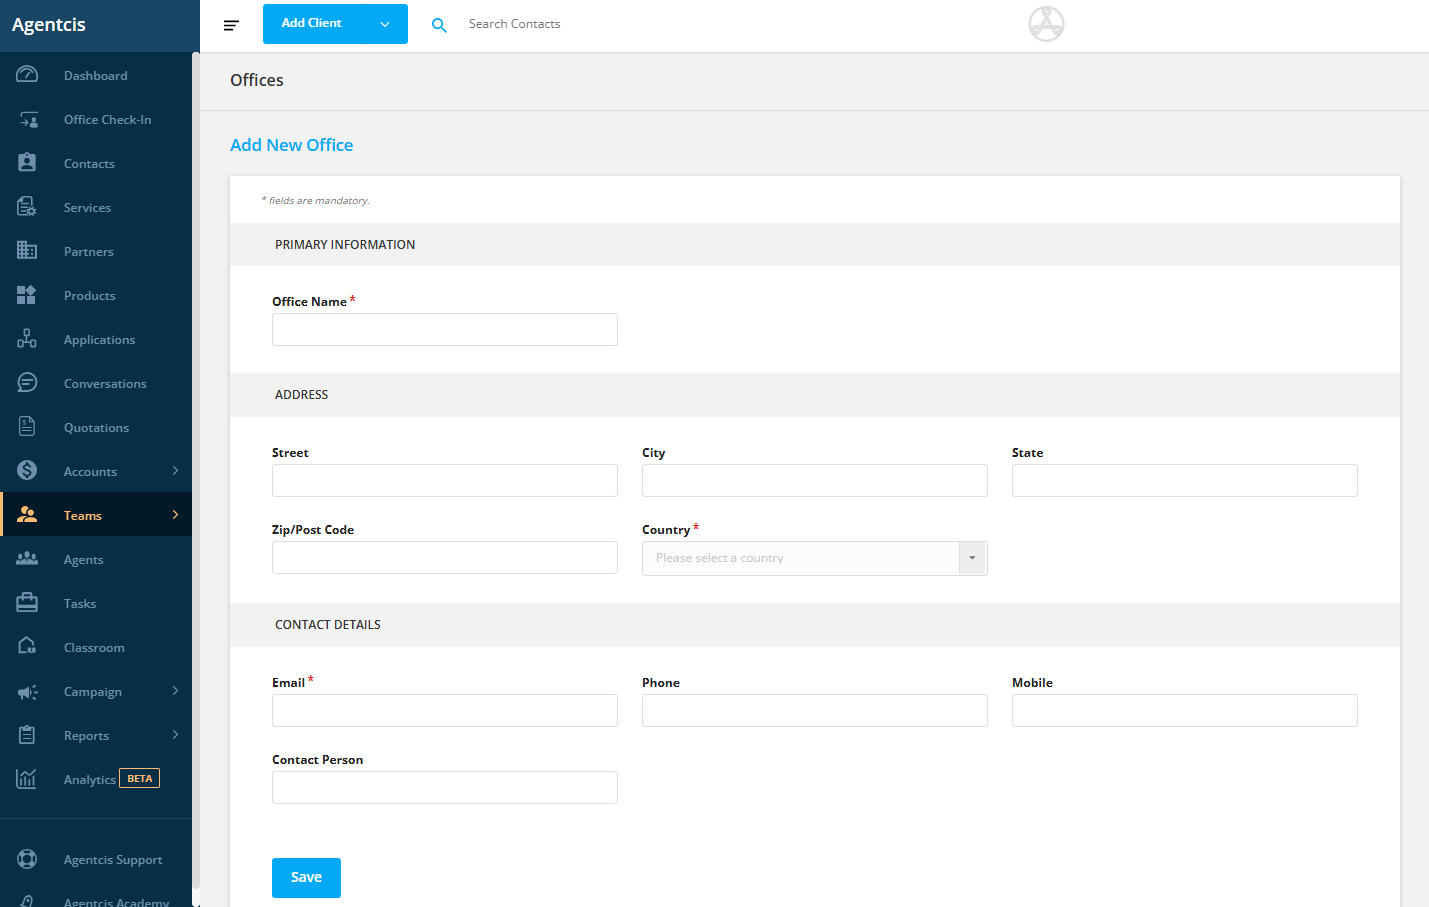
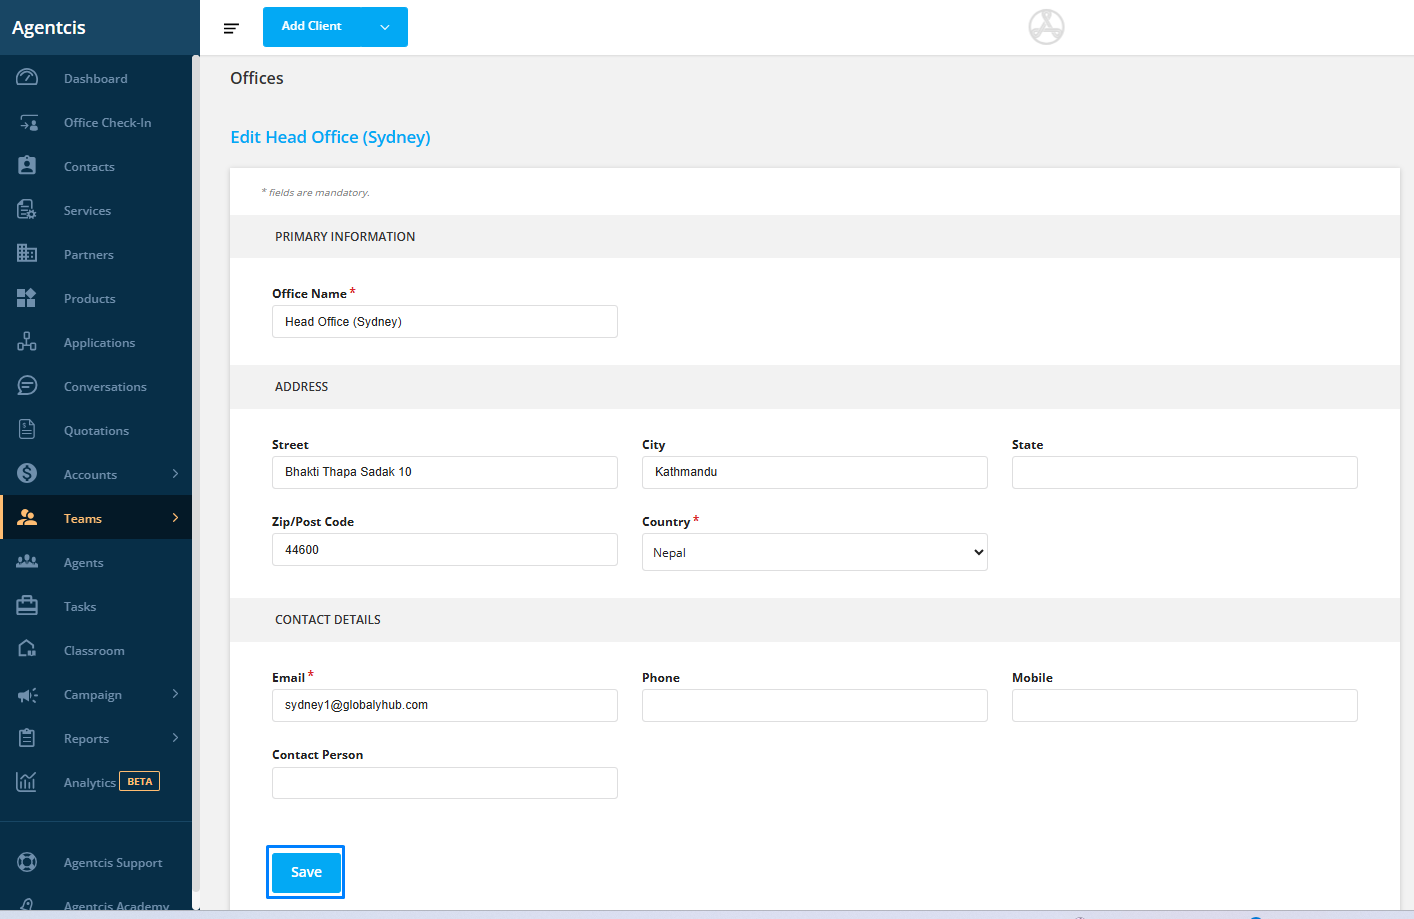
After filling in all the required information, click "Save" to create the new branch office.
Important Note
When a user creates an invoice, the office contact details and address shown on the invoice PDF will be based on the user’s Primary Office. This ensures clients receive the correct contact information specific to the office handling their case or service.
After creating the office:
Assign the appropriate users to the newly created office.
Review each user’s Primary Office setting to ensure invoice consistency.
By following this process, your organization can maintain clean data, proper workflow, and professional documentation across all office locations.
