Notifications in Agentcis keep you updated and reminded about important activities. You will receive them in three ways:
In-System Notifications – Alerts directly within the Agentcis platform.
Email Notifications – Updates sent to your email inbox.
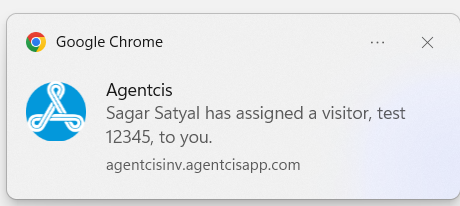
Desktop Notifications – Pop-up alerts on your computer screen when you're logged in.
To set the system notification, follow the following steps:
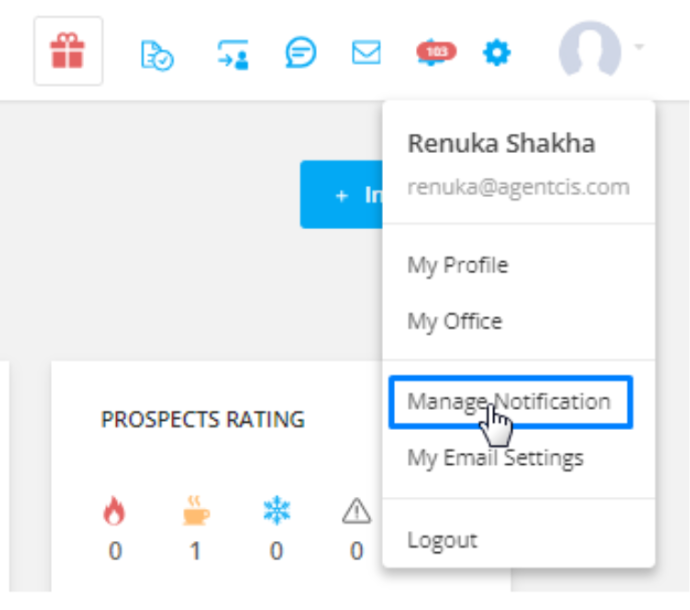
Step 1: Click on your avatar at the top right corner.

Step 2: Select the “Manage Notification” from the drop-down.

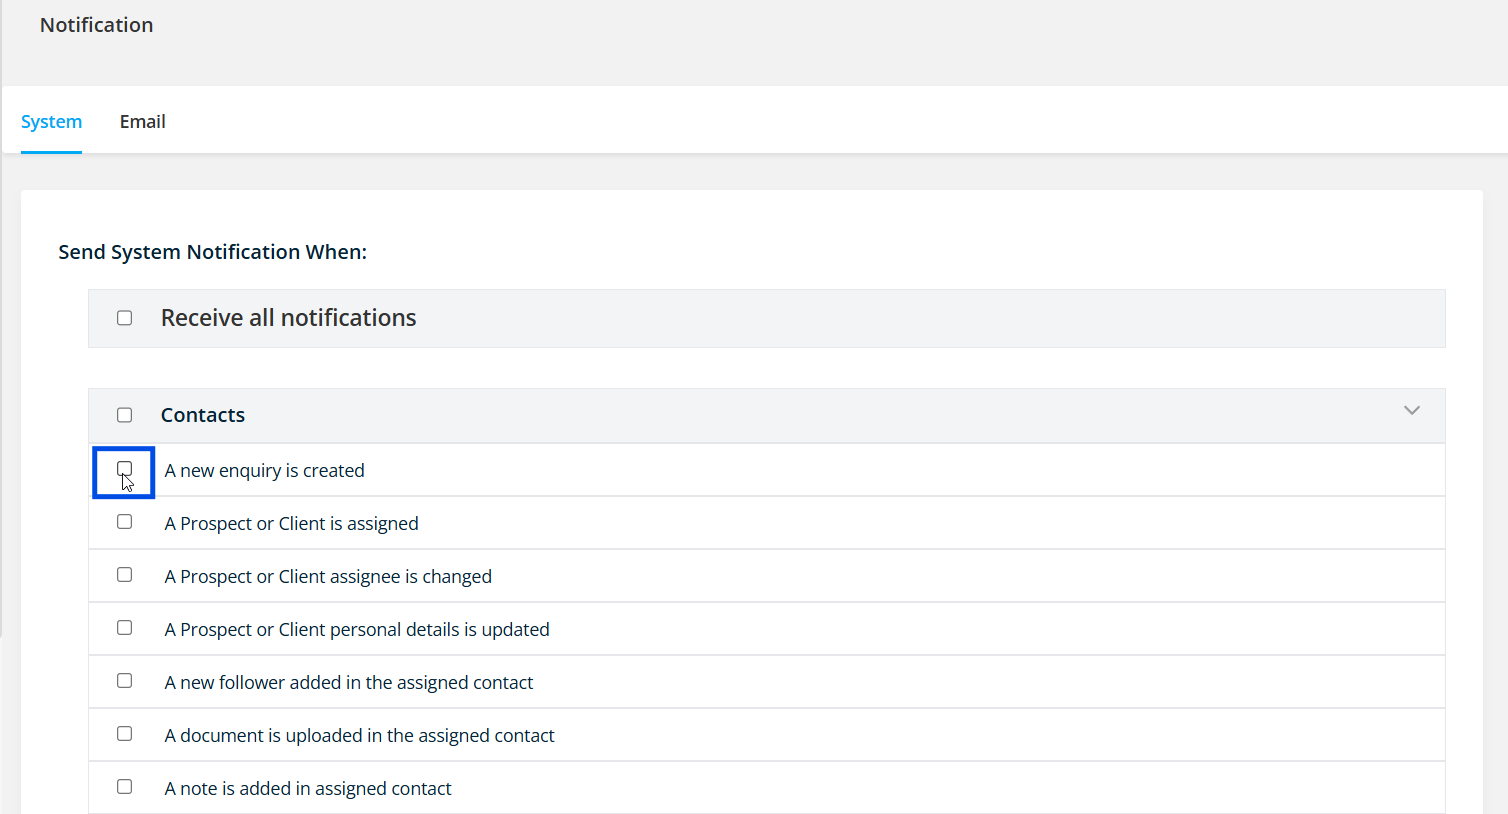
Step 3: Select the option “System” tab.
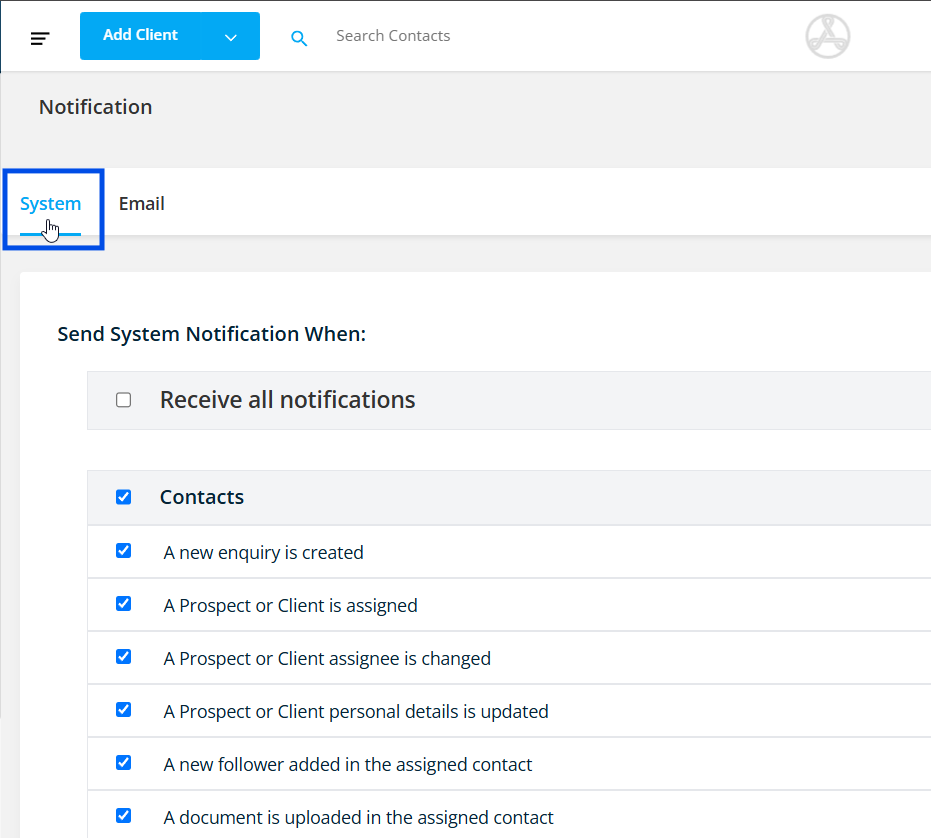
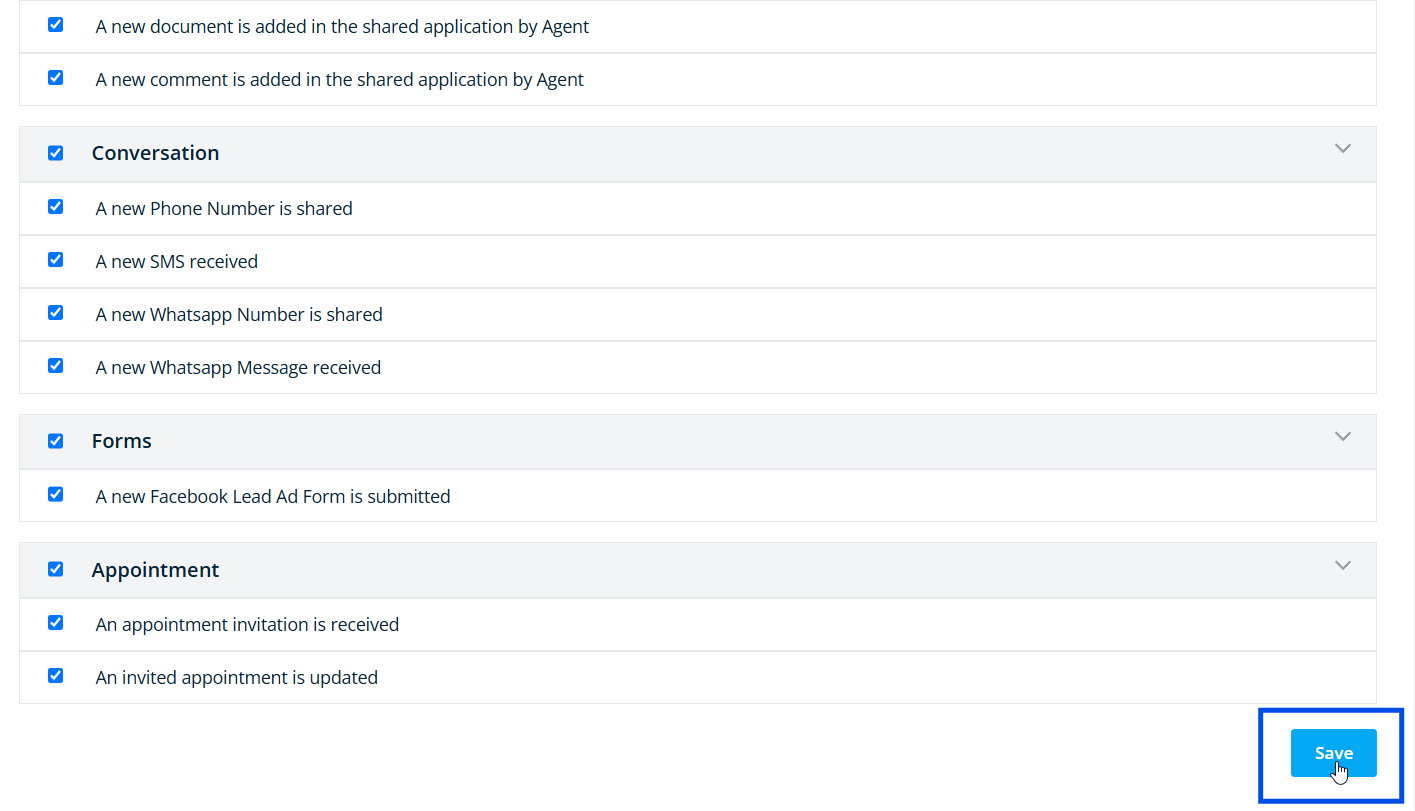
Step 4: Enable the notification based on your preferences simply by clicking the check box.
For example You can set system reminders whenever inquiries are added and prospects, clients, applications, and tasks are assigned to you or any changes are made so that you remain informed and facilitate timely follow-ups and task executions.
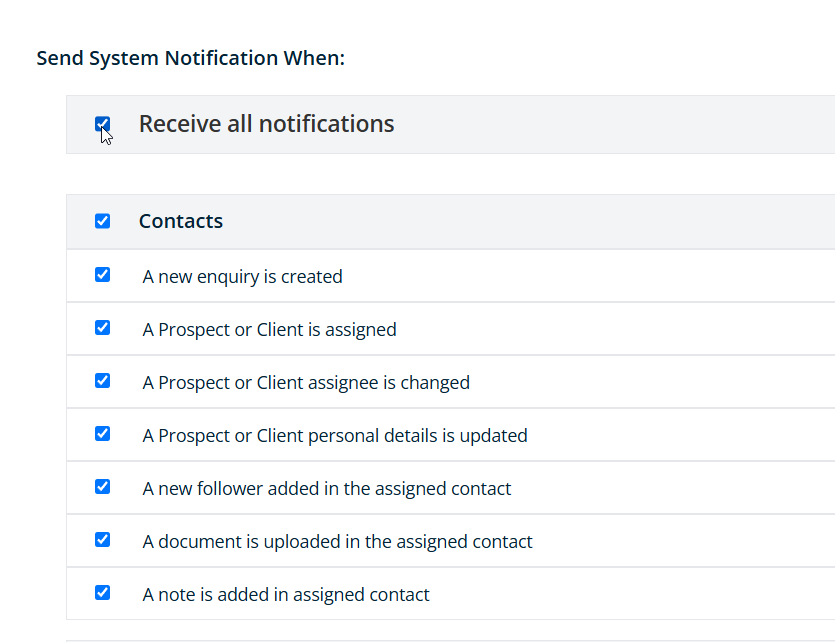
Step 5: Or, enable the “Receive all notifications” option.
Step 6: Scroll to the bottom of the page and select the “Save” option once you complete setting the system notification.
Enable email notifications to receive timely reminders about your assigned tasks and activities. This feature ensures you stay informed and organized by receiving alerts directly to your email inbox, keeping you on top of your responsibilities within the system.
Please Note: You should have the permission to set the email notifications
To set the notifications, please follow the following steps
Step 1: Click on your avatar at the top right corner.

Step 2: Select the “Manage Notification” from the drop-down.

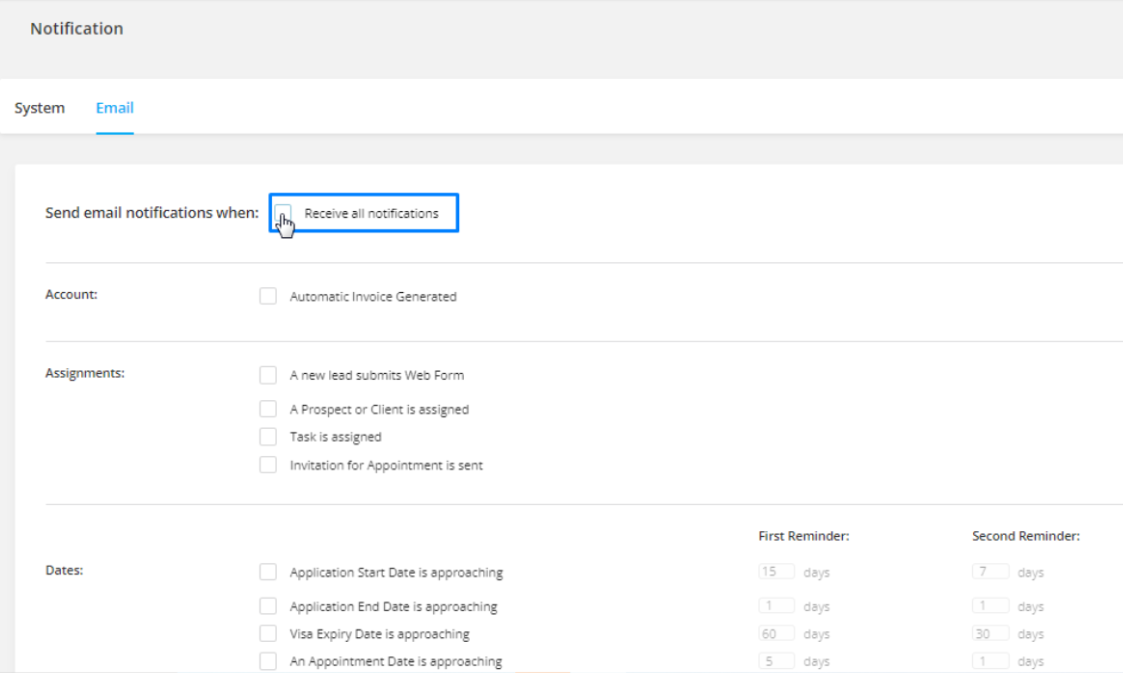
Step 3: Select the “Email” Tab.
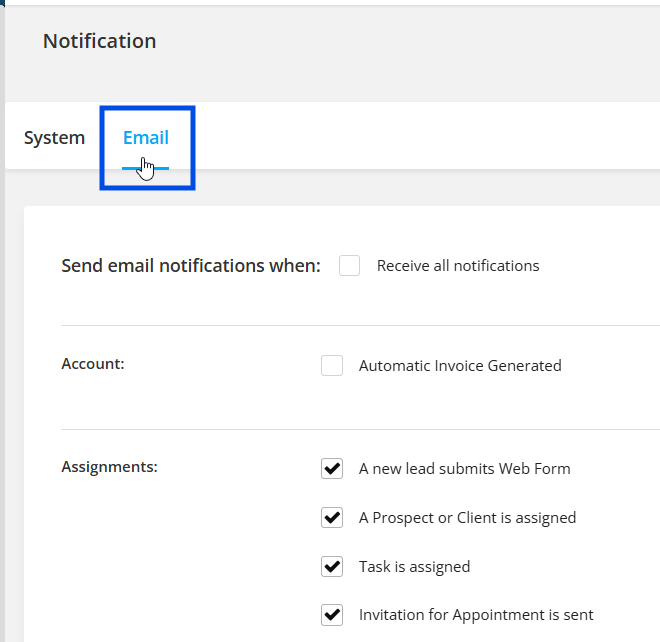
Step 4: Enable the notification based on your preferences simply by clicking the check box.
Step 5: Or, enable the “Receive all notifications” option.
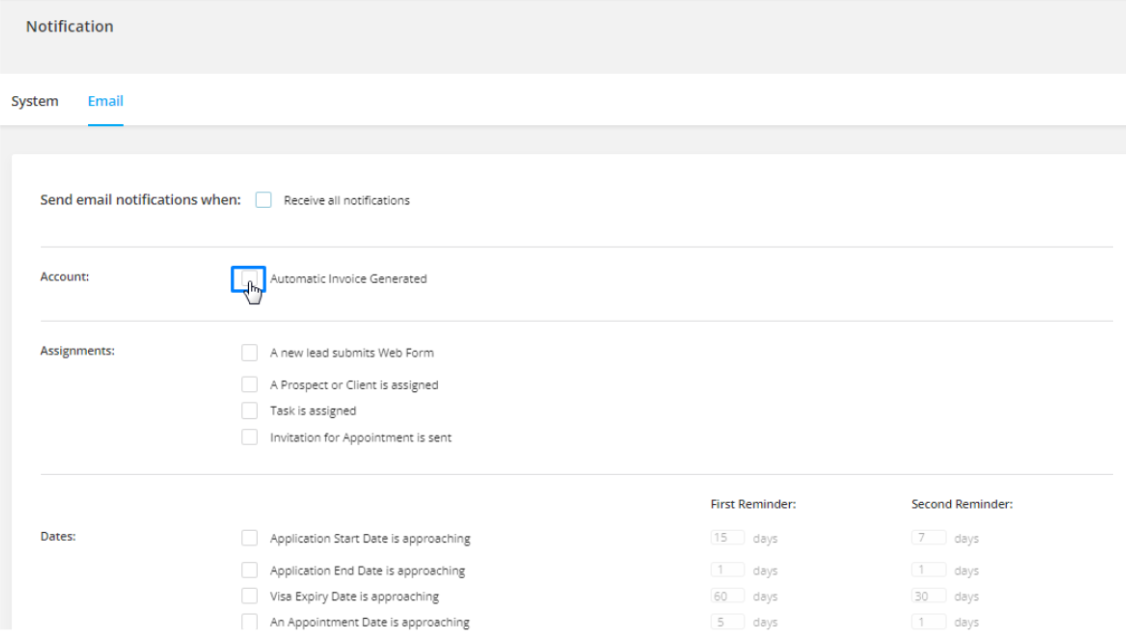
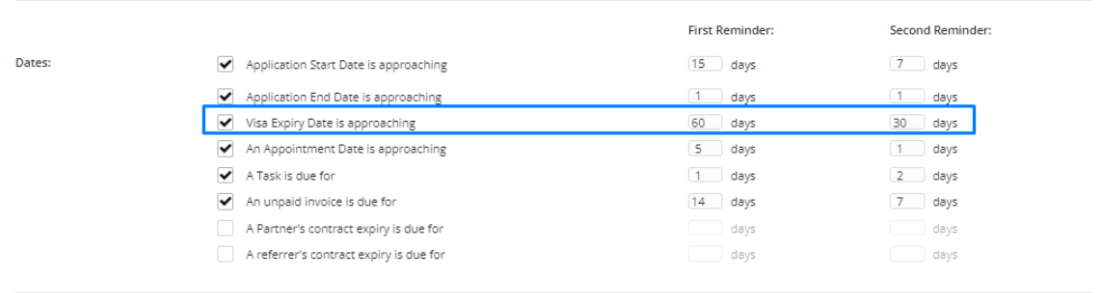
Note: Agentcis enabled setting two different reminders as First Reminder and Second Reminder in case of the dates, Days in Queue and Applications in Stage in Queue.
For Example: You can set email reminders to receive the initial alert 60 days before the client's visa expiry, followed by a second reminder 30 days prior. This ensures timely awareness and facilitates effective action in response to visa expiry.
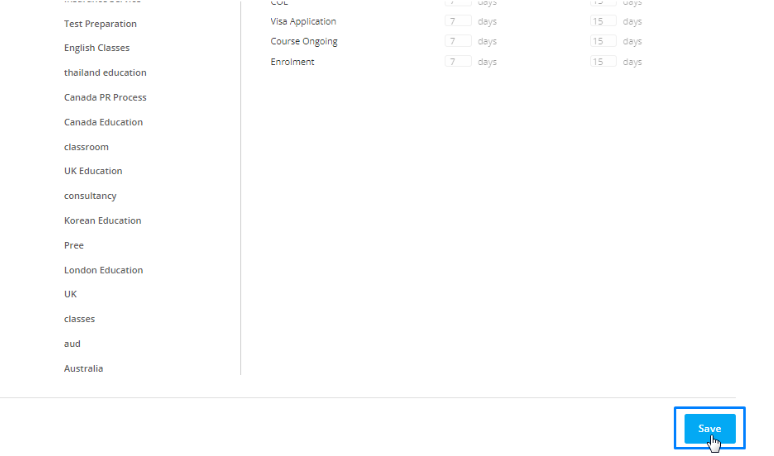
Step 6: Scroll to the bottom of the page and select “Save”, once you complete setting the notification.
To enable desktop notifications for Agentcis, you first need to make sure that notifications are enabled on your device.
Then, follow these steps:
Step 1: On your Agentcis website page, click on view site information from the left side of the address bar.
Step 2: Click on Site Settings.
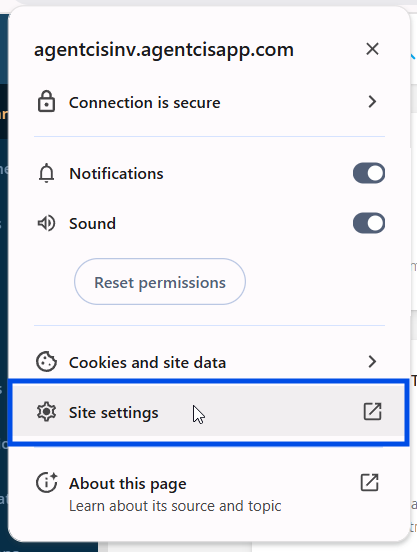
You will land on a new Settings page.
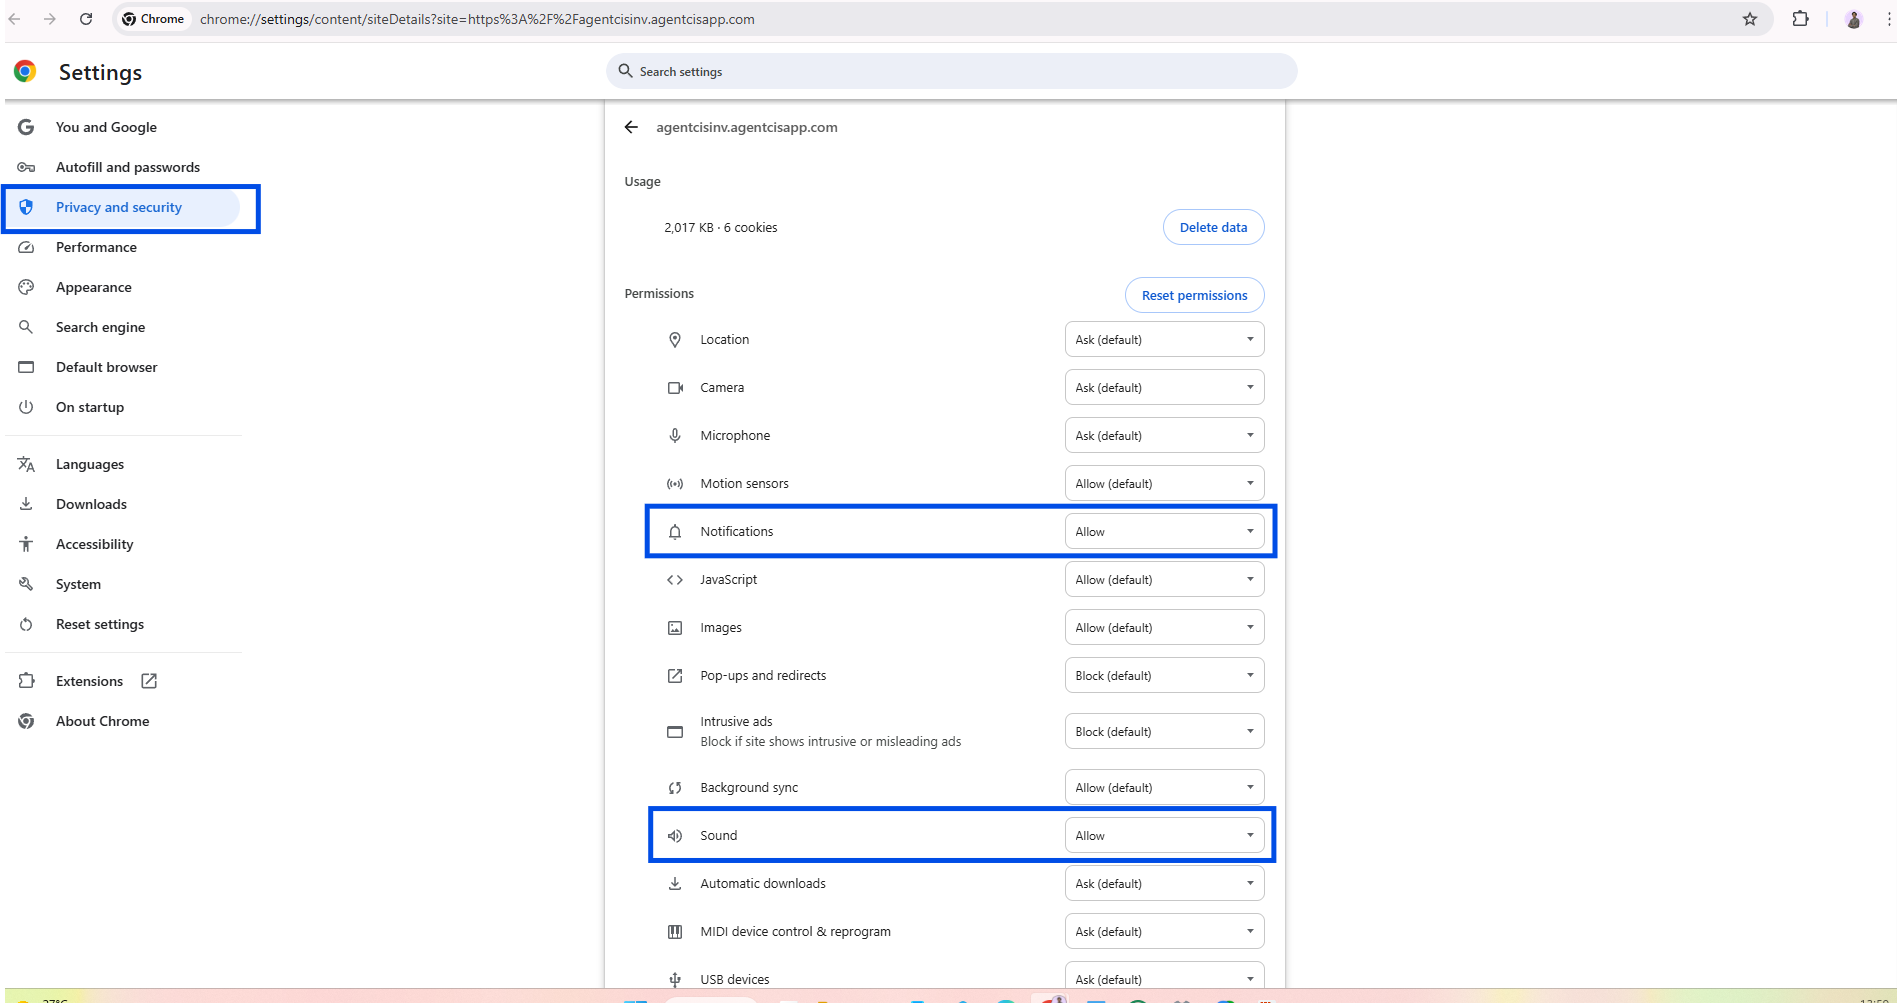
Step 3: On the Site Settings>Privacy and Security, look for the Permissions of Notifications and Sound and make sure they are set Allow.
Step 4: Go back to Agentcis tab and you will be asked to reload to apply your updated settings for this site.

Step 5: Click on Reload and the settings is updated.
Now, you will receive desktop notifications with a sound alert.