Every agency has a unique workflow and information-gathering process. Predefined form fields may not always be sufficient, which is why custom fields allow you to add sections tailored to your needs. These can be created for clients, applications, partners, and products.
Custom fields are organized into sections and appear under the Other Information tab on detail pages. They are also available in reports and lead forms. Additionally, you can filter reports using custom fields by enabling the "Show in list view" option. Fields can also be set as mandatory.
In Agentcis, you can create various types of custom fields:
Text
Number
Date
Dropdown
This flexibility ensures you capture all necessary data as part of your workflow.
To create a custom field for any module you should have the correct permissions:

Step 1: Select Settings from the top info bar.

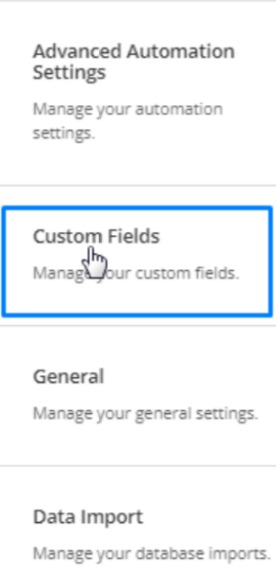
Step 2: Select Custom Field from the list.
Step 3: Select the module for which you are willing to add the custom field.
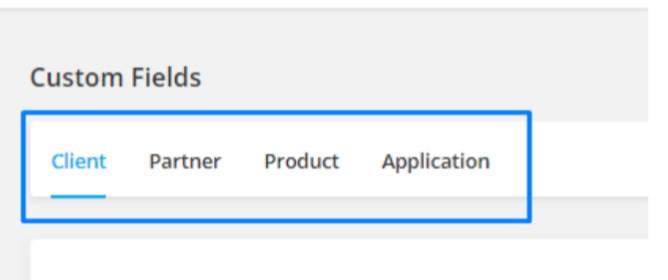
Step 4: Select Add field

A form will appear, as shown in the image below.
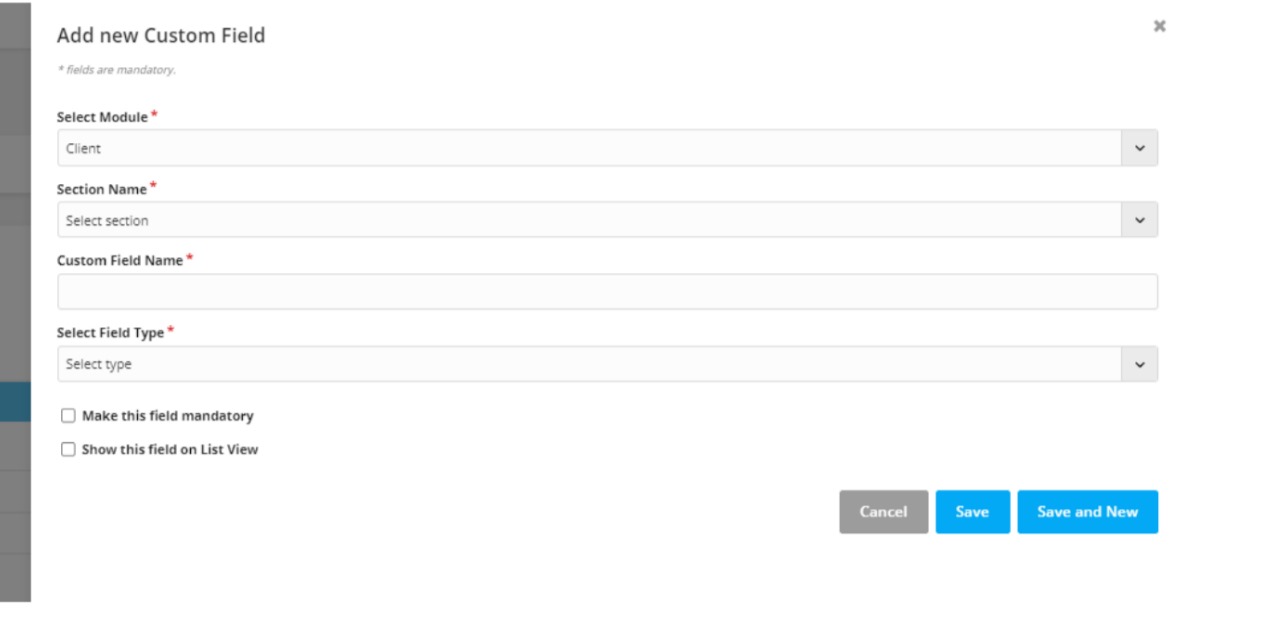
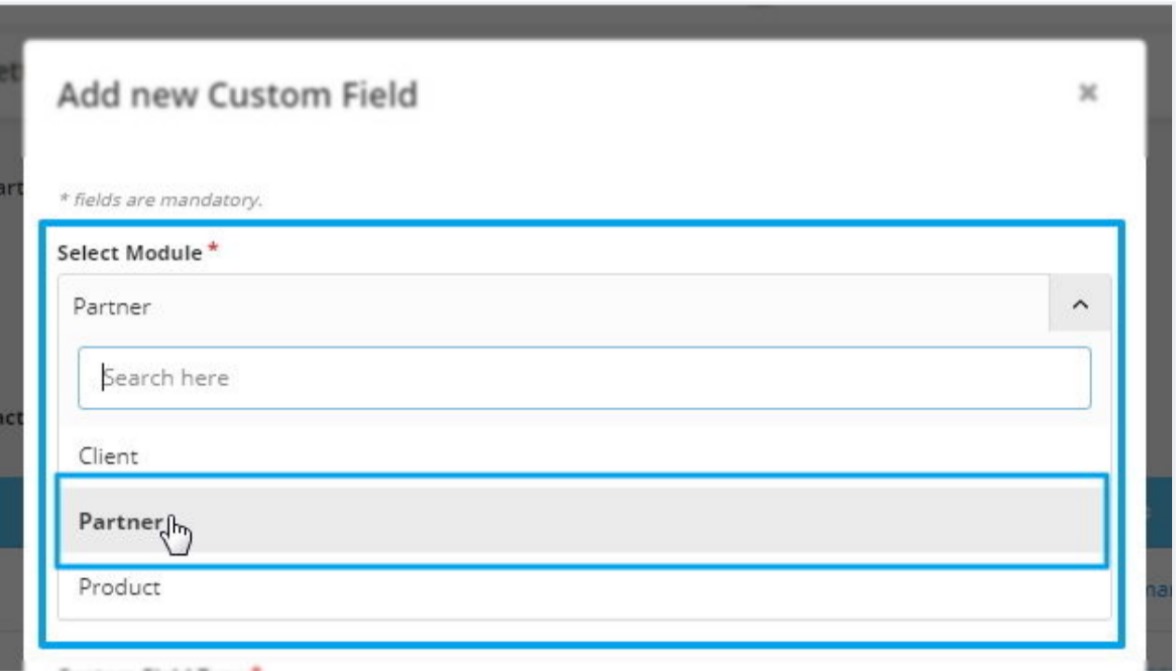
Step 4: Select the Module (Client, Partner, or Product) on which you want to add the field.
Step 5 – Name the section of your Custom field.
A section in a custom field is a way to group related fields together for better organization. Instead of having all fields in one place, sections help categorize information, making it easier to manage and find.
For example, in a Contact module, you can create sections like:
Personal Information (e.g., Alternative Phone Number, Social Media Profile)
Emergency Contact (e.g., Name, Relationship, Contact Number)
Professional Details (e.g., Occupation, Company Name, Work Email)
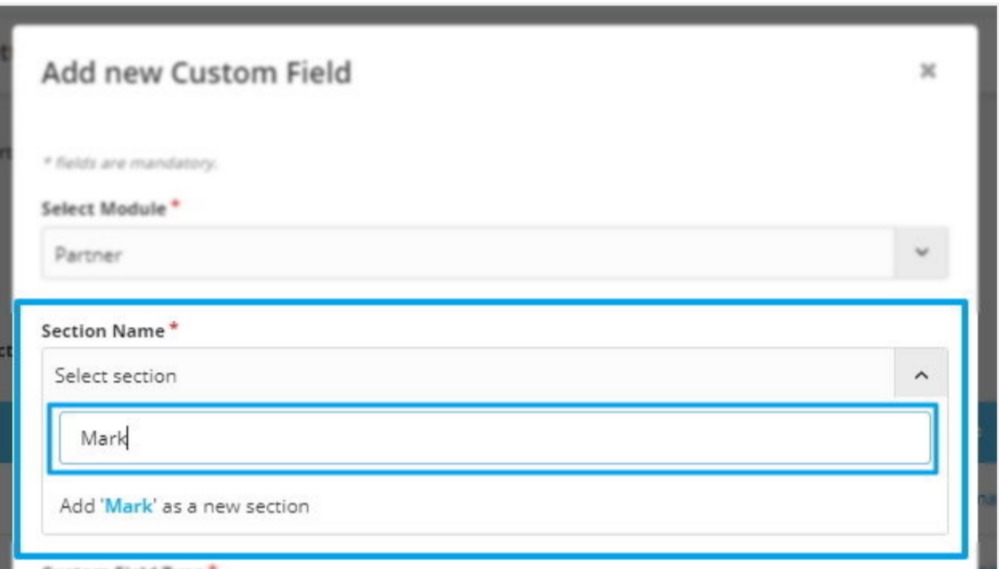
Step 6 – Give the Custom Field Name.
A Custom Field Name is the label given to a custom field to specify what type of information should be entered. It helps users understand the purpose of the field when filling out a form.
If you want to collect a student’s preferred study destination, you can create a custom field with the name "Preferred Study Destination."
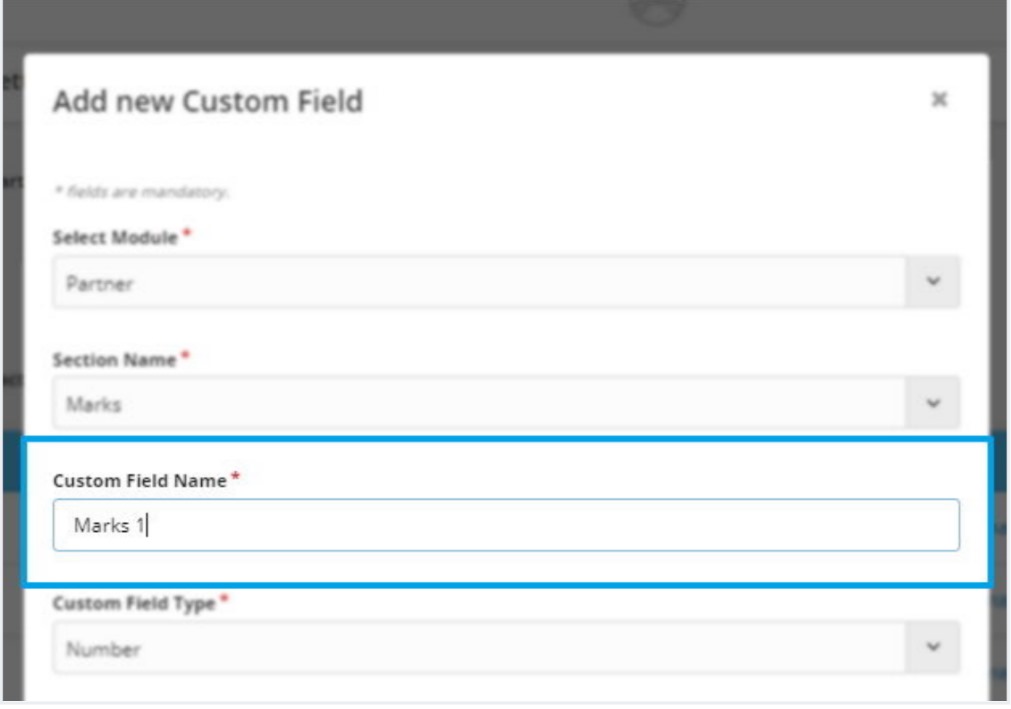
Step 7 – Select the Field Type (Text/Date/Number/Dropdown). In Agentcis, you can create custom fields of different types to collect specific information based on your workflow needs. The available custom field types are:
Text – Used for entering alphanumeric data such as names, addresses, or descriptions.
Example: Full Name, Alternative Phone Number, Remarks
Number – Used for numerical values, ensuring only numbers can be entered.
Example: Passport Number, Years of Experience, Contact Number
Date – Used to select or enter a date in a specific format.
Example: Date of Birth, Application Submission Date, Visa Expiry Date
Dropdown – Used to provide a list of predefined options for selection.
Example: Preferred Study Destination (USA, Canada, UK), Lead Source (Website, Referral, Event)

Step 8 – Here, you have two options. Check on Make this field Mandatory to add a Mandatory field and Check on Show this field on list view to view the field on related module’s table head for reporting purpose.
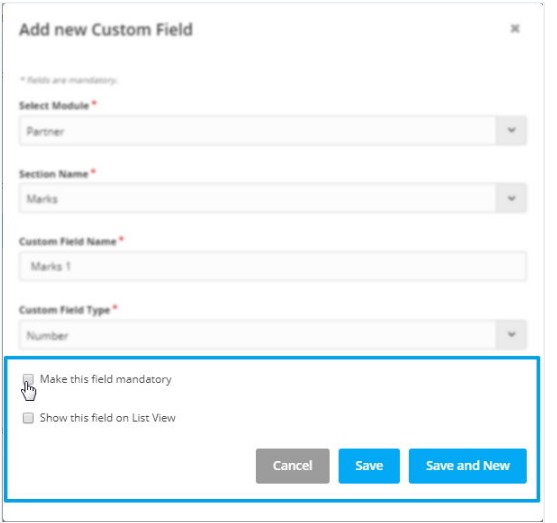
If you select the Dropdown option, you can also select Allow Multiple Dropdown Selections so that multiple options from the dropdown can be selected.
After the custom fields are added, they can be located from:
Creating or Editing Lead Forms
Edit profile for a Contact/Partner/Product
Adding a manual client from the top bar
Other Information tab in contact’s profile
View Other details tab in the application’s detail page