Email Inbox setting enables only forwarding the email inbox of the personal email into Agentcis, but it does not display the emails sent from the personal email within the Agentcis.
To integrate the email, Please confirm you have the permission to do so:
Follow the following steps for the email forwarding:
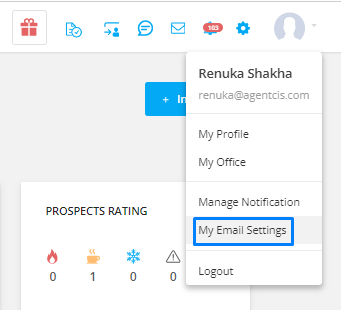
Step 1: Click on your avatar at the top right corner.

Step 2: Select “My Email Settings” from the drop-down.
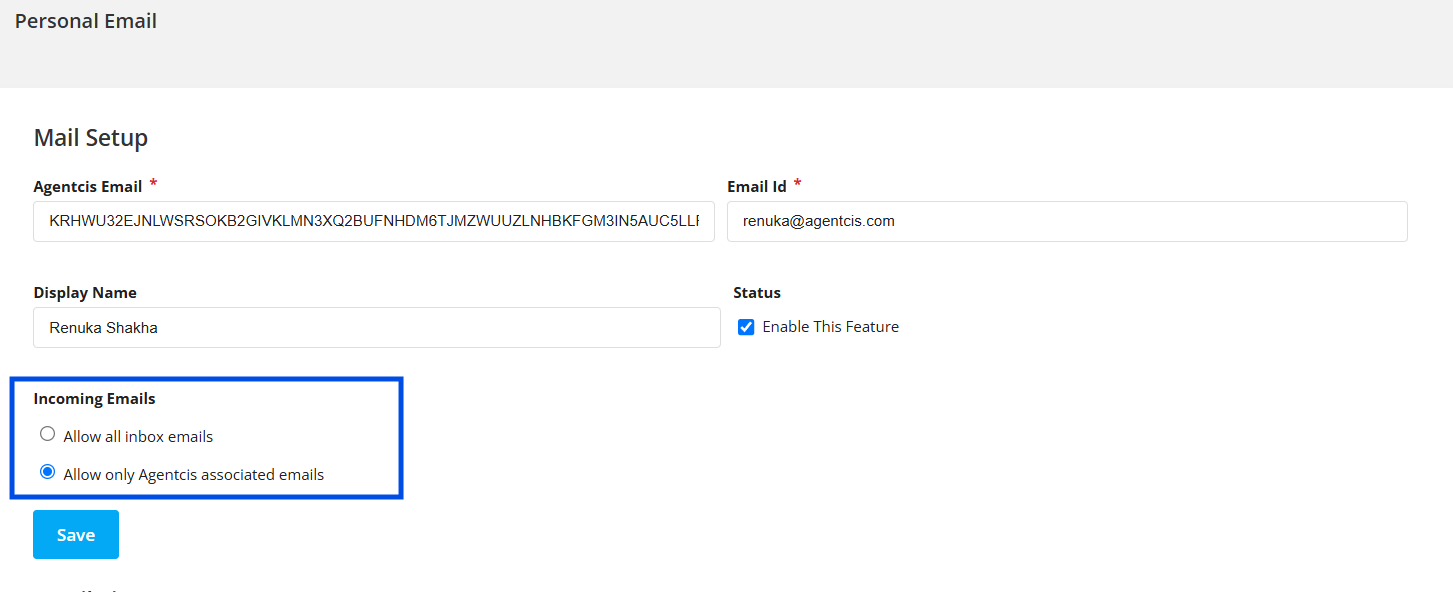
Step 3: Add your “Email ID” In Agentcis, the added email must be unique, ensuring that it is not utilized elsewhere that is within the company's email system or any other context within Agentcis.
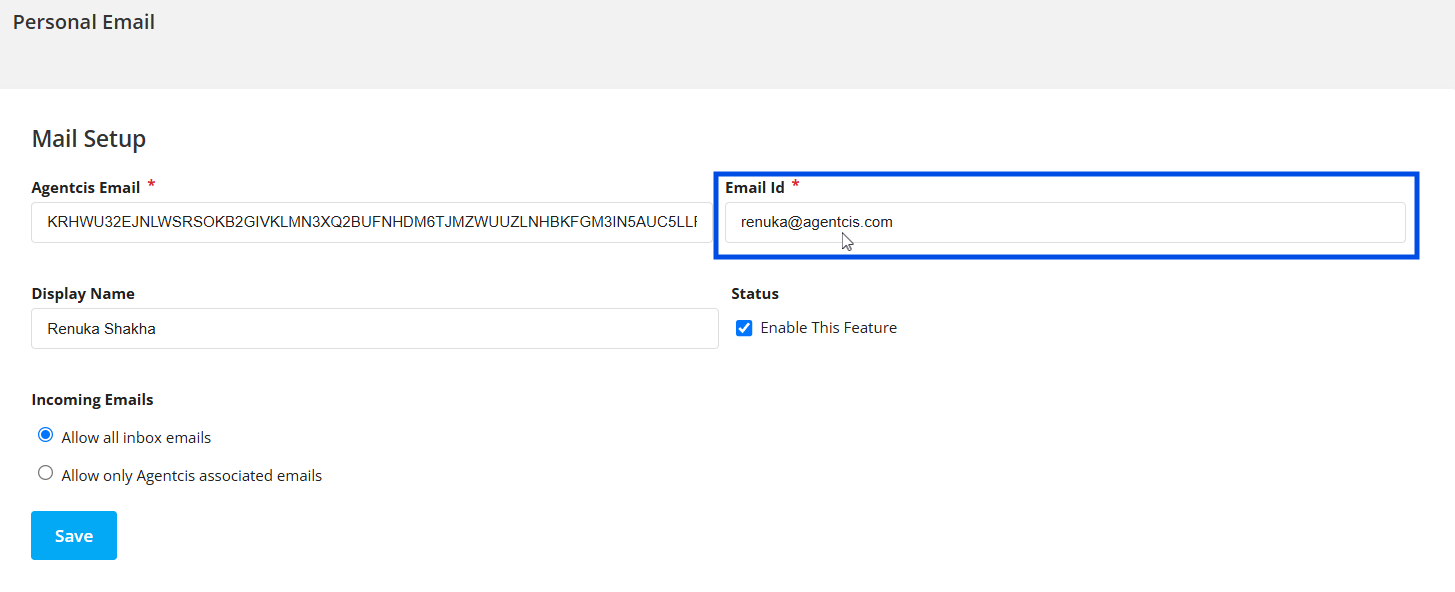
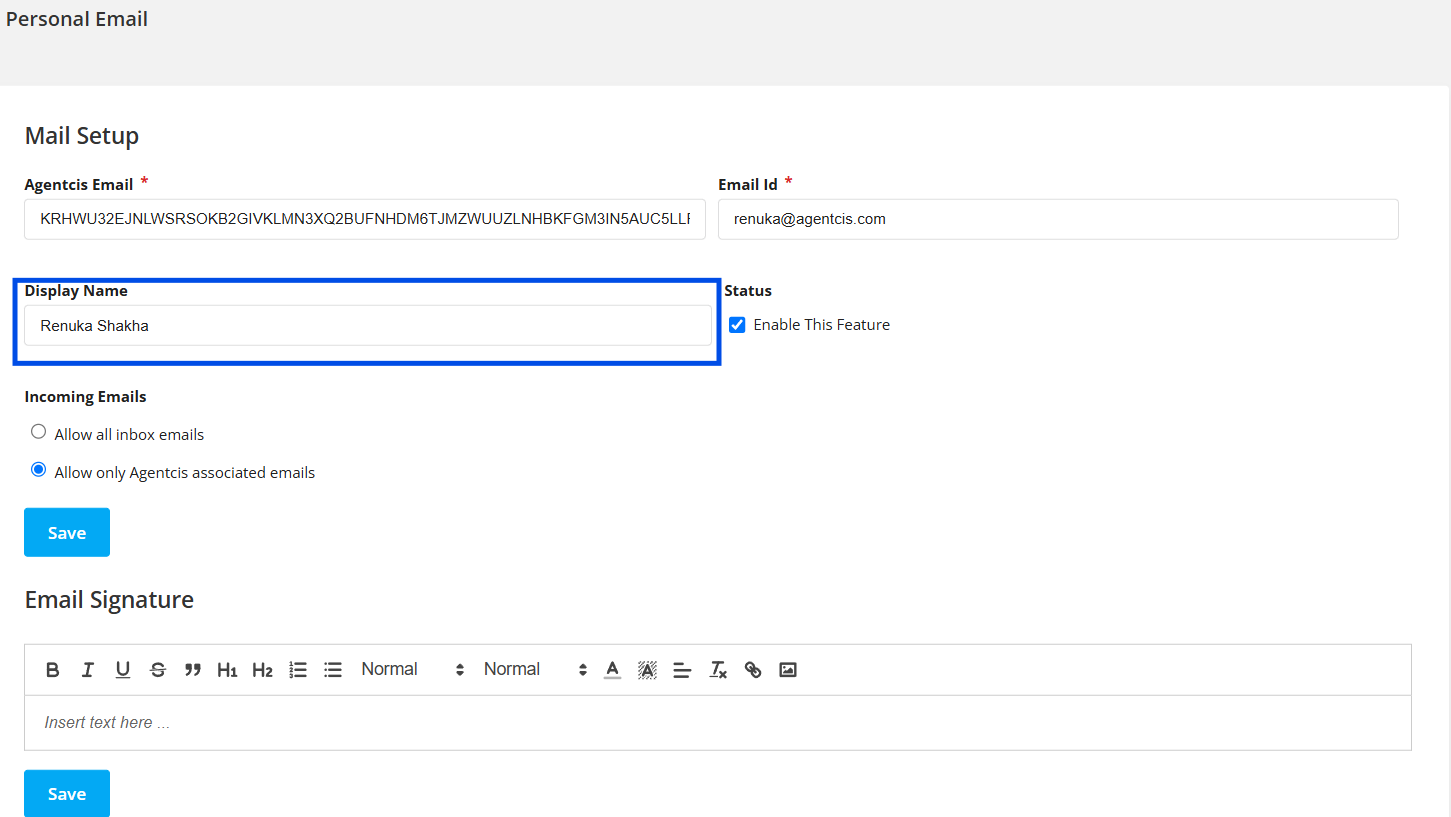
Step 4: Add the “Display Name”.
The display name generally would be your Personal Name. You can also use your company name if you are using the same email as your company email.
Step 5: To manage how emails are shown in Agentcis:
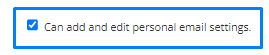
Select the checkbox next to "Incoming Emails" to enable email syncing.
Choose one of the following options:
Allow all inbox emails – Shows all emails from your personal inbox in Agentcis.
Allow only Agentcis associated emails – Shows only emails related to Agentcis in the system.
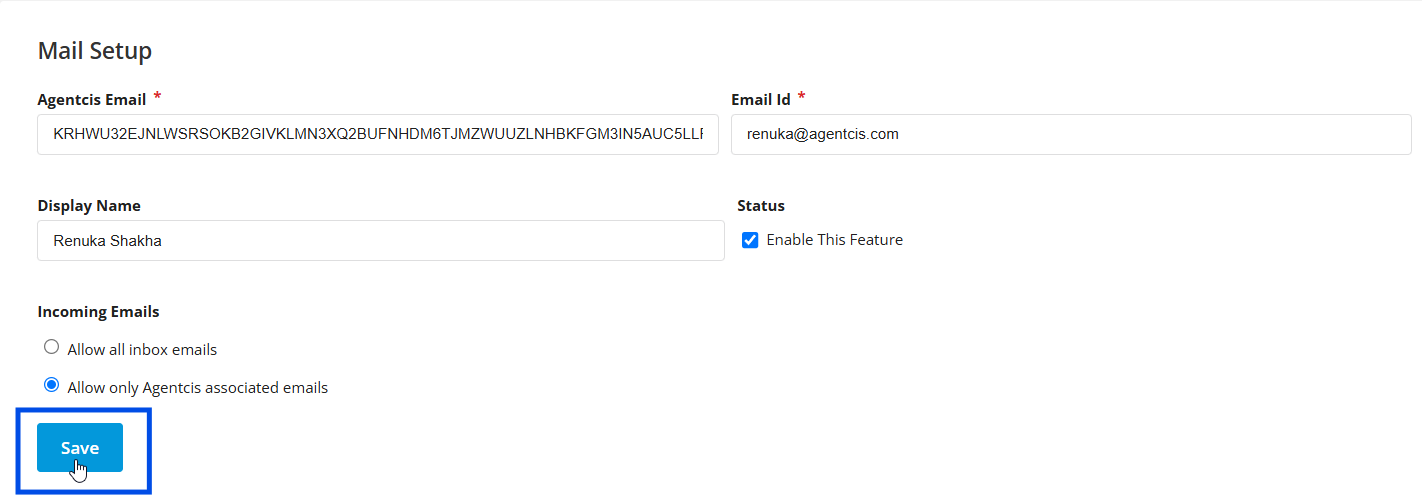
Step 6: Click on the “Save” Tab.
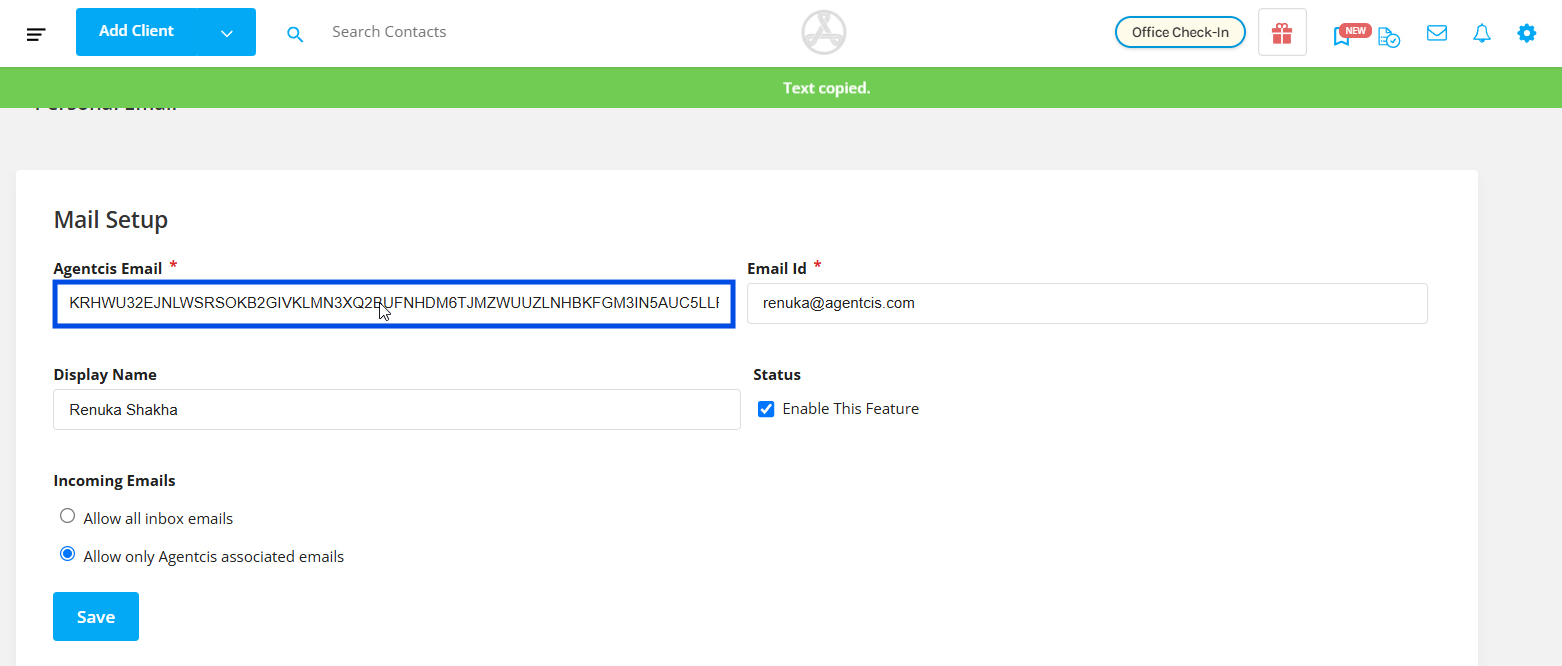
Step 7: Left-click on the Agentcis Email box to copy the email automatically.
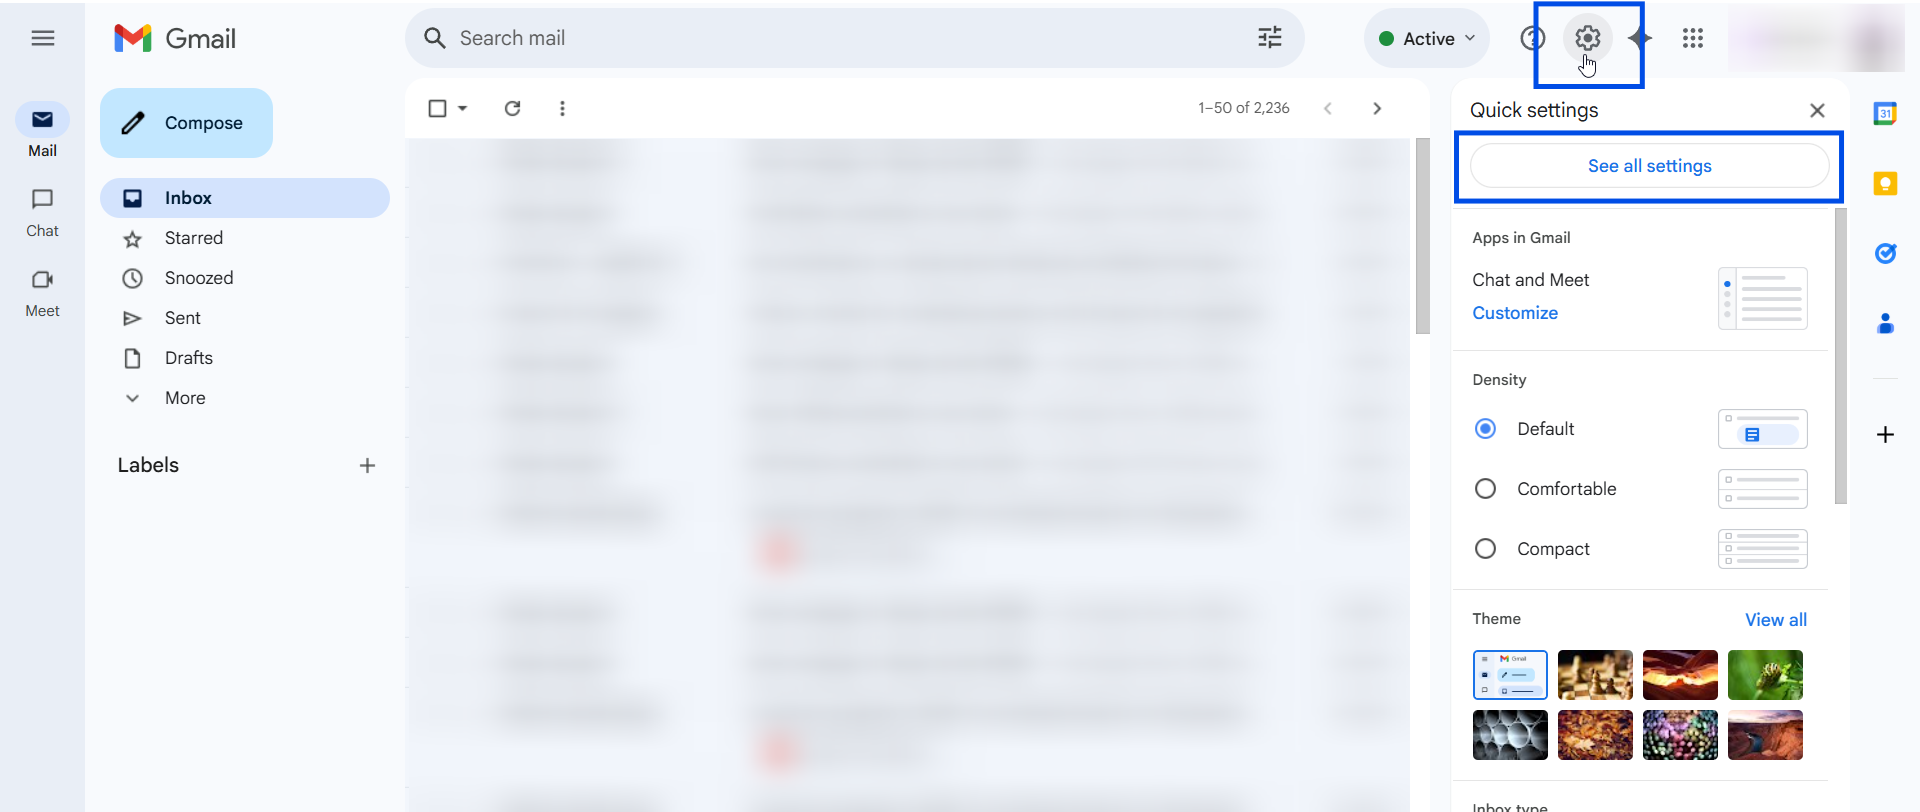
Step 8: Open the email service provider like Gmail in another tab and click on the settings from the top-right. Then click on the ‘See all Settings’ option.
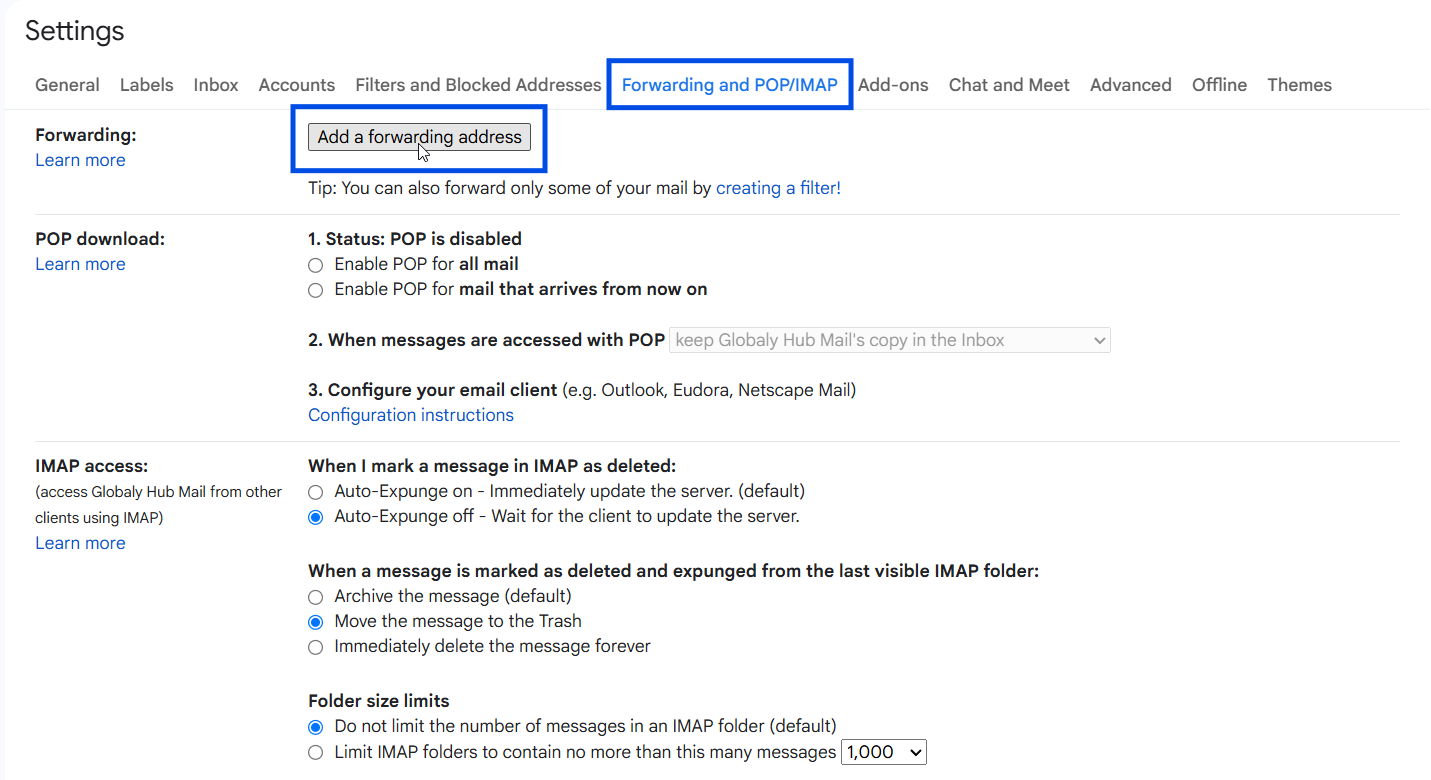
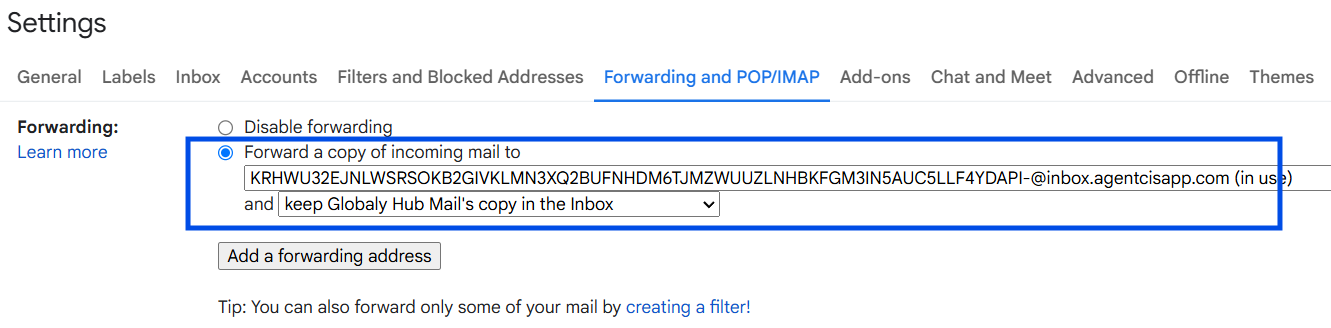
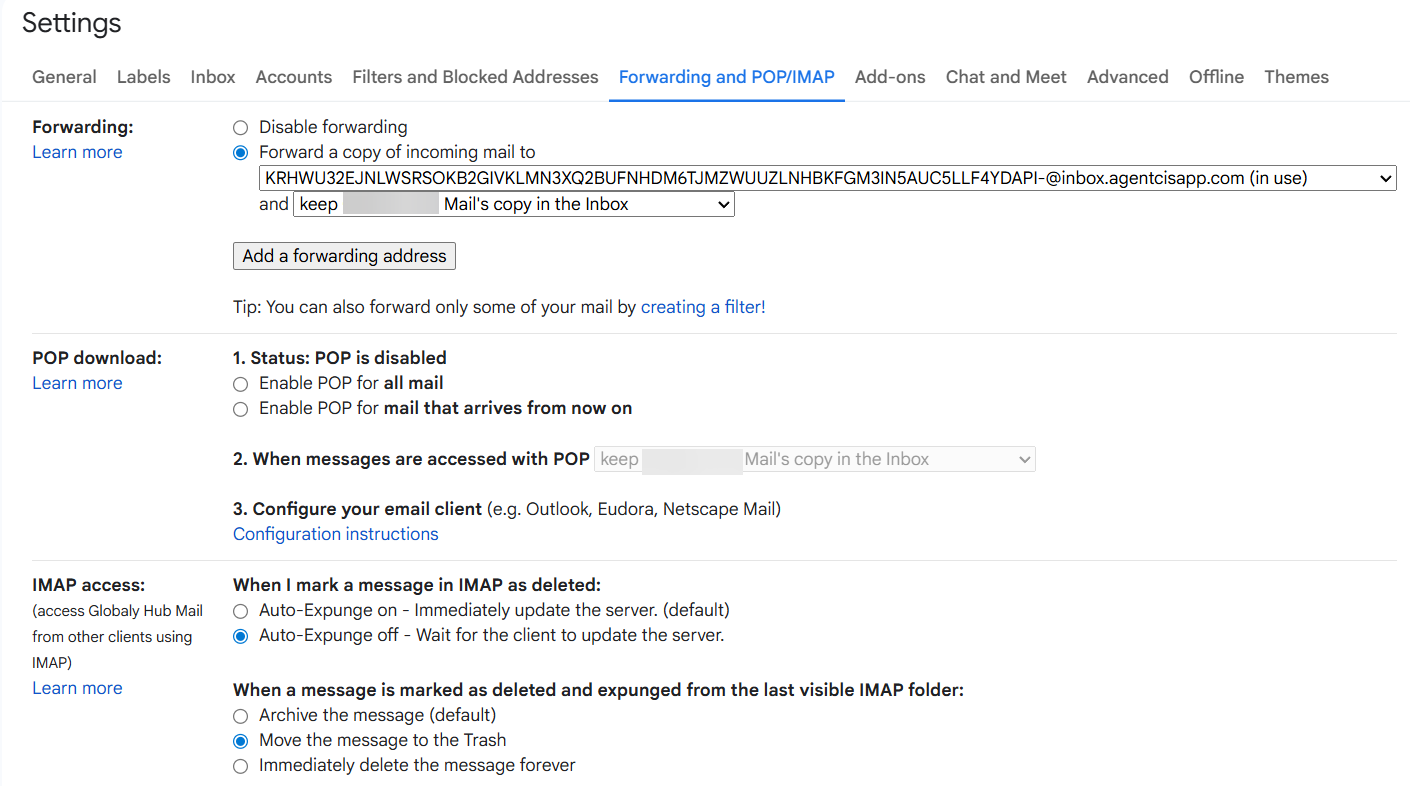
Step 9: On the “ Forwarding and POP/IMAP” section, Click on the ‘Add a forwarding address’ option.
Step 10: Paste the Agentcis Email here. This should be the same email address you copied from Agentcis.
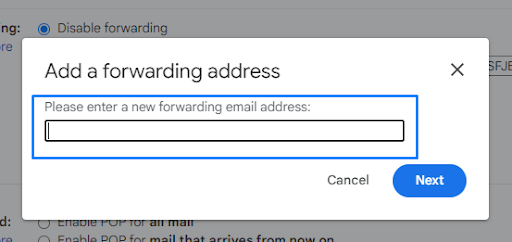
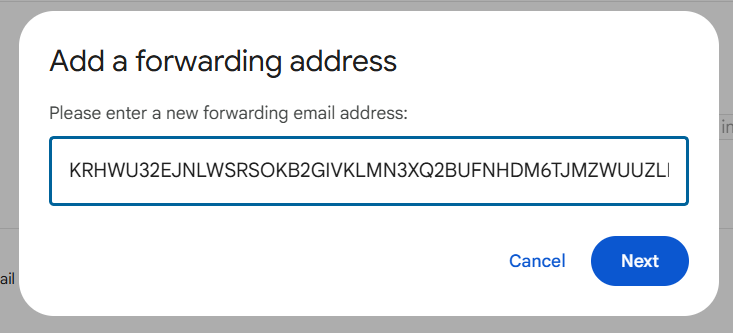
Then click on Next.
Note: Please confirm your google verification after Clicking on Next.
Step 11: After the forwarding address is added, you will receive this pop-up.
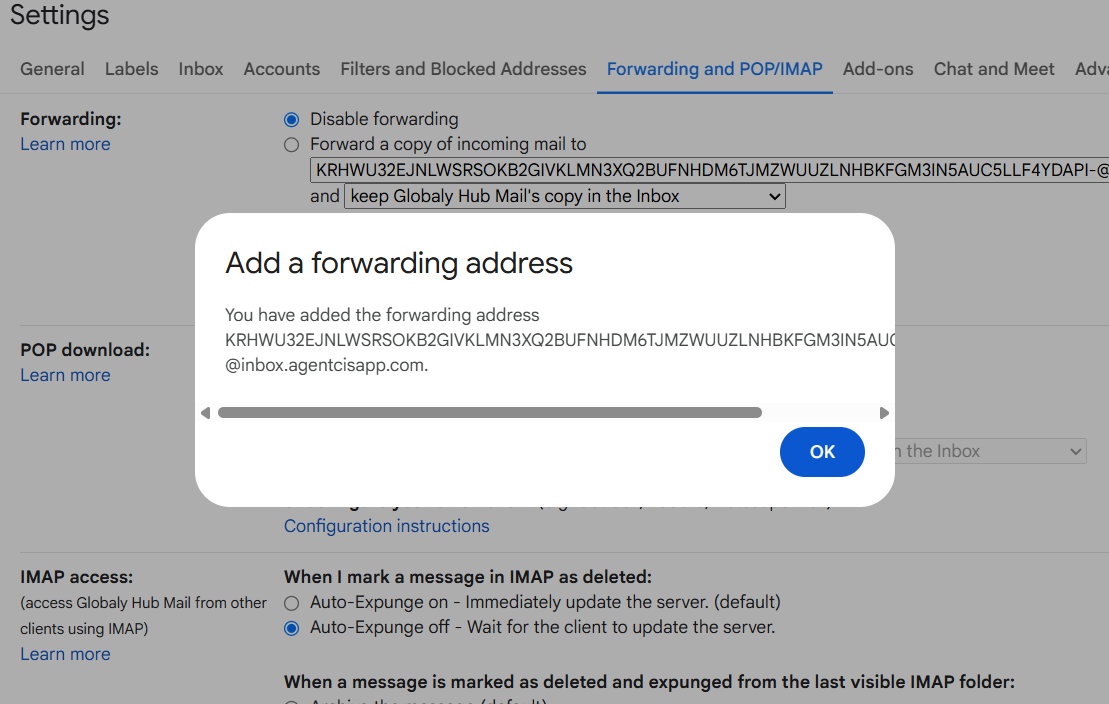
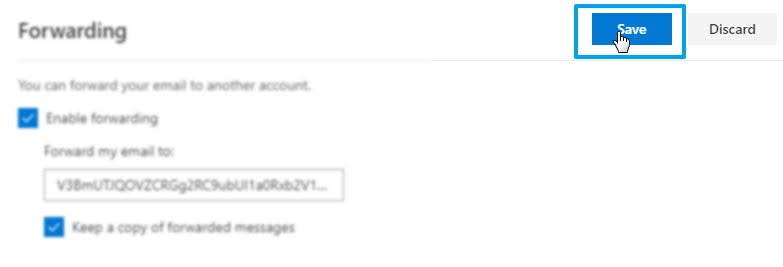
Step 12: Make sure to enable this this checkbox: ‘Forward a copy of incoming mail to’.
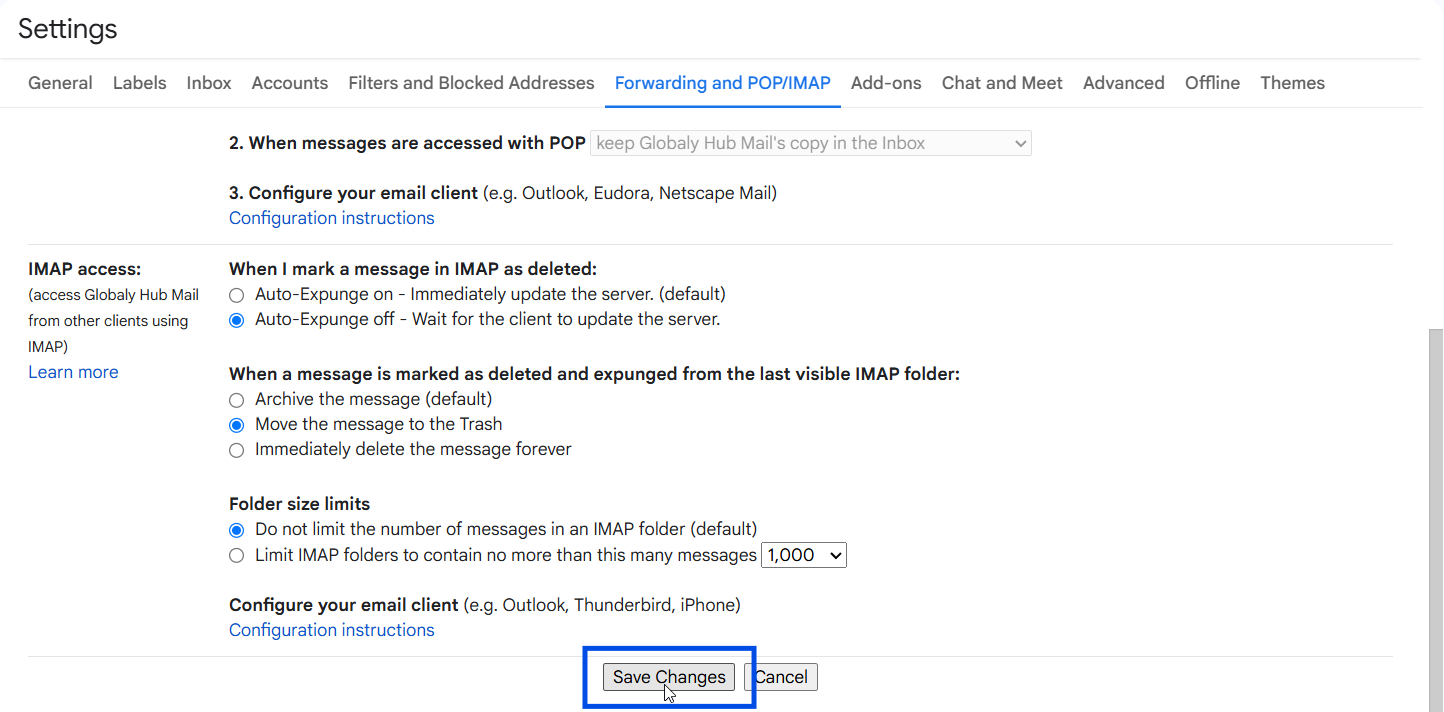
Step 13: On the same page, scroll down and Click on ‘Save Changes’.
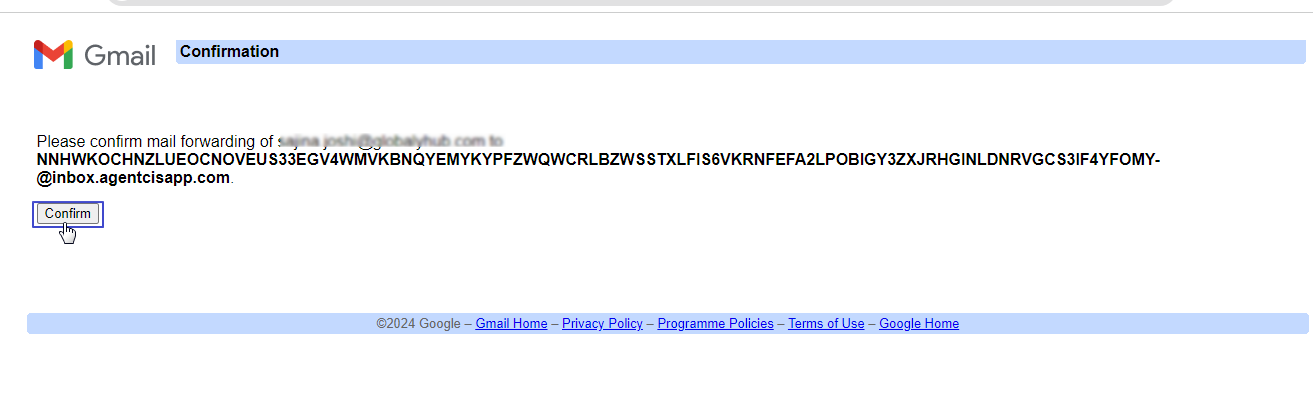
Step 14: Once you Save, you will get an email for the confirmation in the Agentcis inbox.
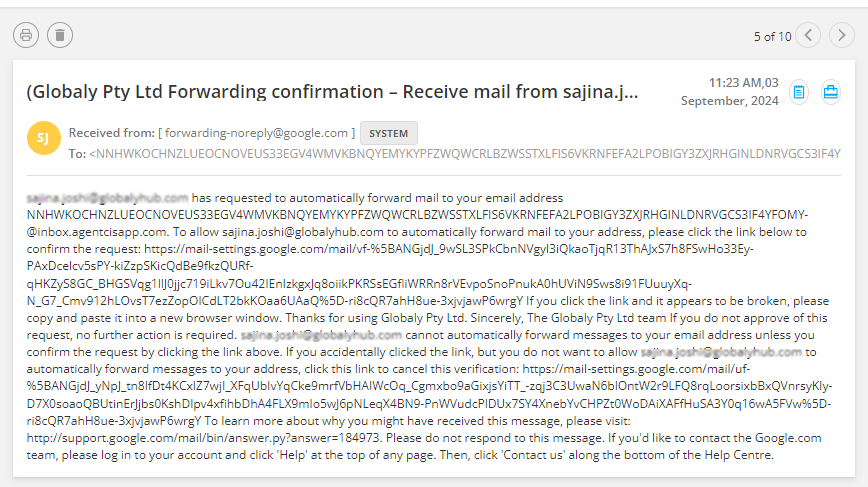
Step 15: Click on the confirmation link and confirm for the forwarding.
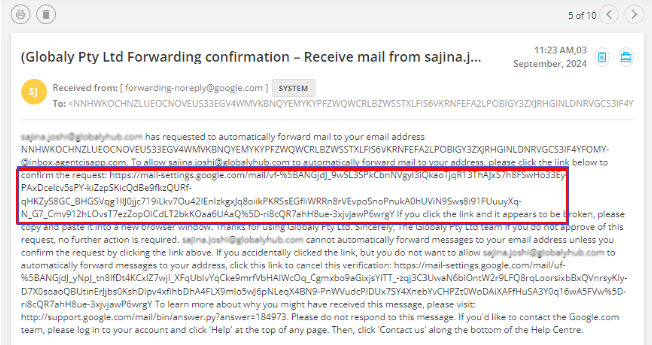
Step 16: Then click on Confirm.
Personal Email Inbox Settings in Outlook
To set the email inbox in outlook, follow the following steps:
Step 1 - Click on the Settings icon from the top right.

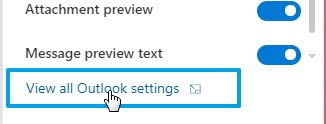
Step 2 - Select the View all settings option.
Step 3 - Click on the Forwarding option.

Step 4 - Click on Enable forwarding option.
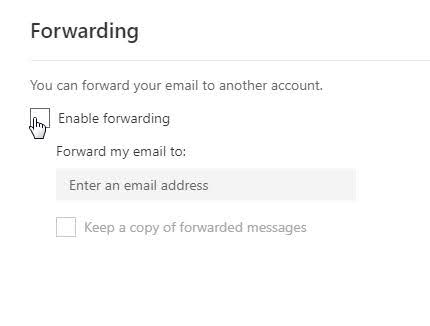
Step 5 - Paste the email address you copied from Agentcis.
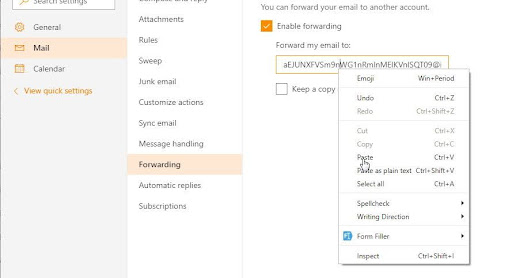
Step 6 - Save the settings in the outbox.

Like a credit score, a Sender Score is a measure of your reputation. Scores are calculated from 0 to 100. The higher your score, the better your reputation and the higher your account credibility rate.
In order to increase the reputation score I would suggest you to please check the reputation score multiple times.
https://account.live.com/reputationcheck
It will ask you to verify your email account by entering a working mobile phone number that can receive the code.
This link also can help you to increase account reputation status.
To ensure smooth and secure email forwarding for clients using customized Outlook domains, it’s important to correctly configure email retrieval settings and domain security. Implementing the following steps will help prevent synchronization problems and improve email deliverability.
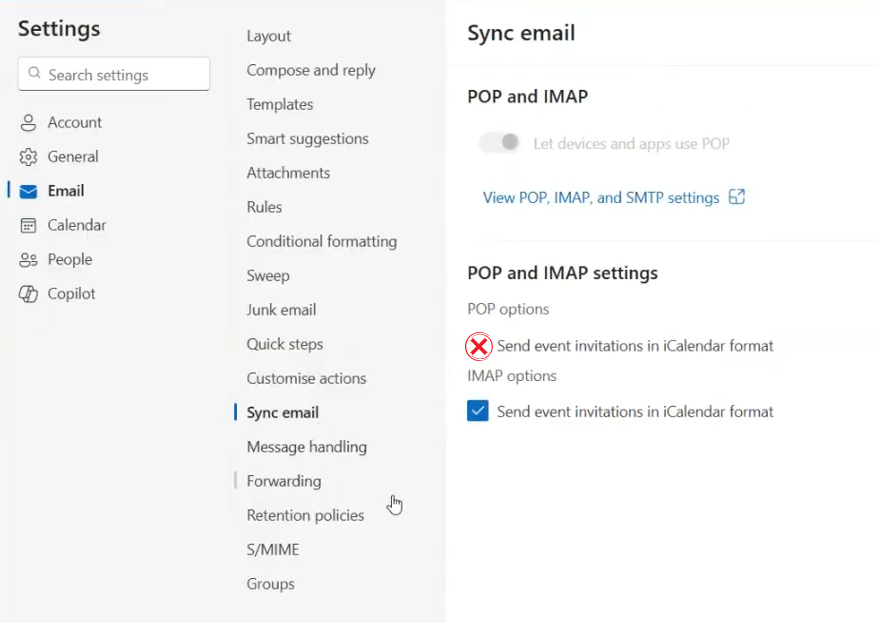
POP (Post Office Protocol) downloads emails to a local device and may remove them from the server, which can cause issues when using multiple devices.
IMAP (Internet Message Access Protocol) keeps emails synchronized across all devices, making it more reliable and modern for business use.
Recommendation: Disable POP and enable IMAP in your email settings.
For Gmail:
For Outlook:
To protect emails from spoofing, phishing, and delivery failures, ensure the following records are set up on the domain:
SPF (Sender Policy Framework) – authorizes email servers allowed to send on behalf of your domain.
DMARC (Domain-based Message Authentication, Reporting & Conformance) – helps detect and prevent email impersonation.
DKIM (DomainKeys Identified Mail) – adds a digital signature for email verification.

