Uploading data one by one could be a very tedious process. So, with the agentcis bulk import feature, you can import all the contacts at once saving you time. You can import the contacts with all of the custom fields as well.
If an email address in your file already exists in the system for a contact without a phone number, importing the file will update and replace all existing data for that contact.
If an email address in your file already exists in the system for a contact with a phone number, importing the file will update and replace all existing data for that contact including the phone number.
If a phone number in your file already exists in the system for a contact without an email address, importing the file will update and replace all existing data for that contact.
If a phone number in your file already exists in the system for a contact with an email address, importing the file will update and replace all existing data for that contact.
To import the contacts in bulk, first of all, please make sure you have permission to do so.

Step 1: Select the settings from the top info bar.

Step 2: Select Data Import from the list.
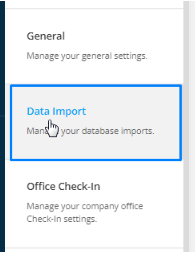
Step 3: Select Contact
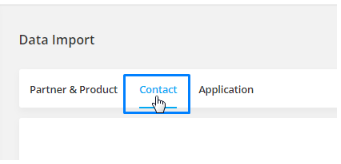
Step 4: Select the Import Contacts tab.

Step 5: Download the template from the Agentcis.
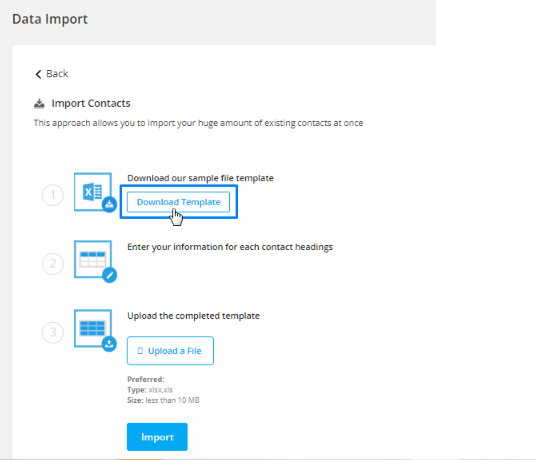
Step 6: Fill in the template with the information of your Clients. The template will also contain the custom field that you have added to your system.

Please Note: To upload the file successfully add all the mandatory fields. The mandatory fields are:
1. First Name
2. Last Name
3. Added By
To prevent the duplicity of the contact, it is suggested to add the email ID or phone number of the contact.
Step 7: Upload the file back into the system.
Please Note: The file uploaded should be less than 10 MB.
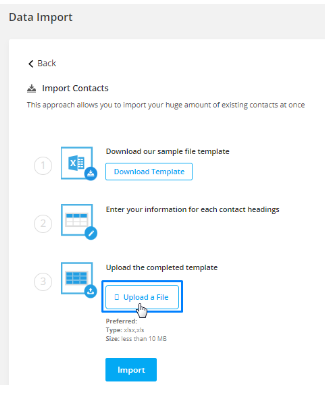
Step 8: Select the import tab once you upload the template.
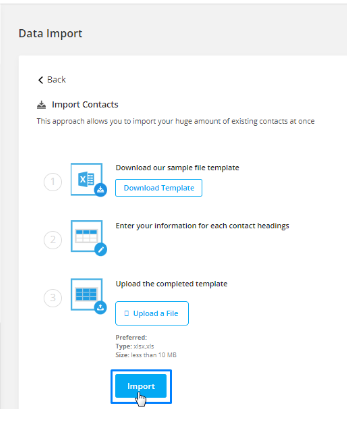
Step 9: To view the details of your upload, click on the Details button.

Step 10: Here you can see the number of Contacts that have been Inserted, Updated, and Failed to import.
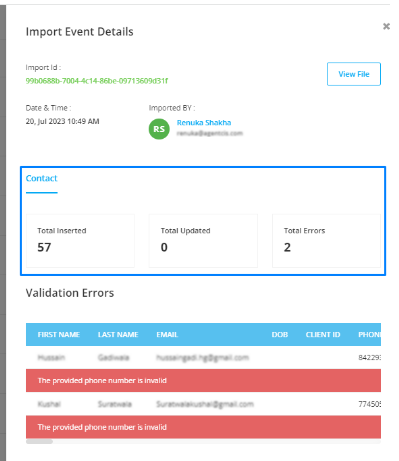
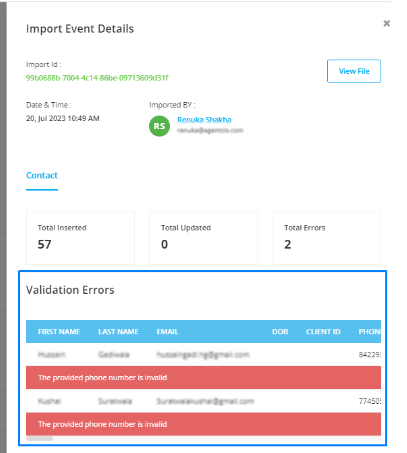
Step 11:If some of your data have failed to import, the Validation Errors are shown in a list view.
Note: Please make sure that the following formats are maintained for each field that is filled in the CSV/excel template.
First Name: Text
Last Name: Text
DOB: dd/mm/yyyy
Phone Number Country Code: Select the country code from the dropdown list provided in the template
Phone: 10-digit phone number
Email: Email address of the contact
Street: Alphanumeric
City: Text
State: Text
Post Code: Alphanumeric
Country: Select from the dropdown list of Countries in the Template
Preferred Intake: dd/mm/yyyy
Country of Passport: Select from the dropdown list of Countries in the Template
Passport Number: Alphanumeric
Visa Type: Alphanumeric
Visa Expiry Date: dd/mm/yyyy
Assignee: Email address of the "Assignee"
Added by: Email address of the "Added by" user
For importing leads and prospects without the use of the template file, please visit this link:
Contact Import (lead and prospect)
Learn how to import contacts in bulk