A group invoice is created when several students or clients are taking services from the same university, partner, or visa provider. Instead of keeping all their individual invoices separate, the group invoice brings them together in one place. It works like a “master invoice” that links all the bills related to that partner, making it easier to track payments and manage accounts.
If 5 students are applying to the same university, each student will still have their own individual invoice created. But Agentcis can generate a group invoice that combines those 5 invoices under the university’s name. This way, the university or partner receives one combined statement.
You can group all your commission invoices of a partner together to create a single invoice.

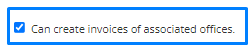
To create a partner group invoice, please make sure you have the permission to do so:
Then, follow the steps given:
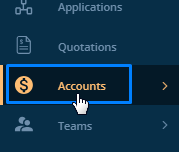
Step 1: Select Accounts from the side navigation bar.
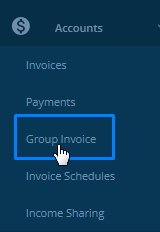
Step 2: Select Group Invoice from the dropdown.
Step 3: Click on Create Group Invoice.

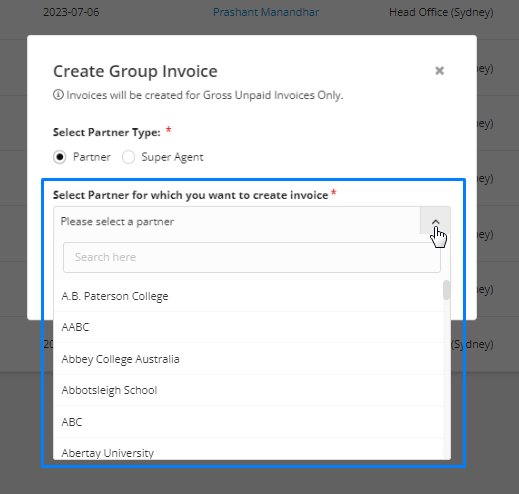
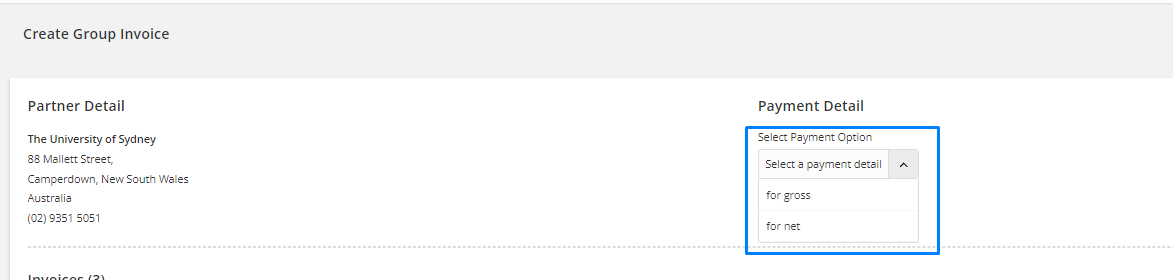
Step 4: In the popup select partner.
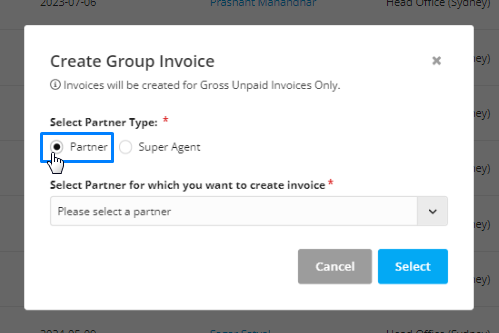
Step 5: Then from the dropdown menu, select the partner for which you want to create the group invoice for. You can also search for the partner by their name.
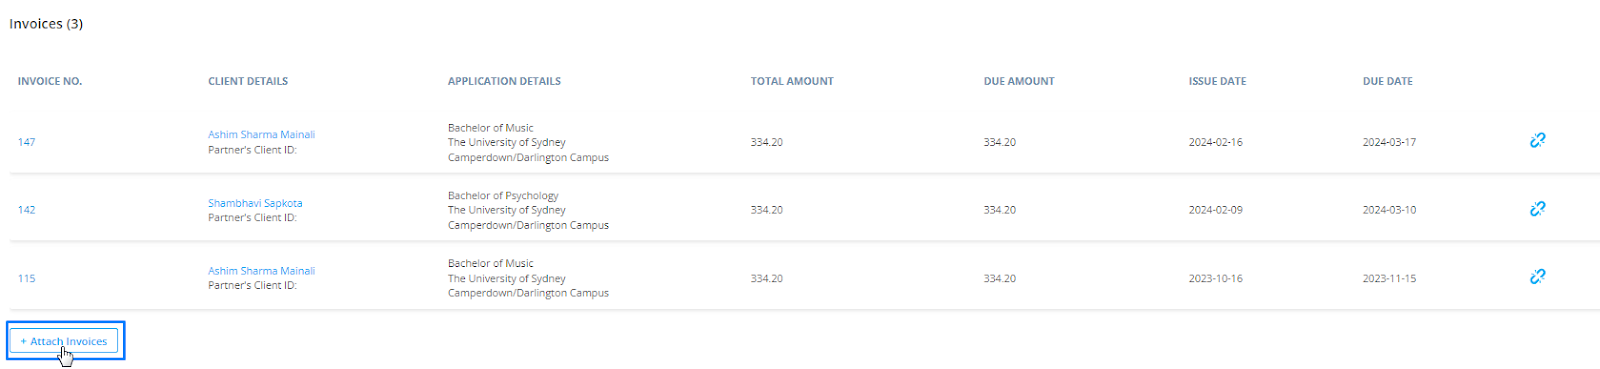
After the partner is selected, you will be directed to a new page to attach the invoices created for this partner in the system.
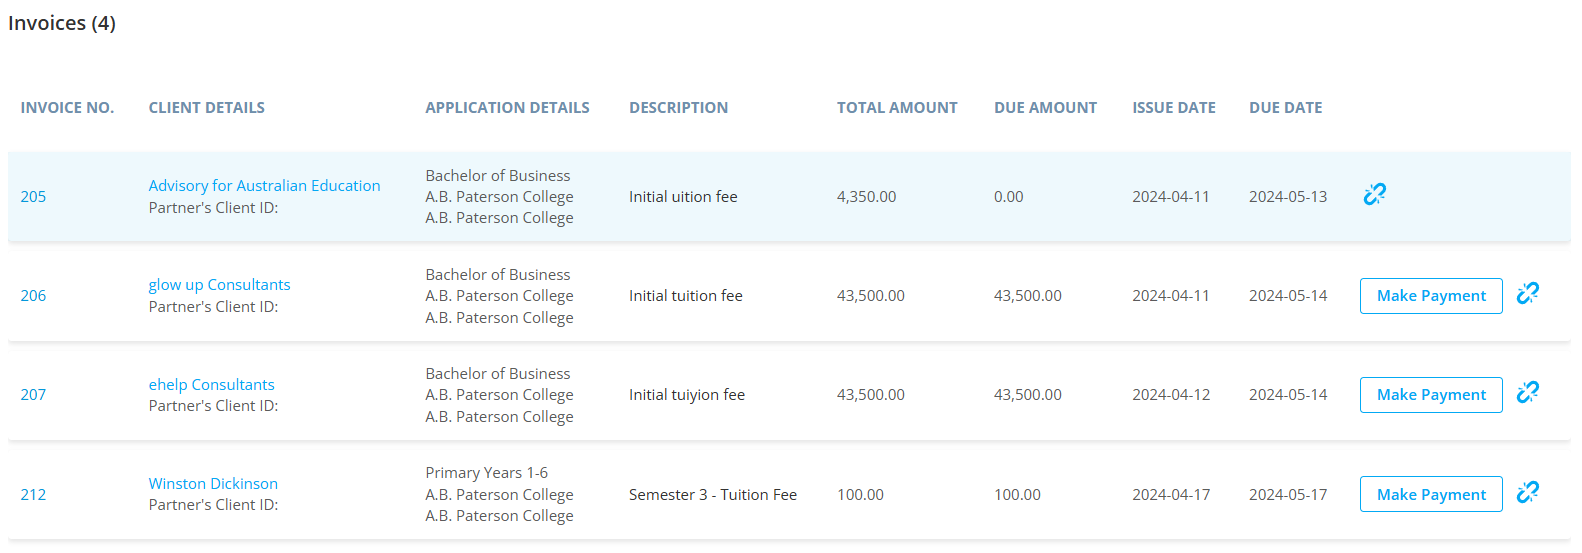
Step 6: You can search for the invoice by their numbers or client’s name.
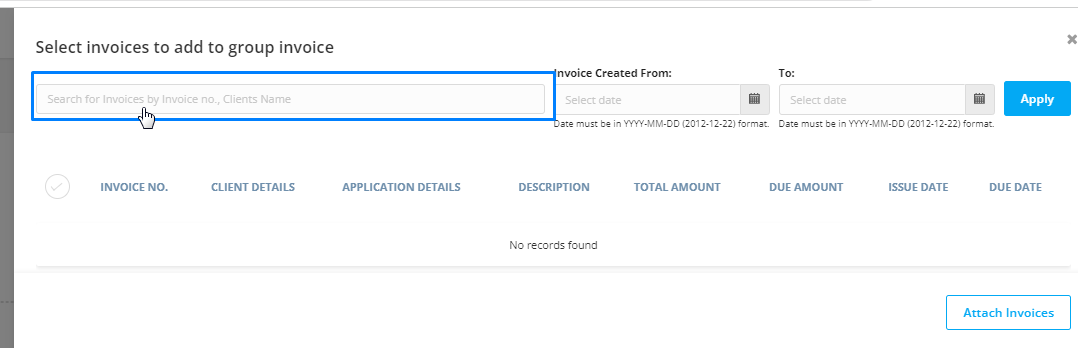
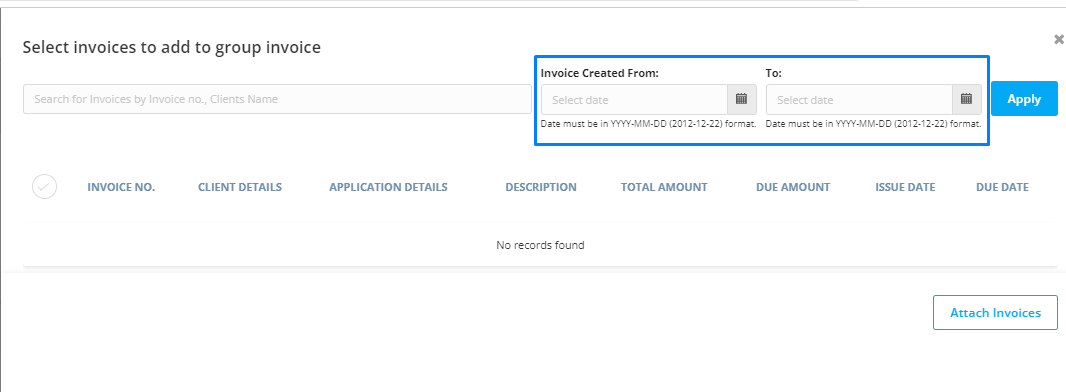
Step 7: You can also apply the created date filter.
Step 8: Click on the tick marks to group the invoices.
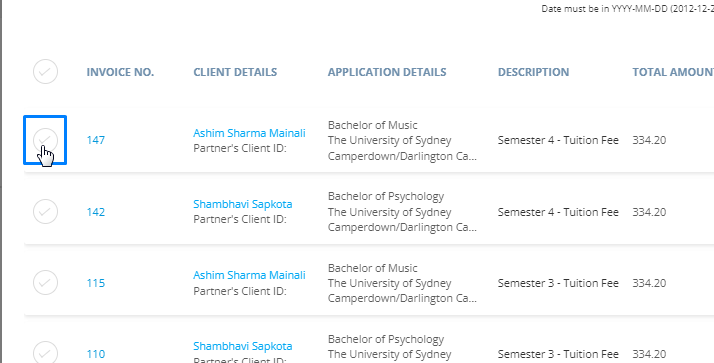
Step 9: Click on the Attach Invoice button. The number of invoices that are tick marked will be selected for the group invoice.

Step 10: Then select the Payment option.
Step 11: Select an invoice due date.

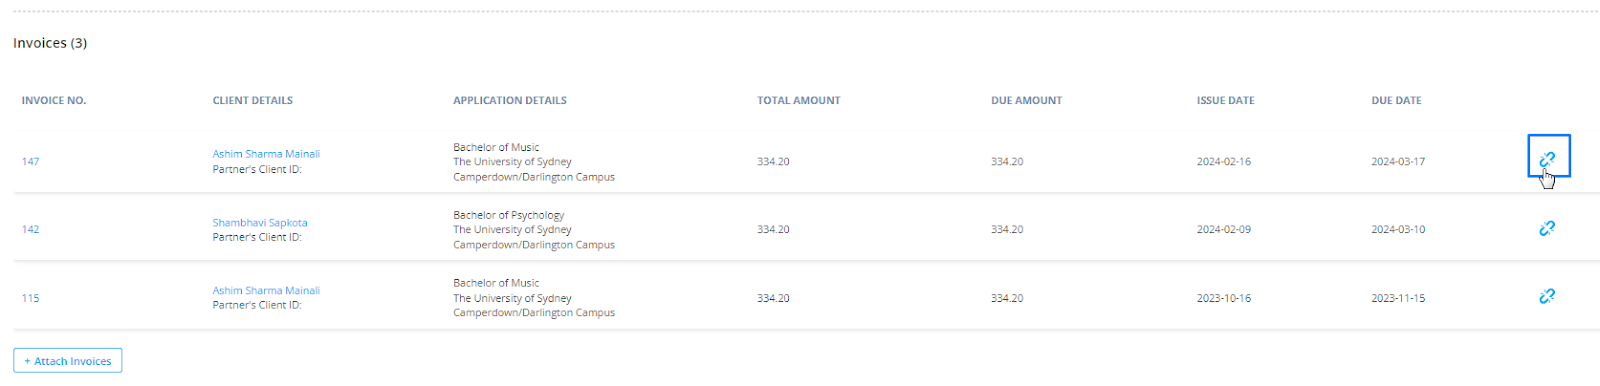
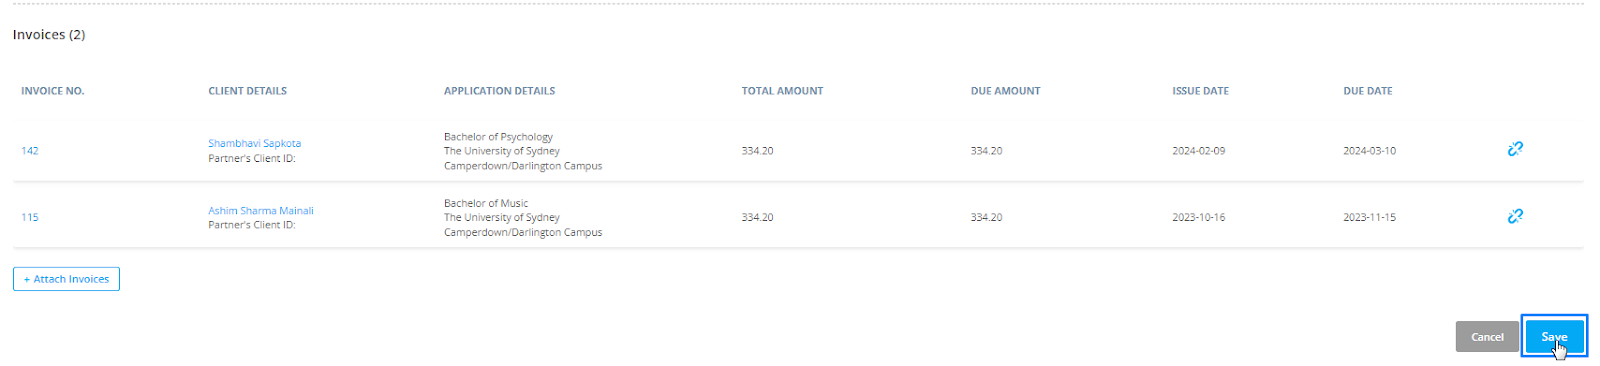
Step 12: You can view all the invoices that you have grouped along with their details. If you have to attach more invoices click on the add attach invoices button and repeat the process again.
Step 13: If you have accidentally included an invoice that you do not want to group, click on the remove icon to remove the invoice from the group.
Step 14: Click on the save tab once you complete it.
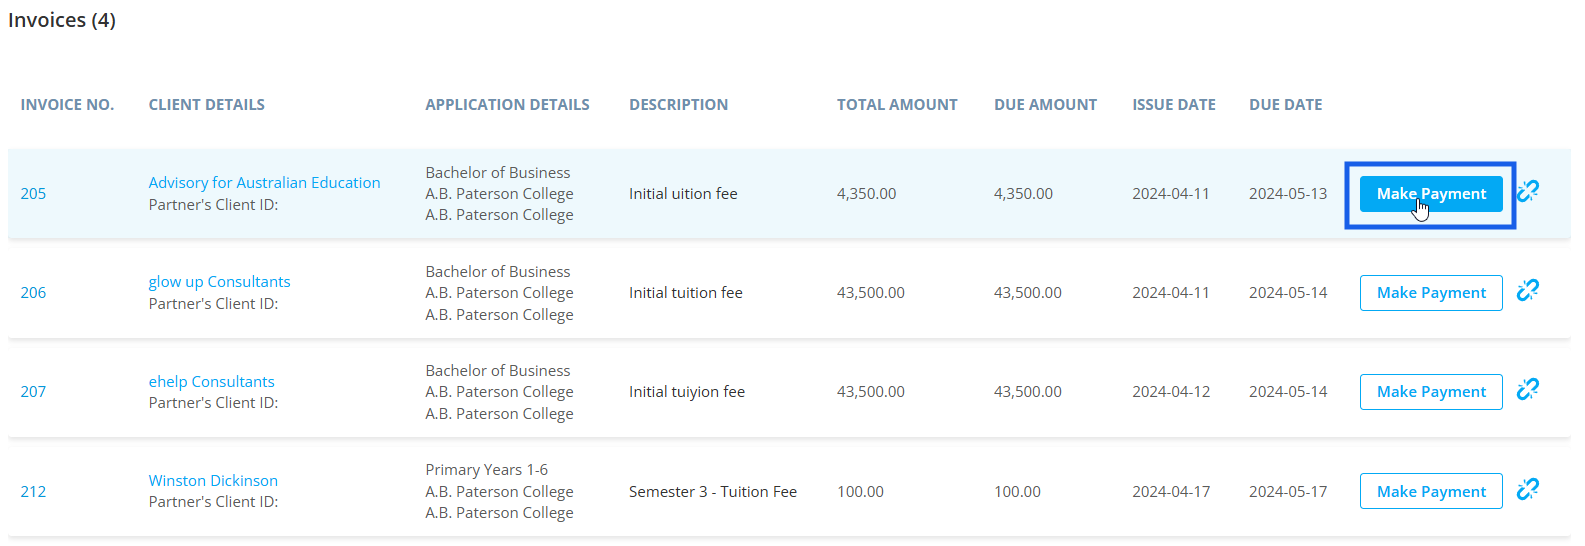
After the group invoice has been created, you can record the received payments by clicking on the Make Payment option for the respective invoices of the clients.
Then, enter the amount that has been received from the client along with Payment Method and payment date.
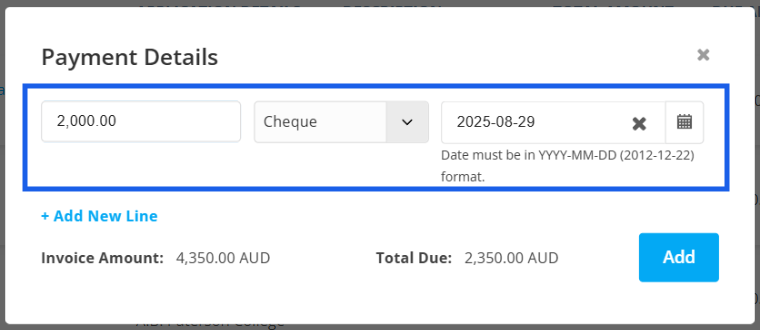
The amount that is due to be paid will be displayed below the payment details.

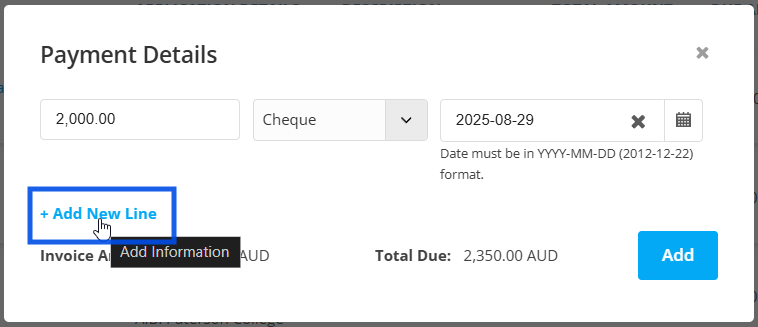
In case, the client is making partial payments or payments in installments, you can record such payments by clicking on +Add New Line
Then enter the amount that has been paid, the payment method and the date accordingly.
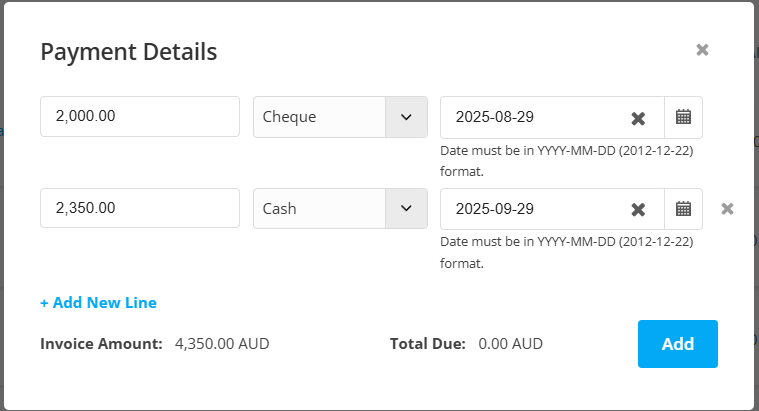
After the total of the invoiced amount has been received, the Total Due will be shown as 0.00 in the respective partner’s currency.
After adding the necessary details, click on Add.
After the payment has been made for one invoice, the Make Payment option will disappear. You can repeat the process for other invoices as well.
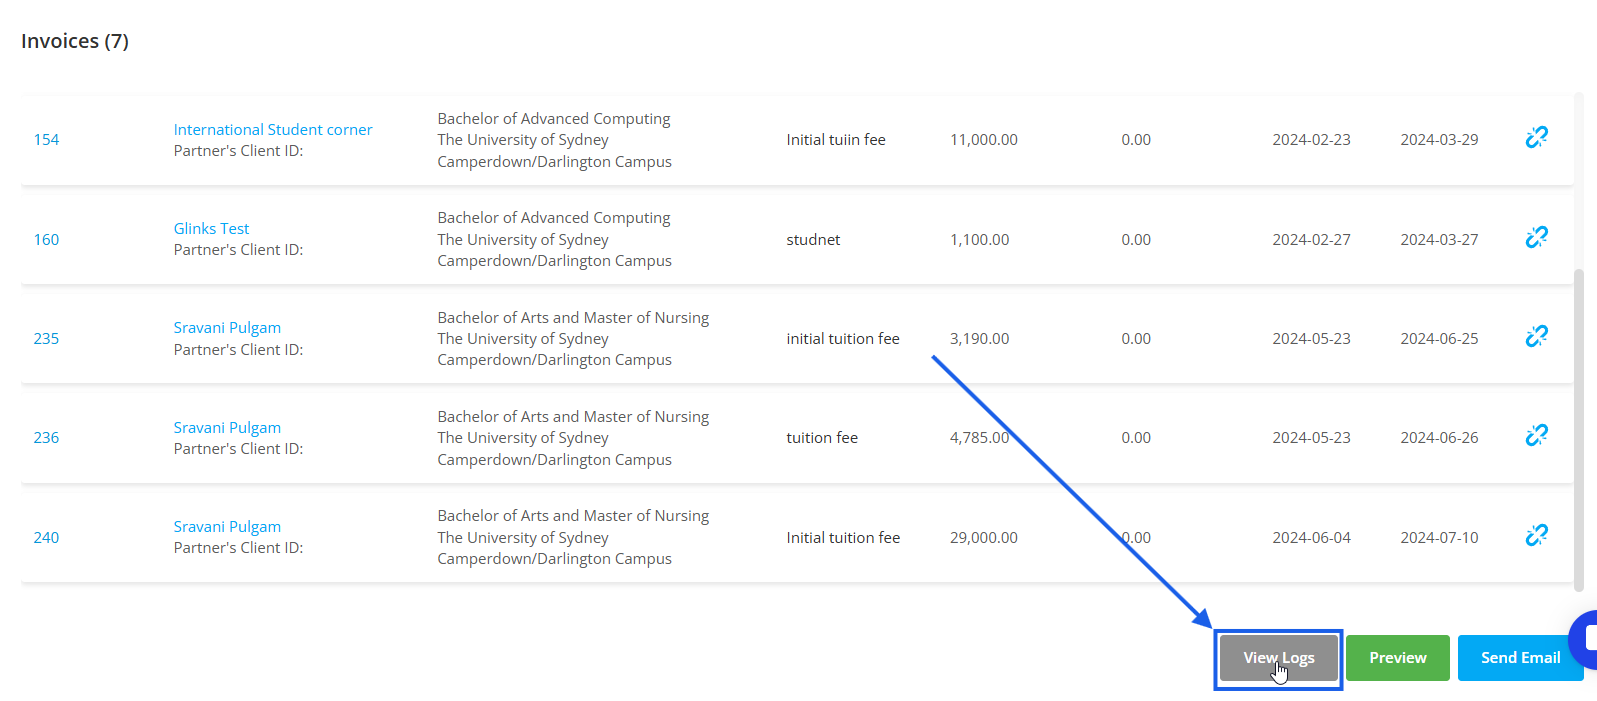
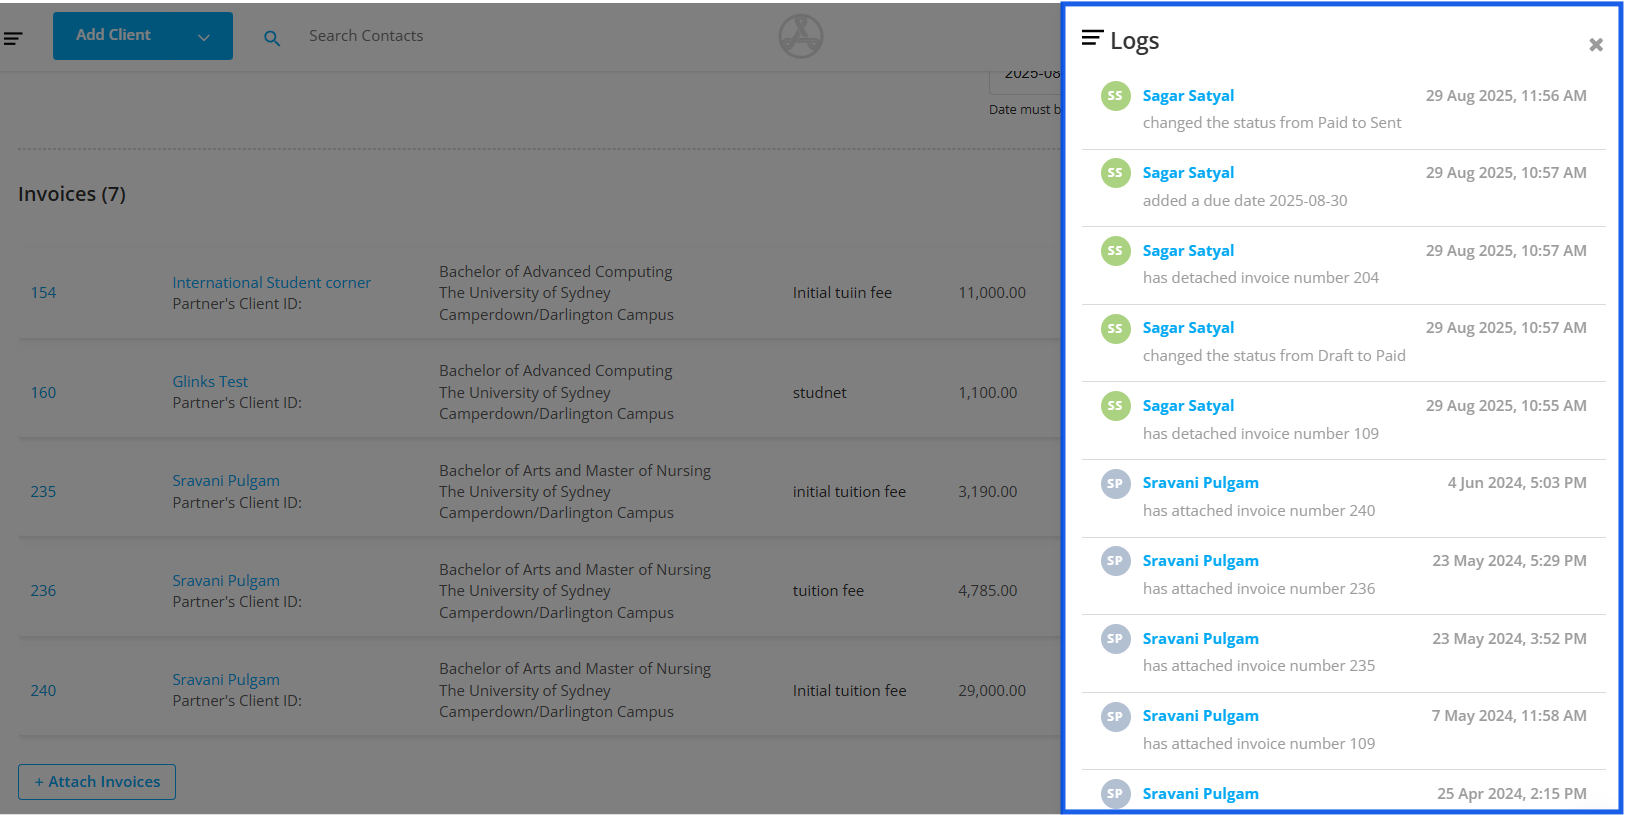
To view the activity log of an invoice, click on the View Logs section. Every change, step, and amendment made to the invoice is listed here by date, giving you a clear history of all updates.
To view the group invoice, click on Preview.
You can send an email to the partner and the pdf of this group invoice will be automatically attached to the email.
