In many cases, an agency may not have a direct link with a university or partner. In such situations, the applications are processed through a Super Agent: a middle agent or agency that does hold the direct partnership with that university. When multiple students are connected to the same Super Agent in the system, their invoices can be grouped together into one combined invoice.
This feature makes it easier to manage income-sharing arrangements with Super Agents. Instead of handling each student’s invoice separately, the Super Agent group invoice combines all related invoices, ensuring clear records and smoother financial tracking.
If 5 students are applying to a university and your agency does not have a direct link with that university, the applications for those students must have the Super Agent connected to them. Each student will still have their own invoice, but Agentcis allows you to generate a Super Agent group invoice that merges those 5 invoices under the Super Agent’s name. This way, payments and commission sharing are managed in a single, organized statement.

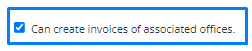
To create a super agent group invoice, please make sure you have the following permission:
Then follow these steps:
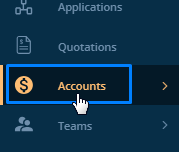
Step 1: Select Account from the side navigation bar and then select Group Invoice from the dropdown.
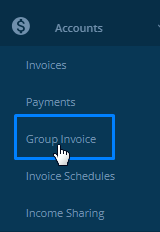
Step 2: Click on Create Group Invoice.

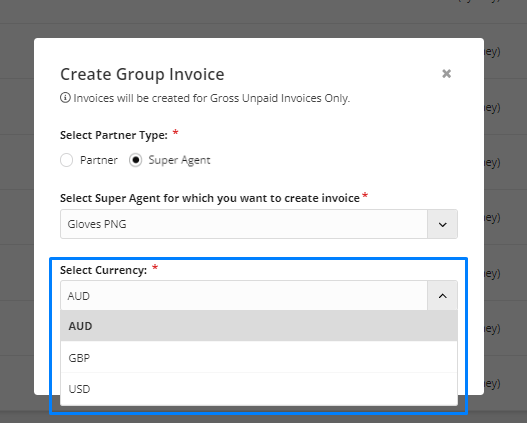
Step 3: In the pop up, select Super Agent.
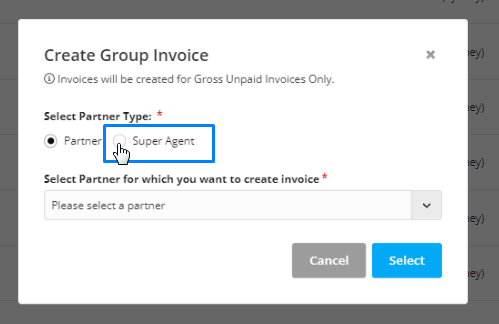
Step 4: From the drop down select the Super Agent.

Step 5: Select the currency of the invoice.
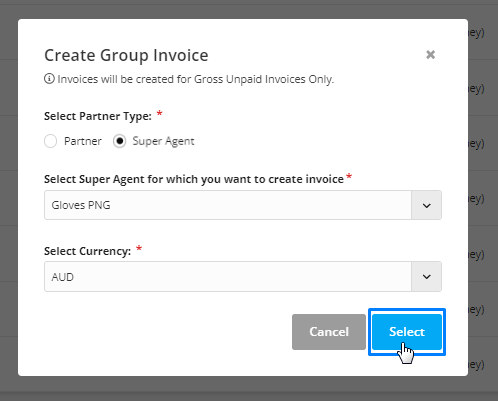
Step 6: Then, click on select.
Step 7: You can search for the invoices to group by their invoice numbers or client name.
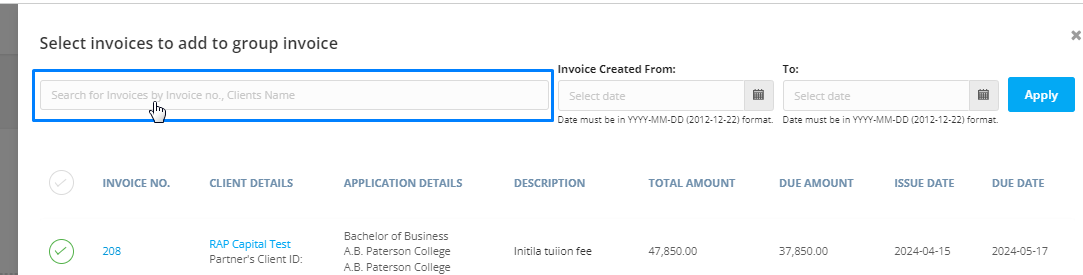
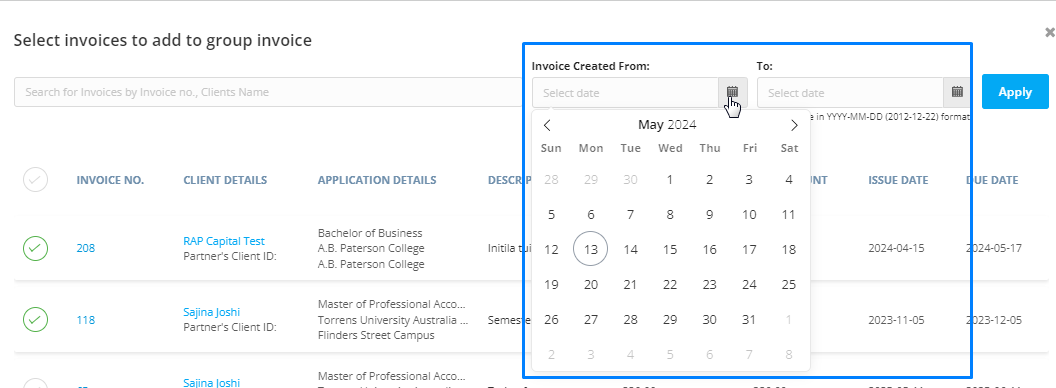
Step 8: You can also apply the created date filter.
Step 9: Click on the tick marks to group these invoices.
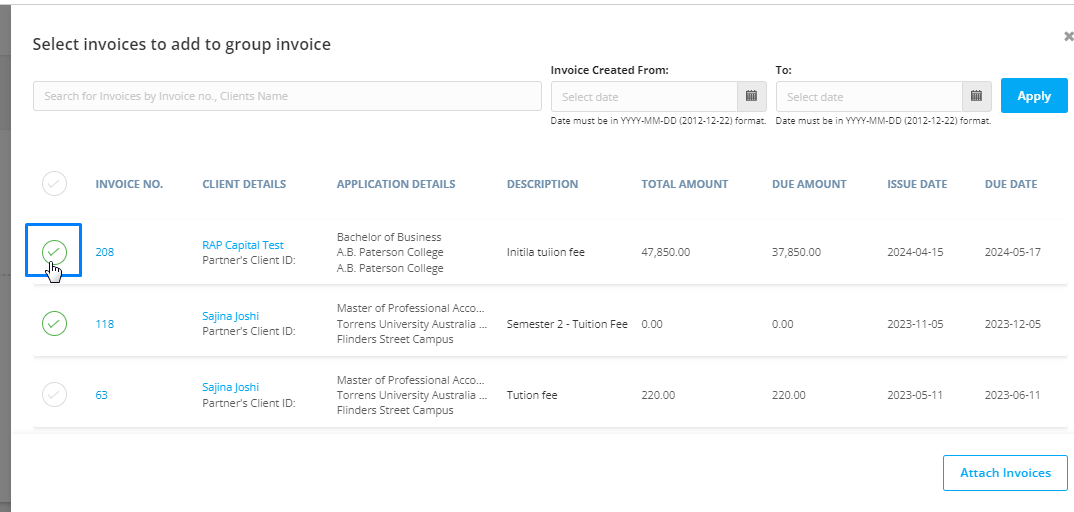
Step 10: Click on the attach invoice button to attach the selected invoices.

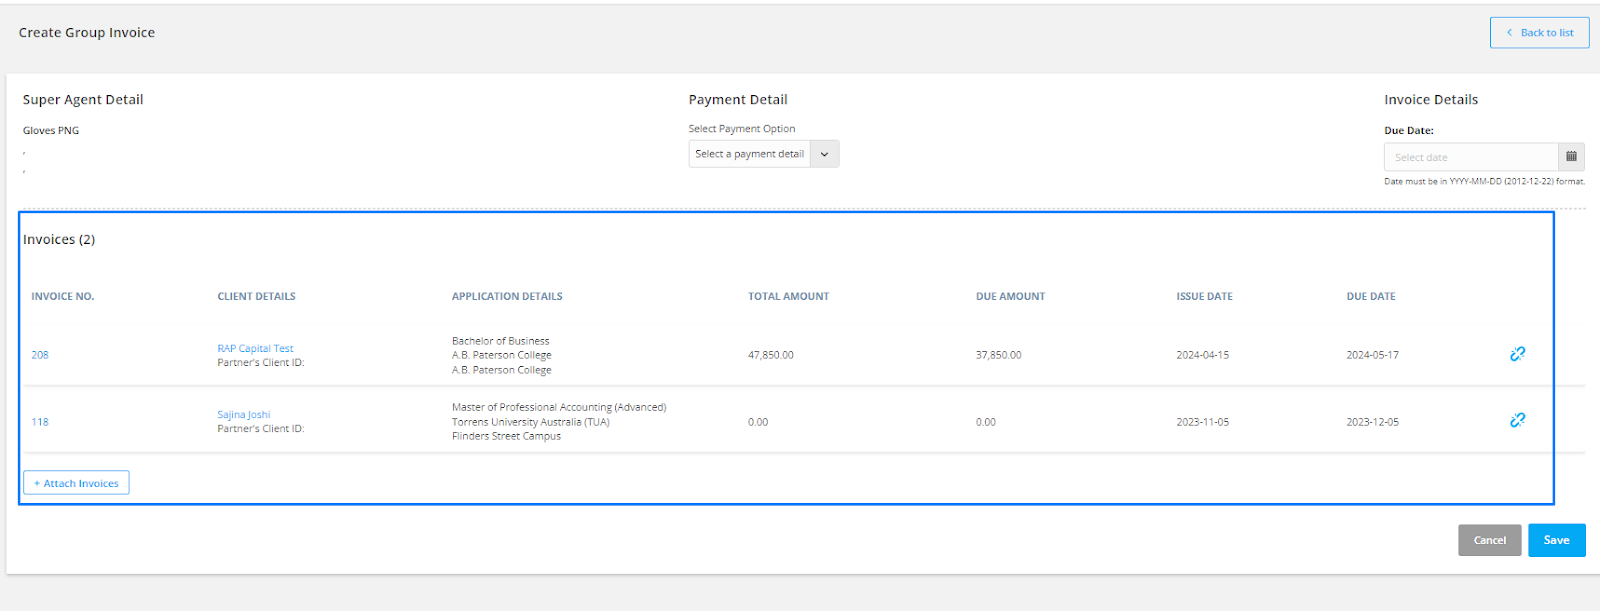
Step 11: Select the payment option which shall be displayed in the invoice.

Step 12: Select the invoice due date.

Step 13: You can see all of the invoices that you’ve grouped along with their details.
Step 14: If you have to attach invoices further, click on the add attach invoices button and repeat the process again.
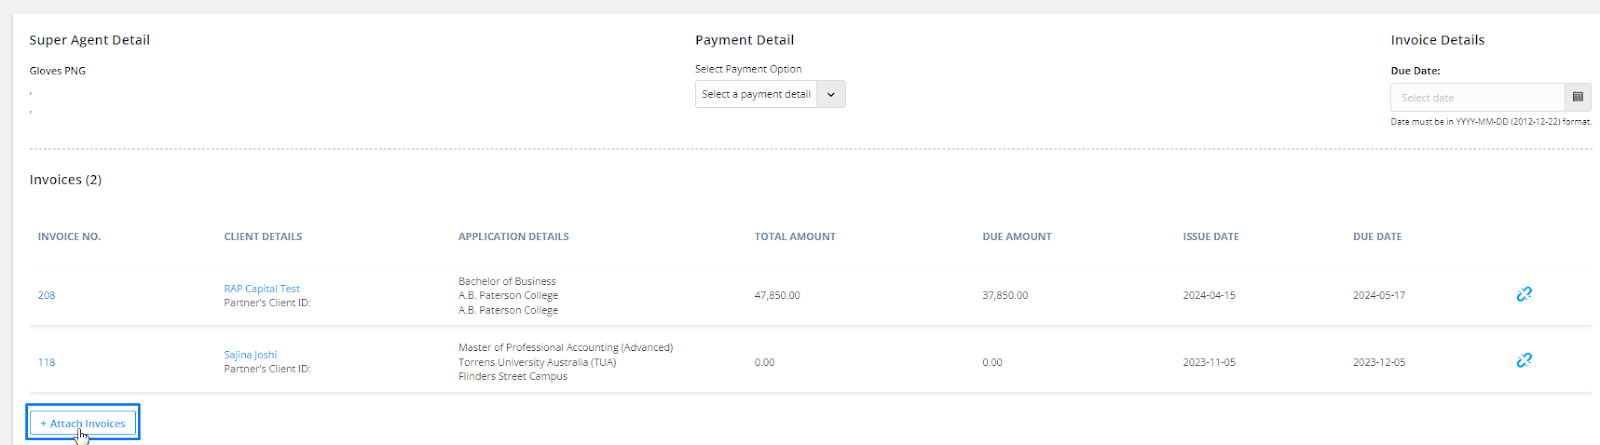
Step 15: If you have accidentally included an invoice that you do not want to group just click on the remove icon to remove the invoice from the group.

Step 16: After making all the necessary adjustments, click on save.

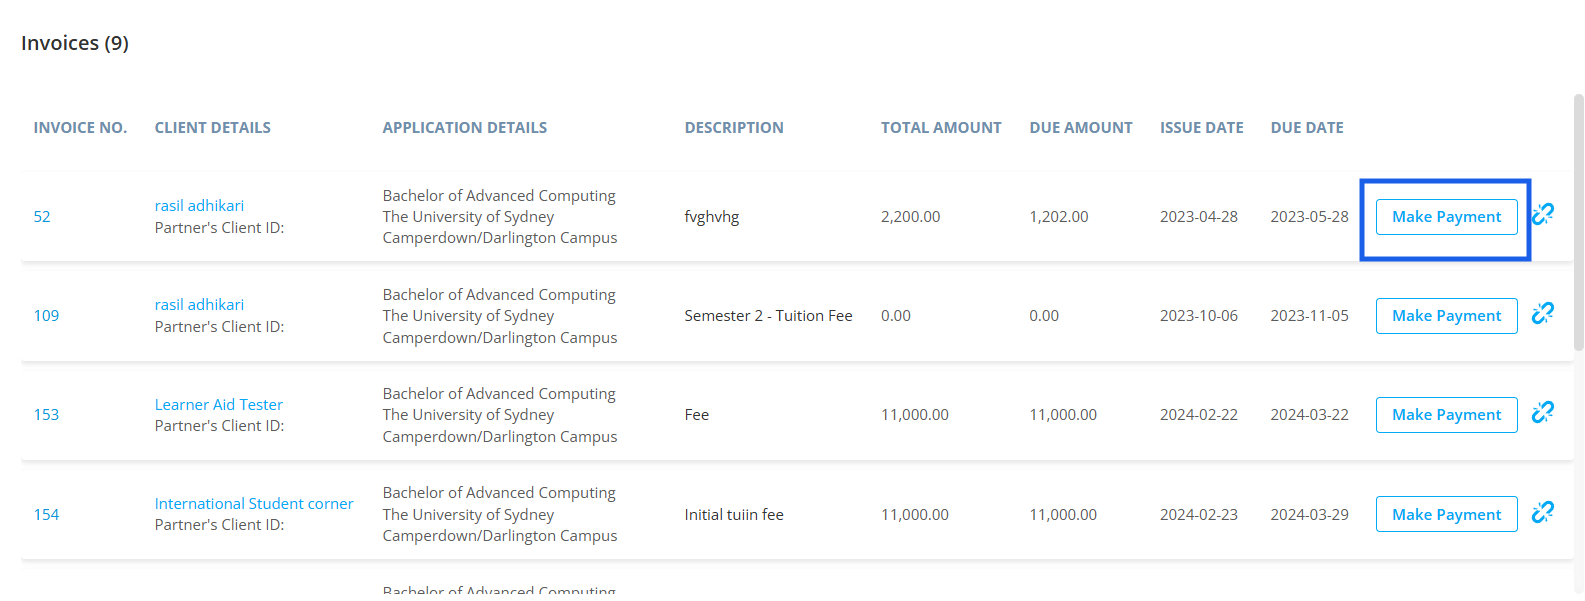
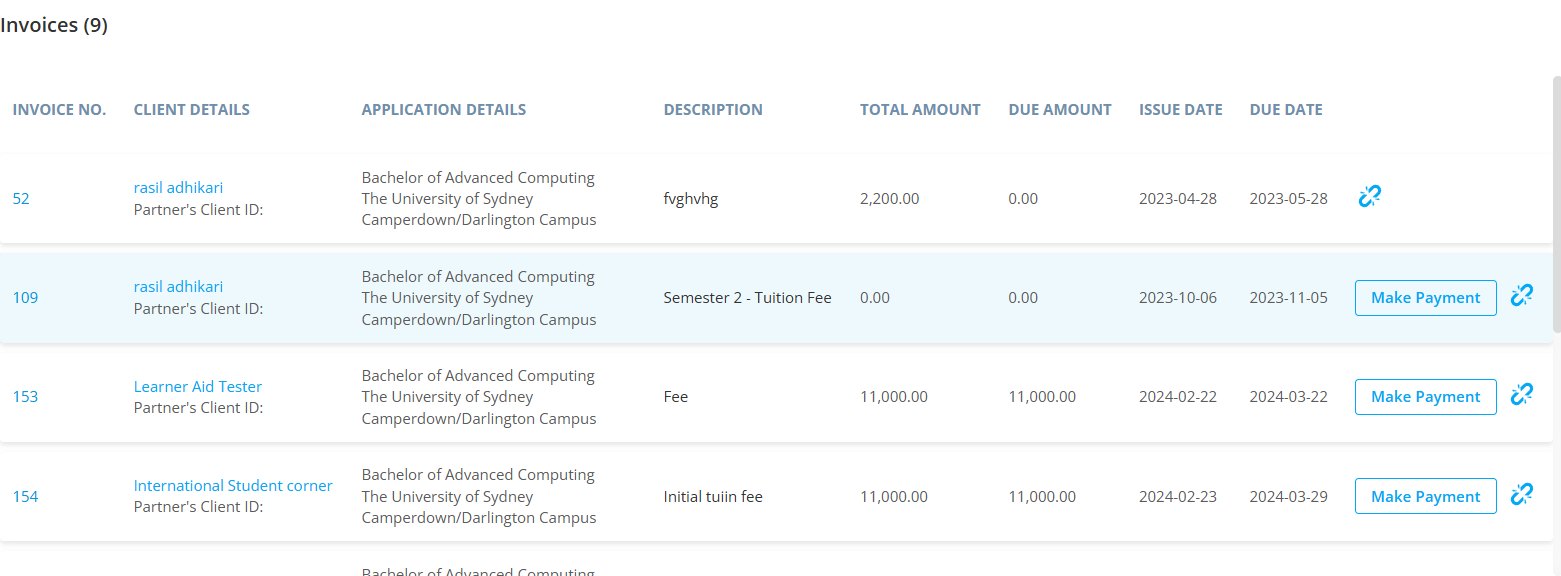
If the payment has been received for some client of this group invoice, you can click on make payment for the invoice of that client.
Then, enter the amount that has been received from the client along with Payment Method and payment date.
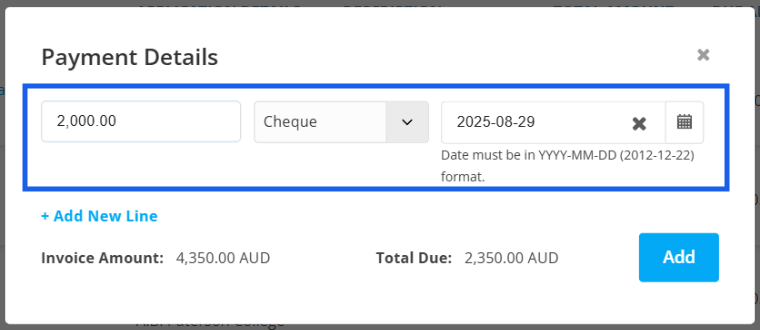
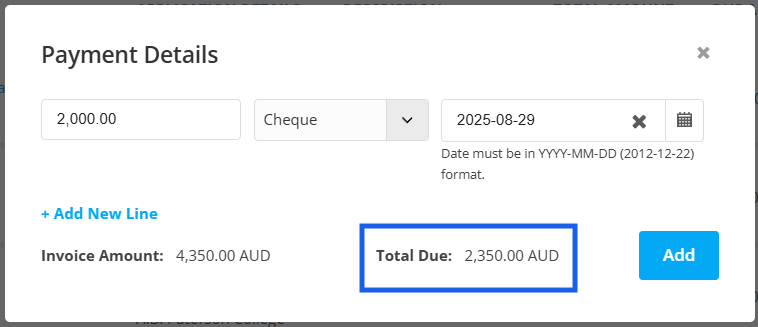
The amount that is due to be paid will be displayed below the payment details.
In many cases, the client may not pay the amount in full. You can click on +Add New Line and add multiple payments over the interval like installment payments.

Then enter the amount that has been paid, the payment method and the date accordingly.
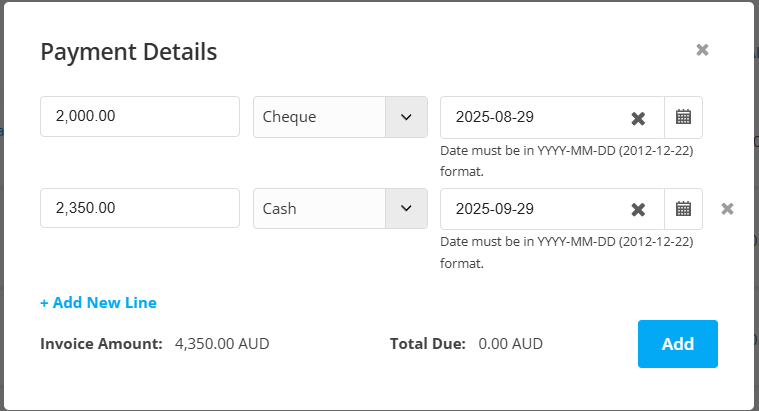
After the total of the invoiced amount has been received, the Total Due will be shown as 0.00 in the respective partner’s currency.
After filling the necessary details, click on Add.
After the payment has been made for one invoice, the Make Payment option will disappear meaning the total of payment has been received. You can repeat the process for other invoices as well.
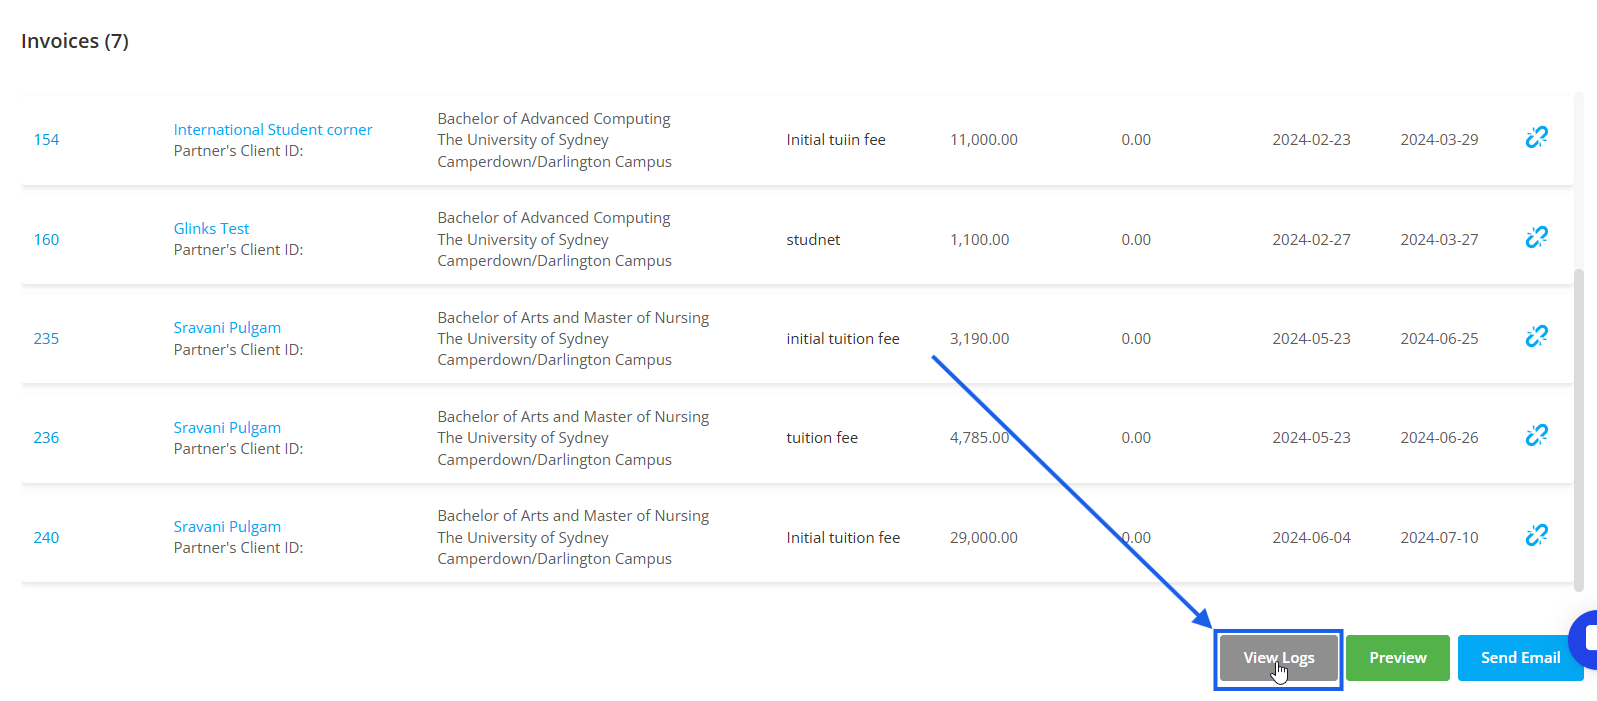
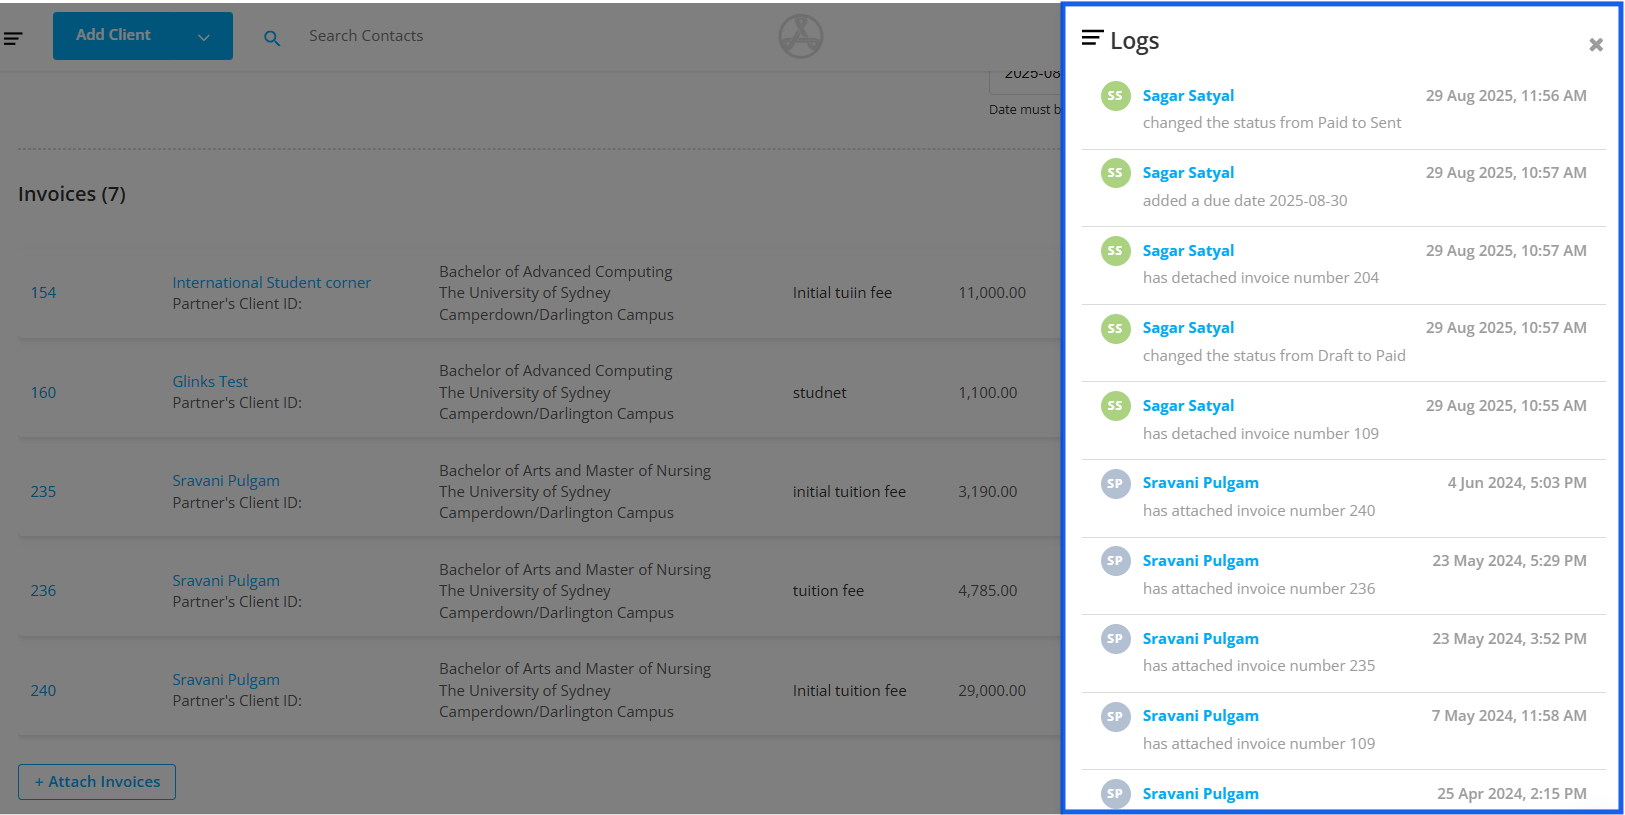
To view the activity log of an invoice, click on the View Logs section. Every change, step, and amendment made to the invoice is listed here by date, giving you a clear history of all updates.
To view the group invoice, click on Preview.
To Send an email attaching this invoice as a pdf, click on Send email.
