Agentcis provides three subscription plans to its users:
Starter
Professional
Premium
All plans are available on either a Monthly or Yearly basis. You can upgrade from one plan to another at any time, and you can also switch from monthly to annual billing to save additional costs.
Note: Please ensure you have the necessary permission before making changes to your subscription.
To explore the features available in each plan, please check this link: https://agentcis.com/pricing/
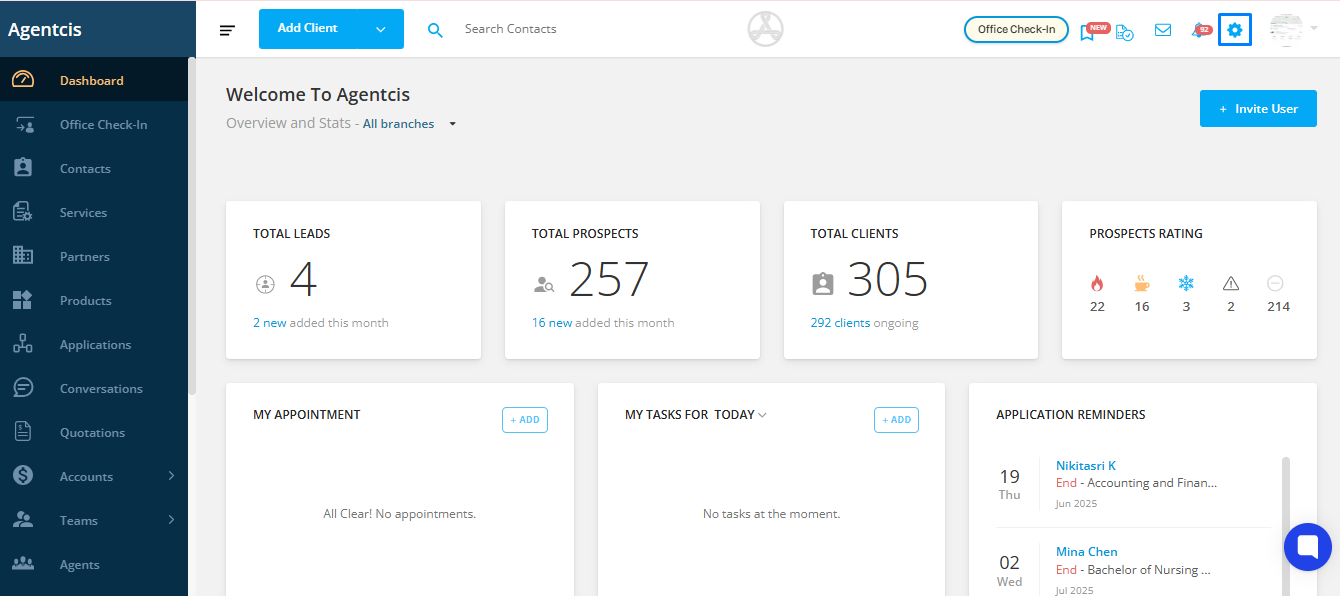
Step 1: Go to Settings from the top info bar.
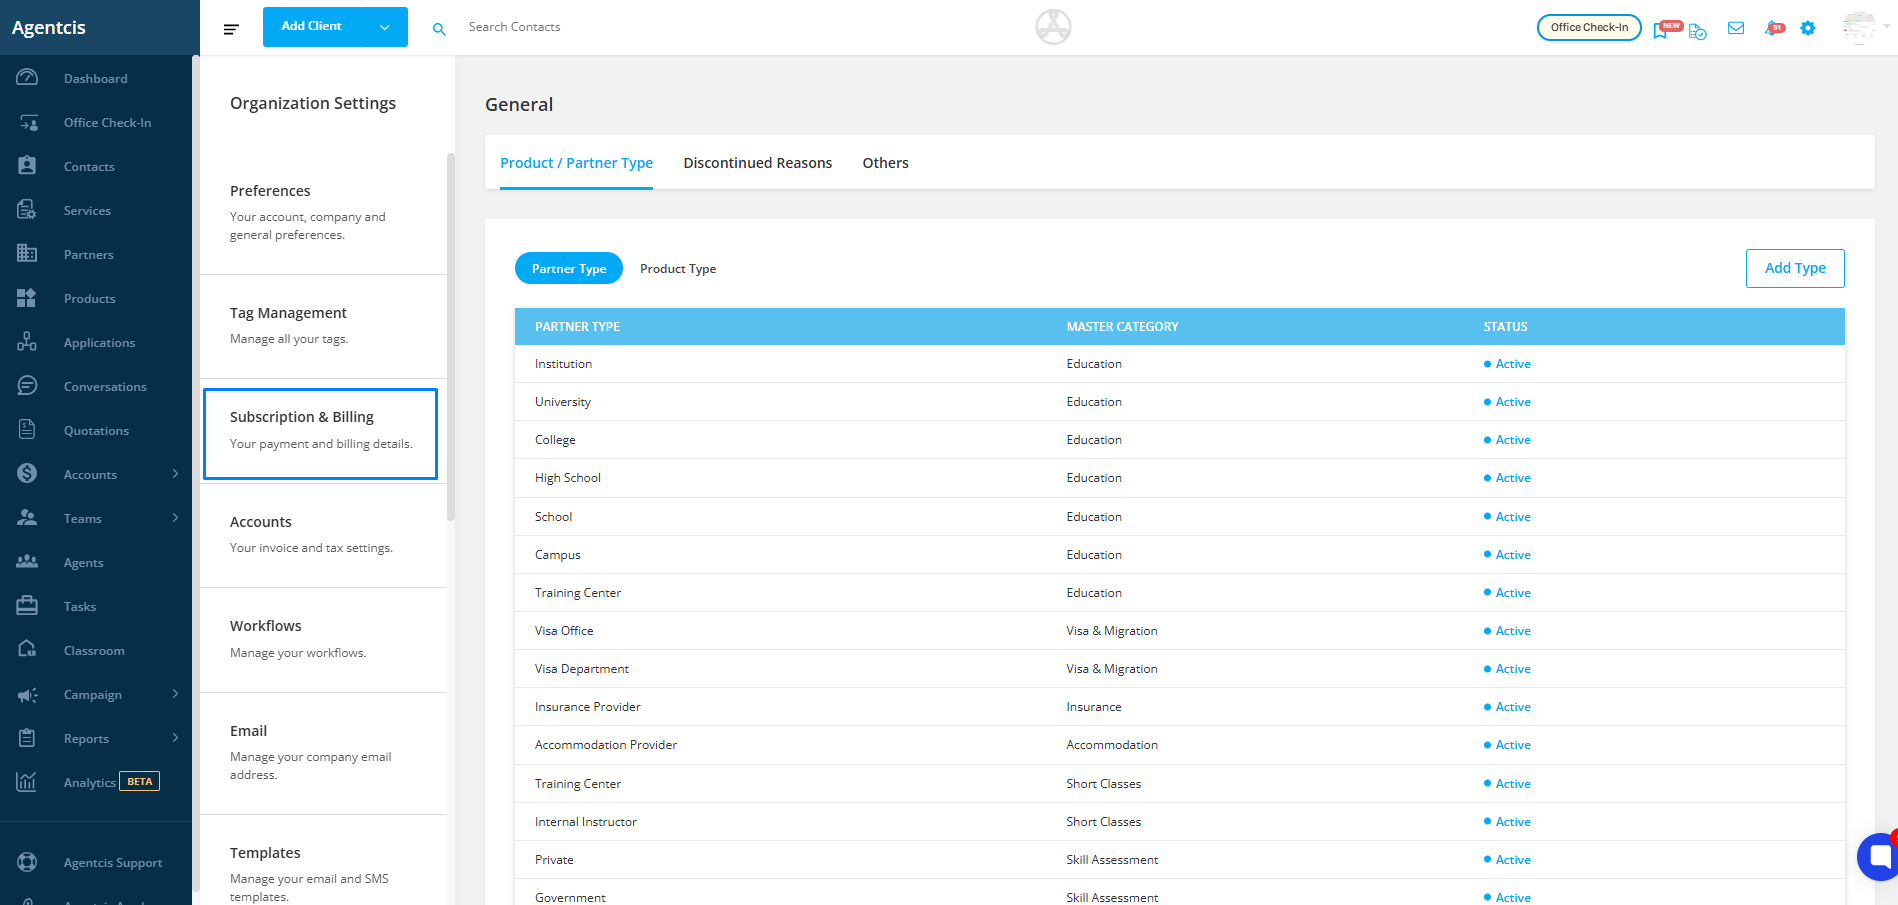
Step 2: Select Subscription and Billing from the list.
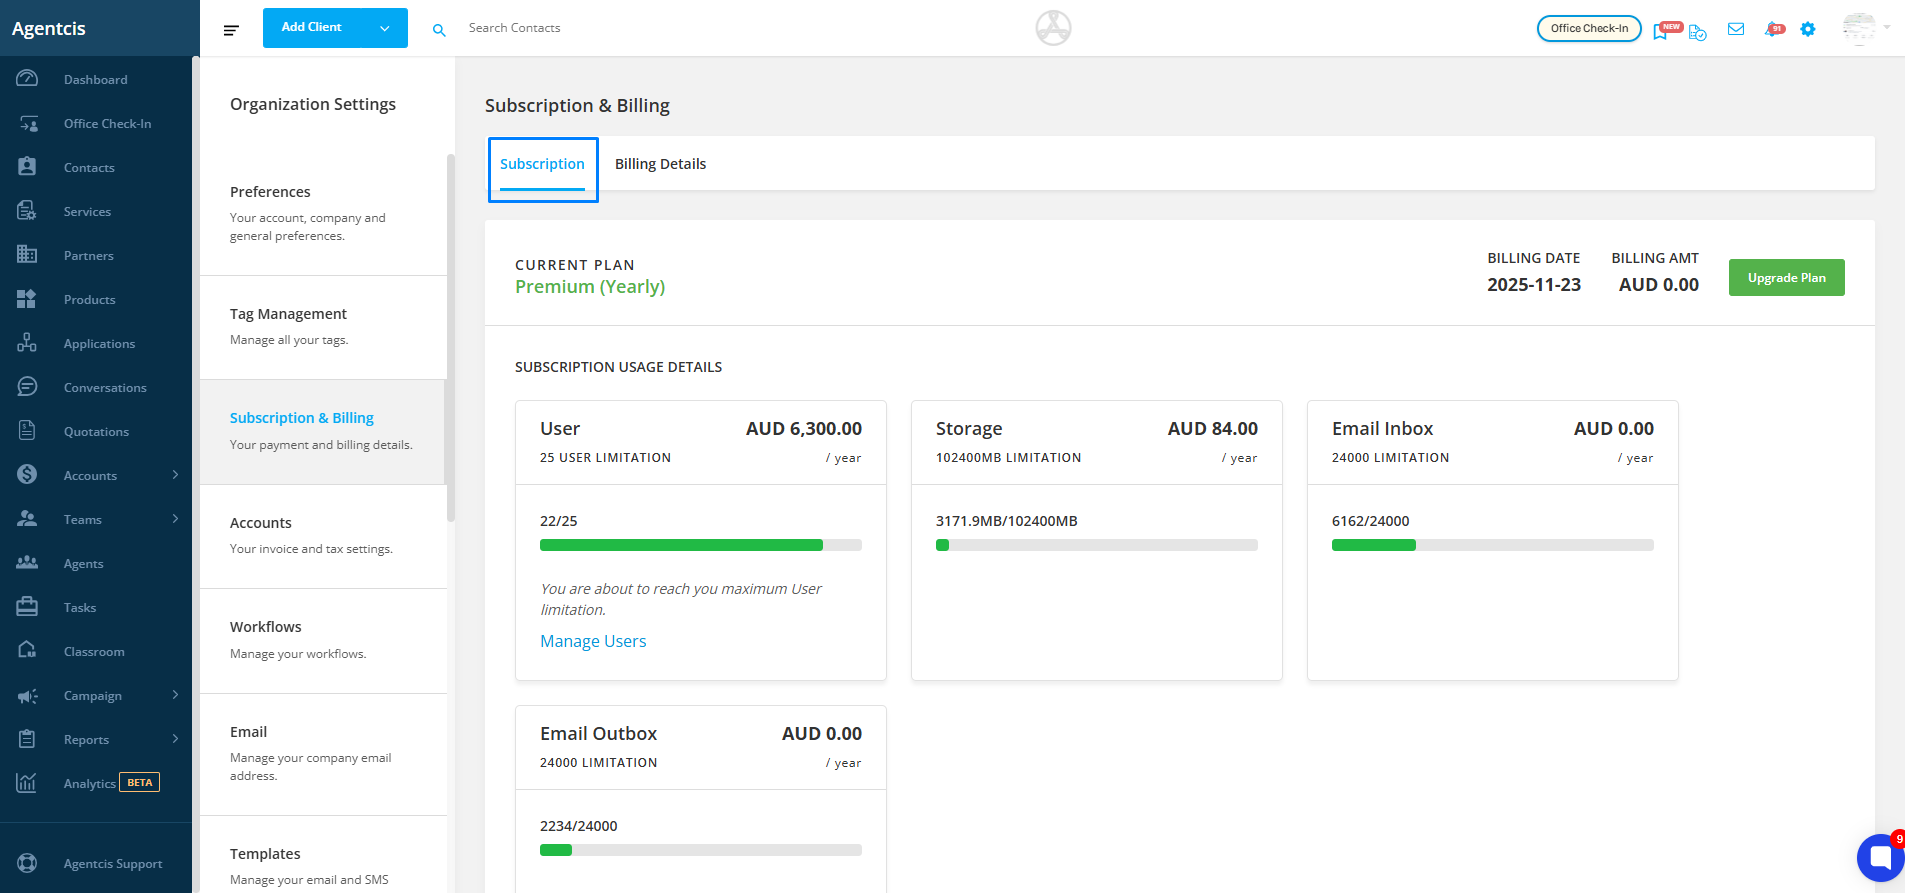
Step 3: Click on the Subscription tab on the top-left corner.
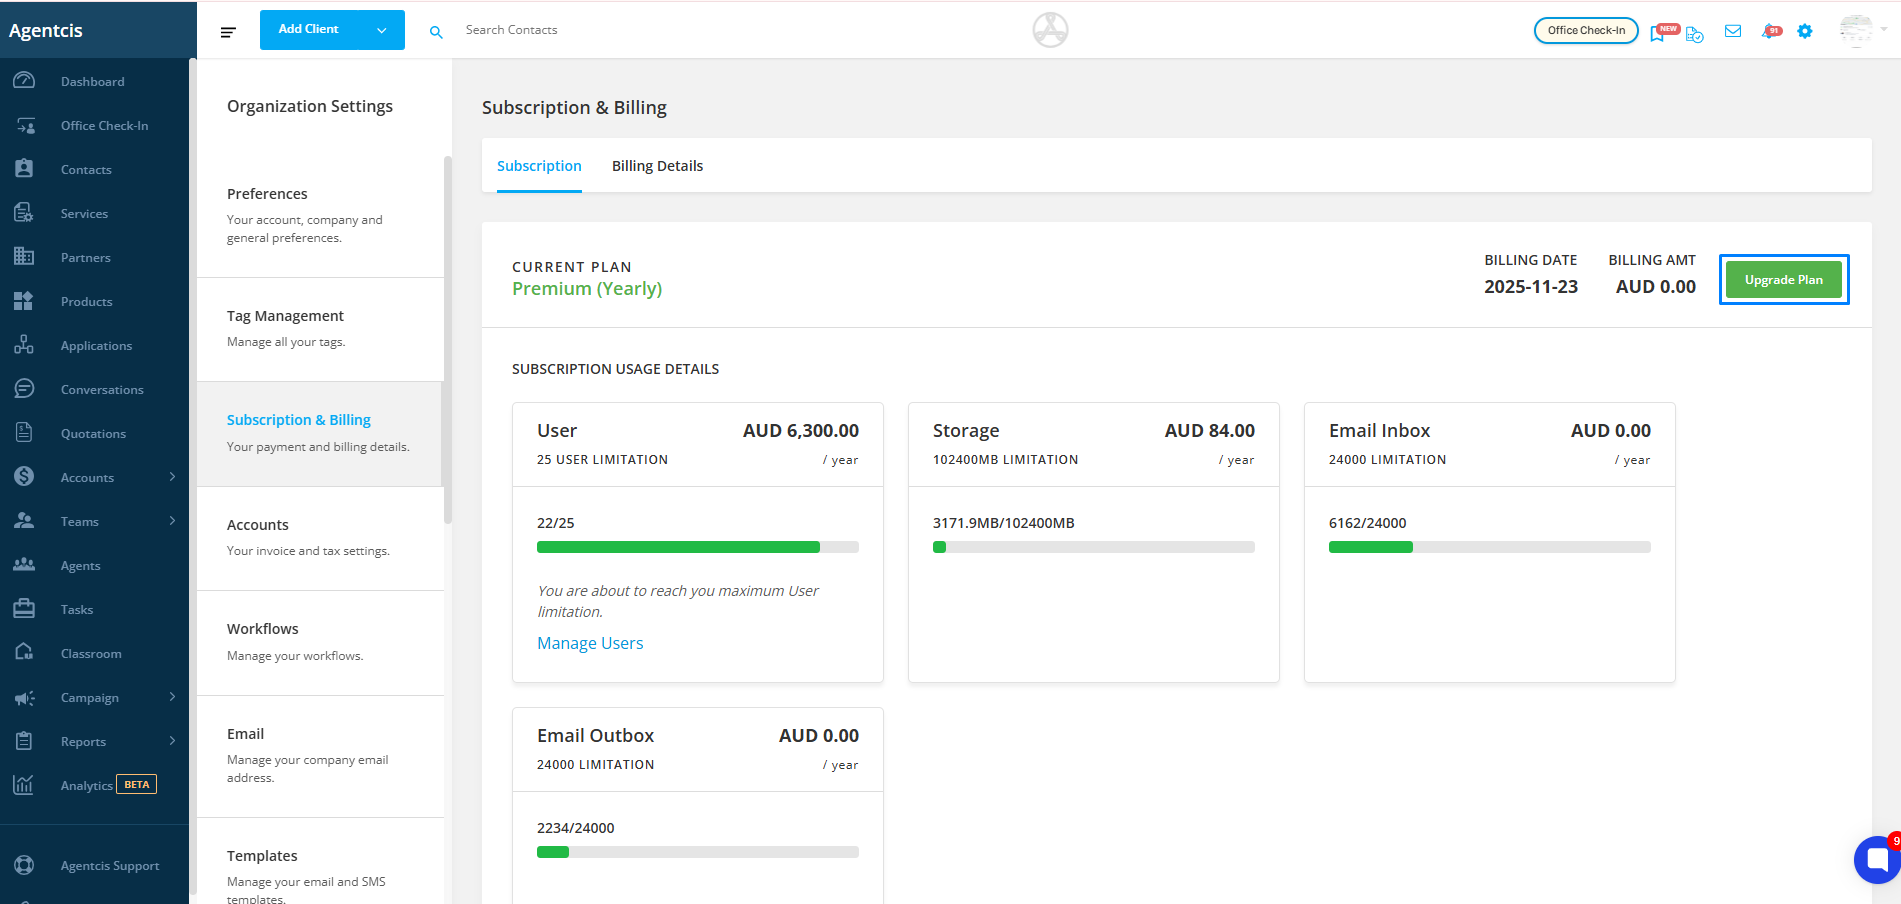
Step 4: Click on the Upgrade Plan tab on the top-right corner.
Step 5: To switch from Monthly Billing to Annual Billing, check the box for Bill Annually.
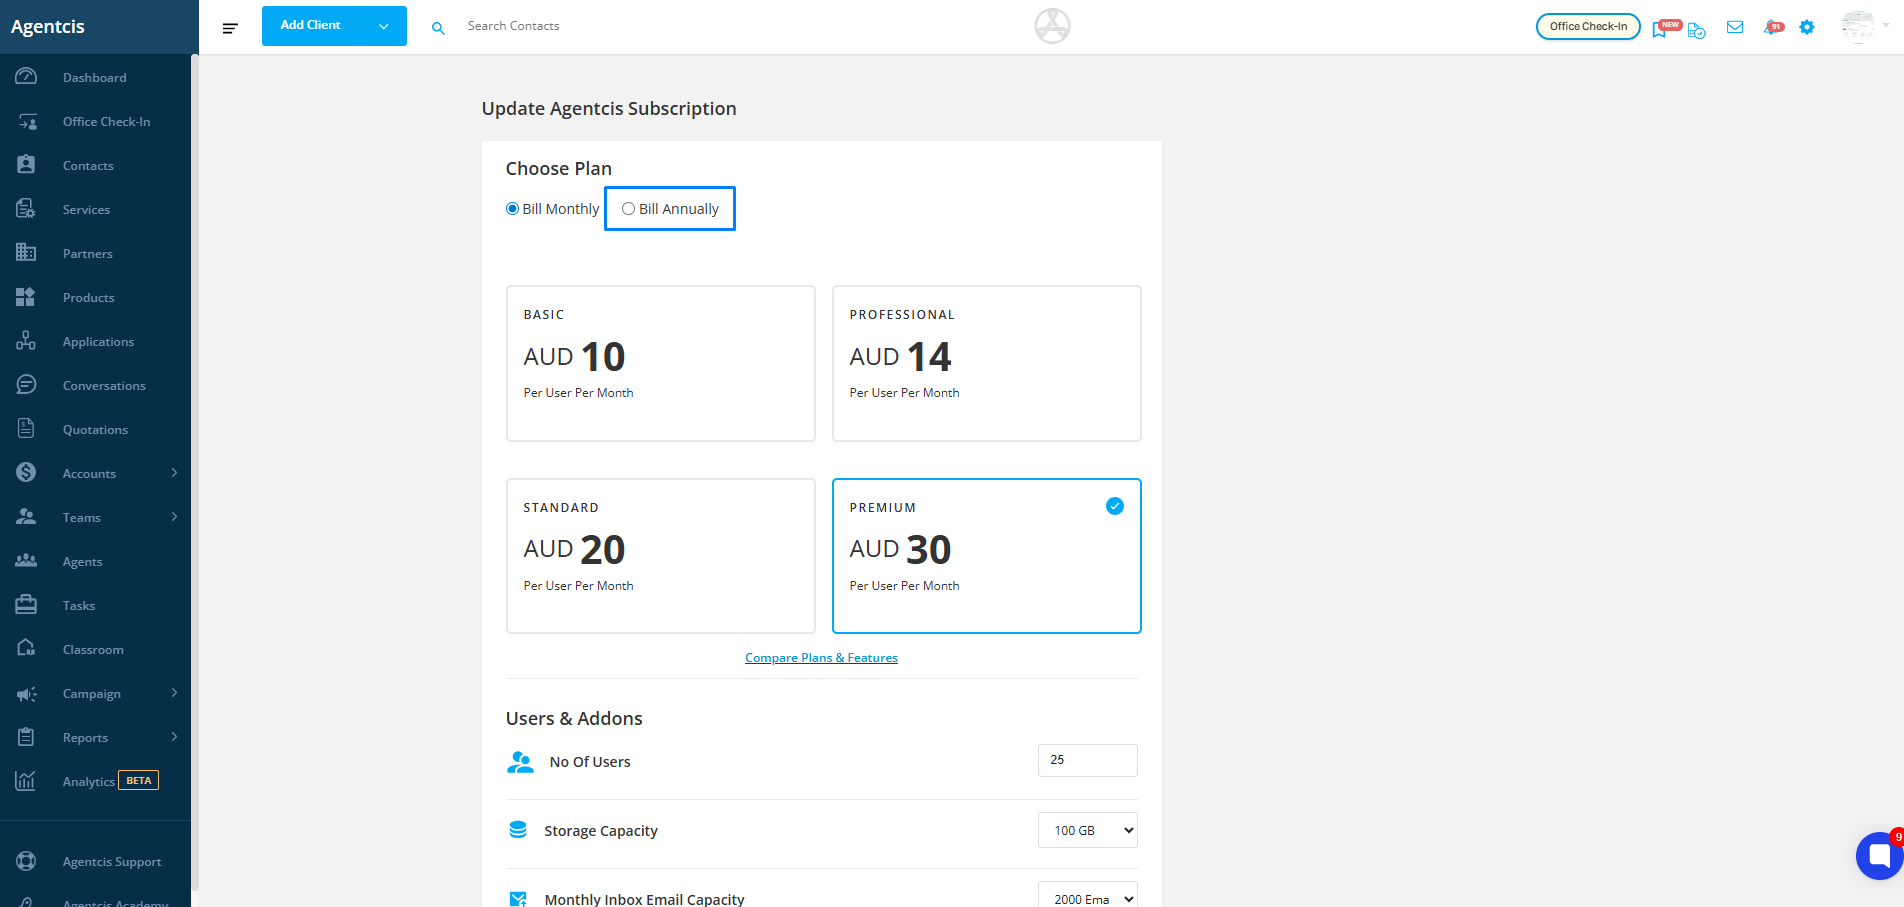
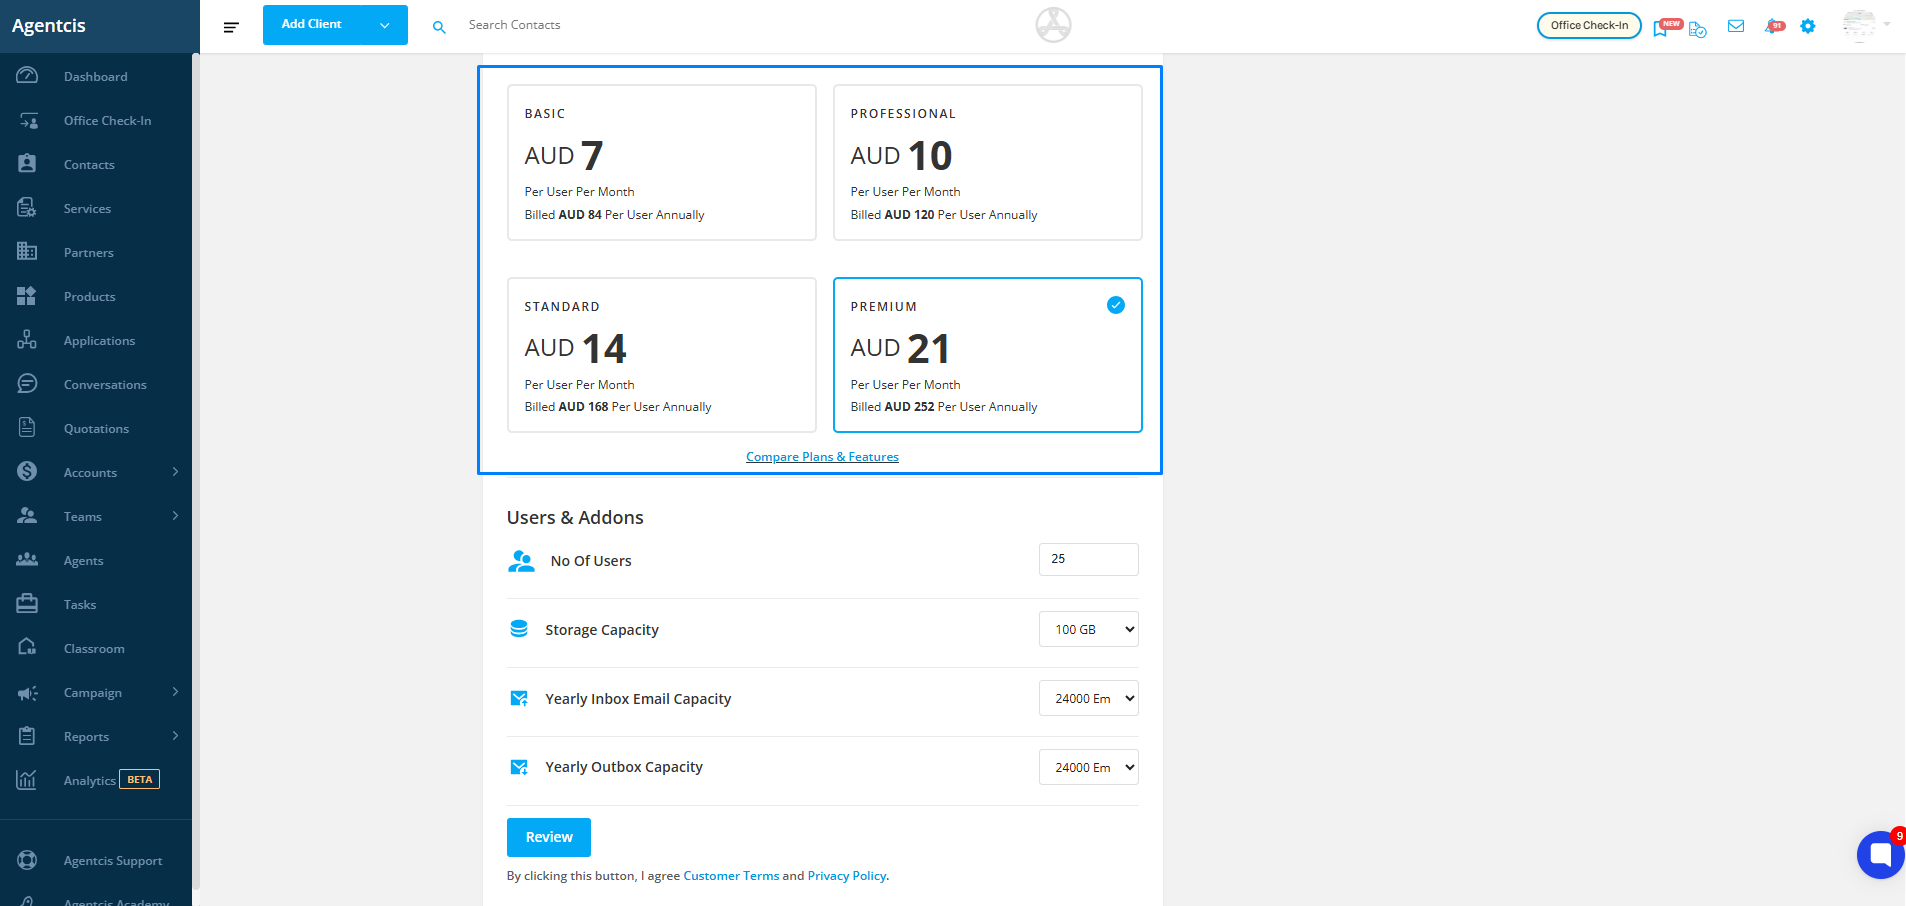
Step 6: To upgrade your plan, select the desired plan.
Example: If you want to upgrade from Starter to Premium, select the Premium plan.
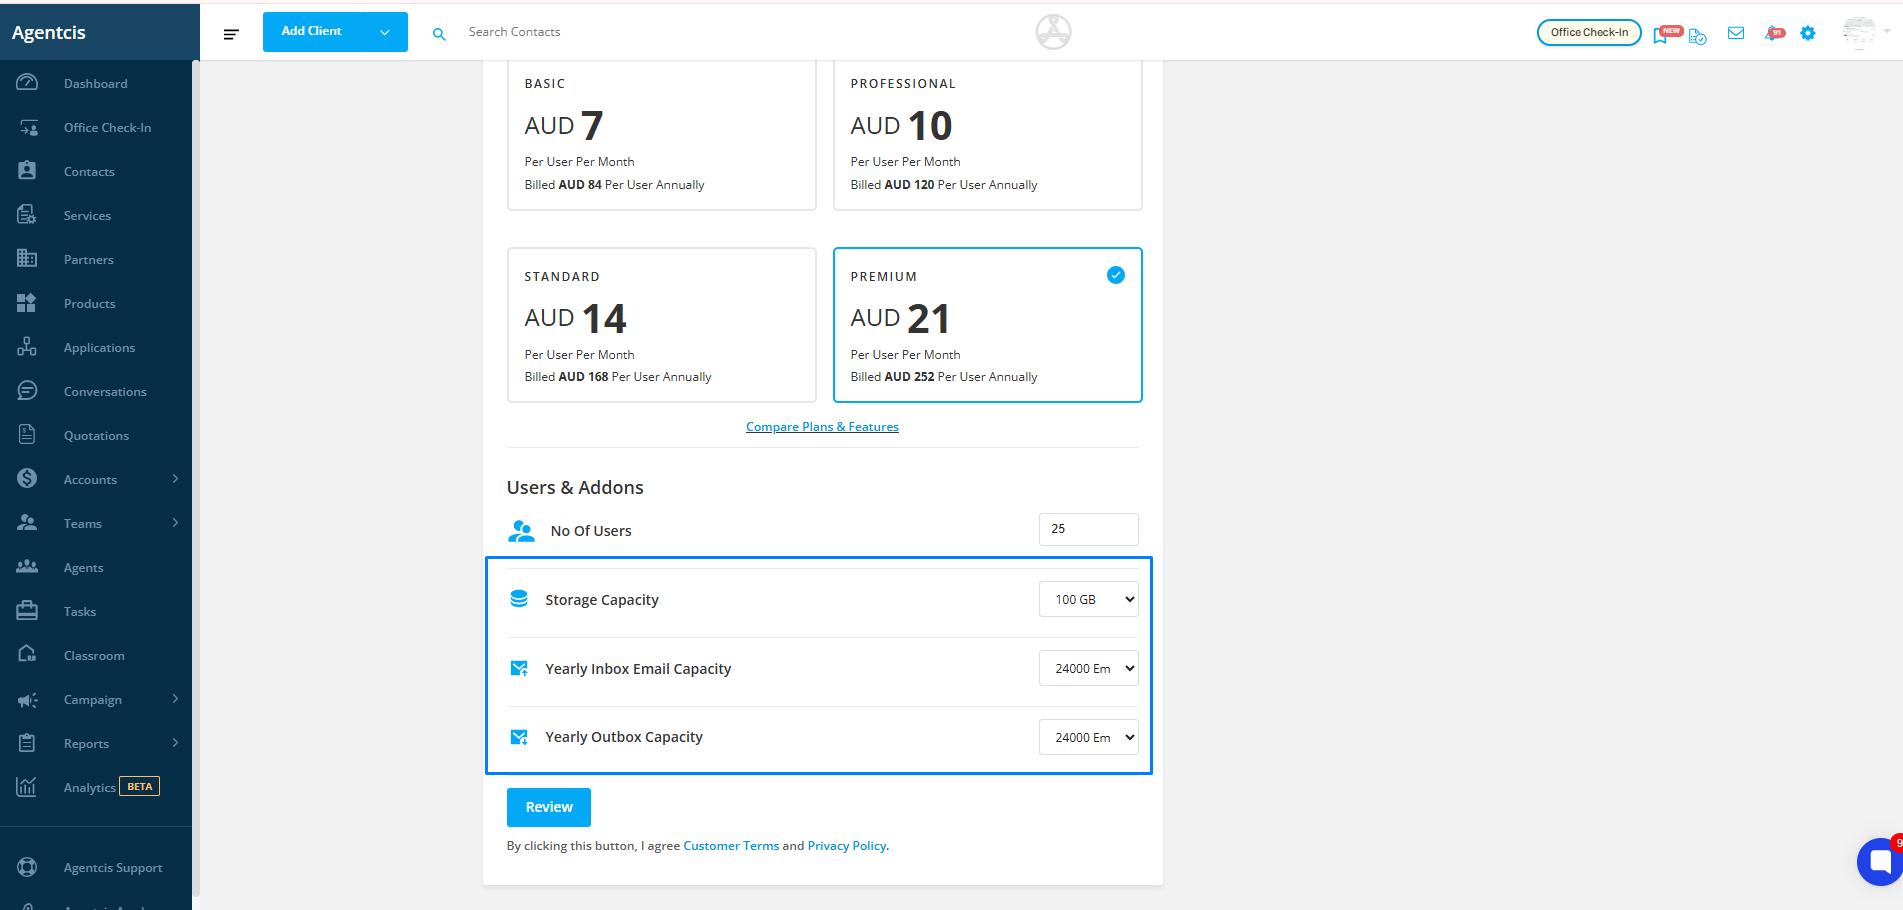
Step 7: You can also purchase Add-ons. Each plan includes a fixed amount of storage, email inbox, and email outbox capacity. If you run out, you can purchase additional storage or email capacity by selecting them from the drop-down menu.
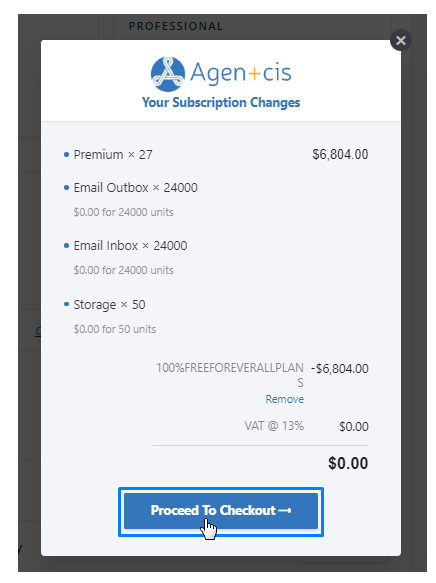
Step 8: Once you’ve made your selections, click on Review.
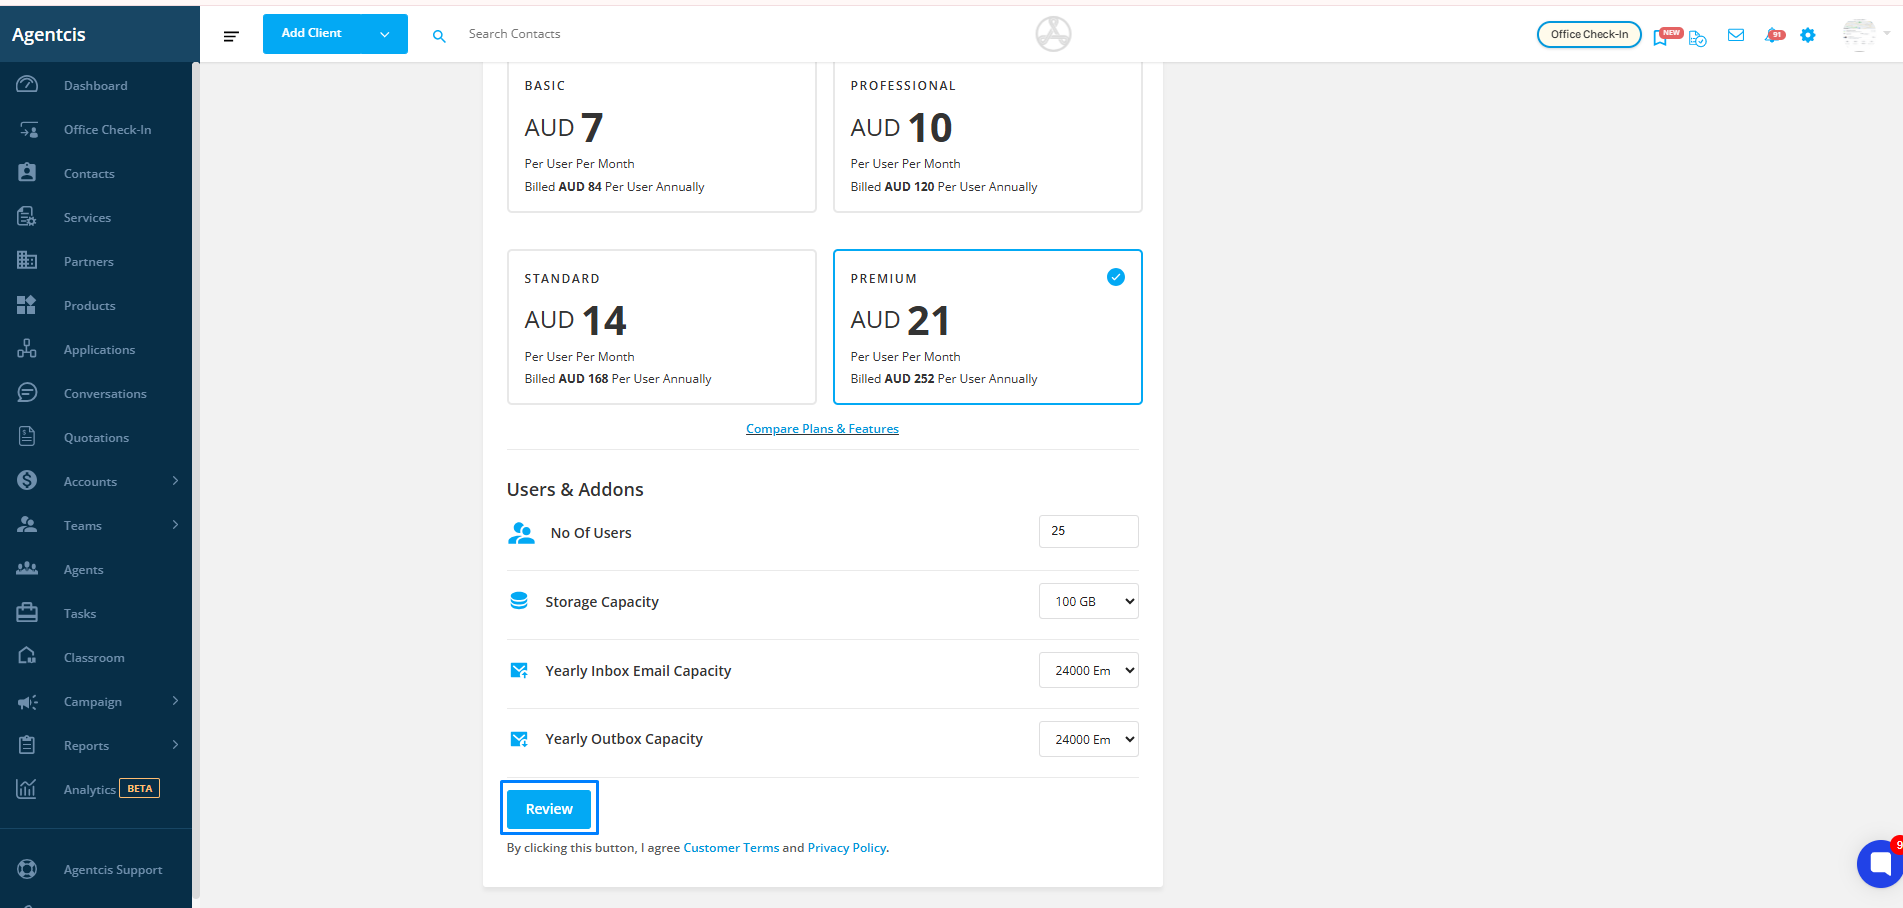
If you’ve already added card details, you’ll see the Review option.
If no card details are saved, you’ll see Request to Upgrade instead.
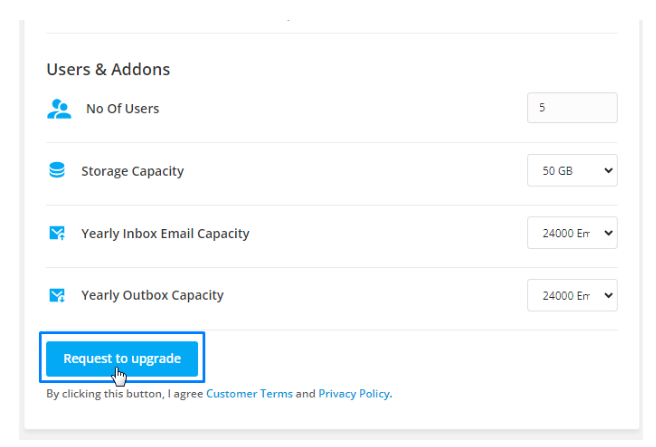
Step 9: If you select Request to Upgrade, your request will be sent to the Agentcis team for processing.
Step 10: If you selected Review, check the changes you’ve made and click Proceed to Checkout on the pop-up.
Step 11: Update your billing address if required.
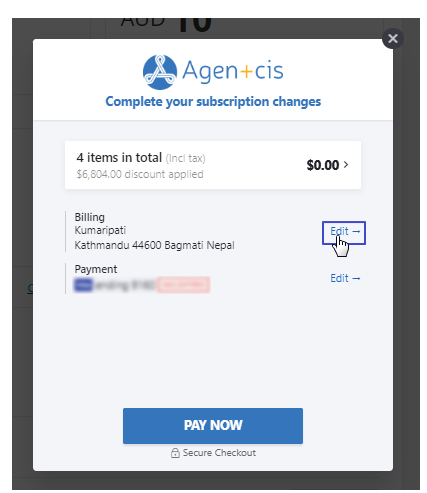
Step 12: Finalize your payment method (Card or PayPal) by clicking the edit option next to the payment.
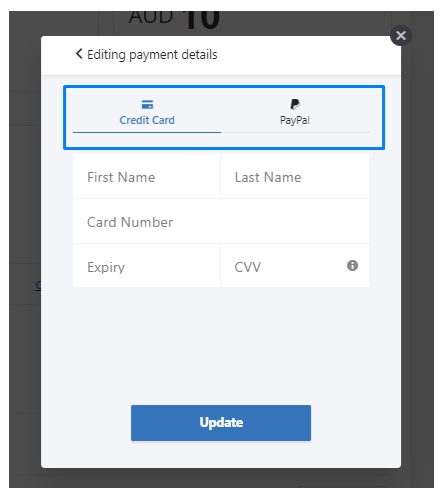
Step 13: Click Pay Now to complete the process.
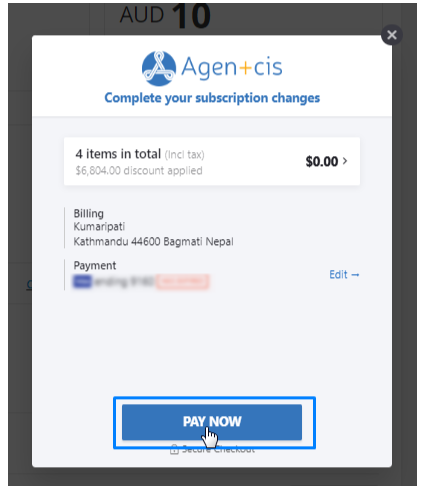
Now your subscription has been updated.