You can now automatically send WhatsApp messages for various triggers like birthdays, status changes, application updates, and more. To send the automated WhatsApp message, follow the following steps.
Please Note: Before sending the automated whatsapp message, you have to integrate AhatsApp with Agentcis. To integrate whatsapp follow the following link:
Also, you should have the following permission and access to WhatsApp.

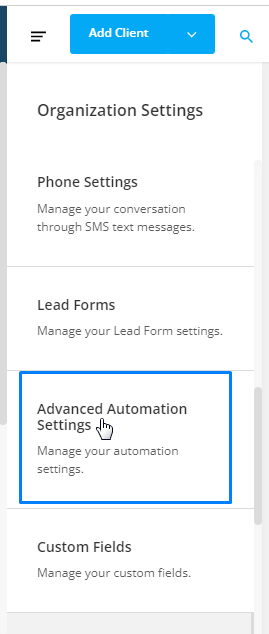
Step 1: Select settings from the top info bar.

Step 2: Select Advance Automation Settings from the list.
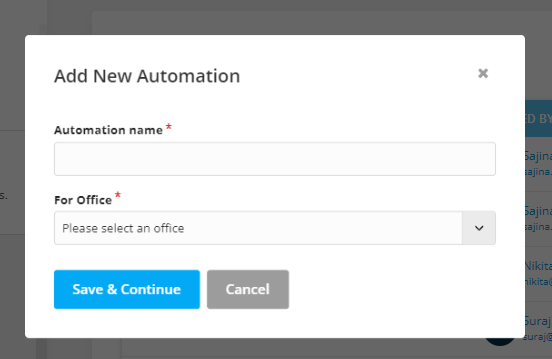
Step 3: Select Add

Step 4: Give automation the suitable name and select the branch office for which you are creating the automation.
Step 5: Select the trigger such as contact birthday, status change, application update and many more as per your requirement.
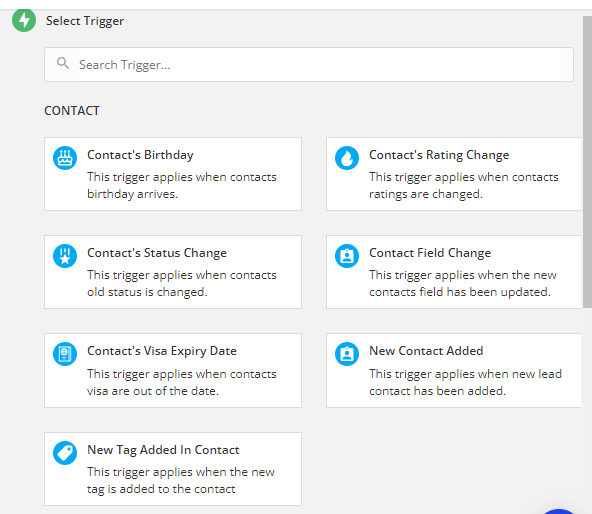
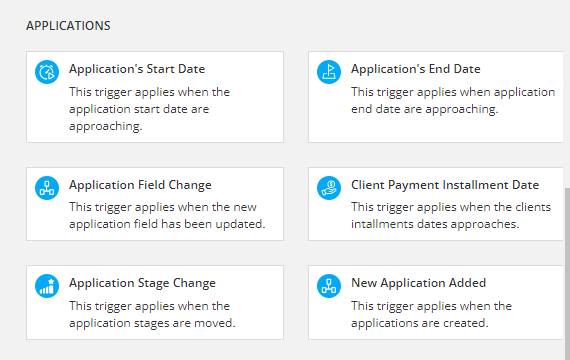
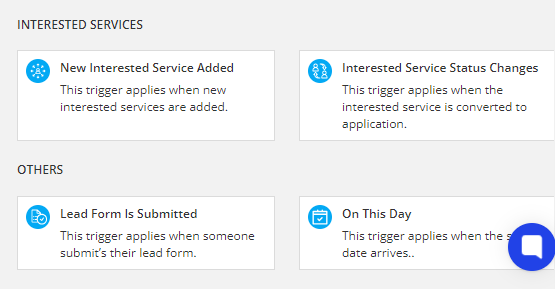
Each trigger has certain fields that need to be defined to activate the trigger. You will be able to see further details on each trigger, once it’s selected.
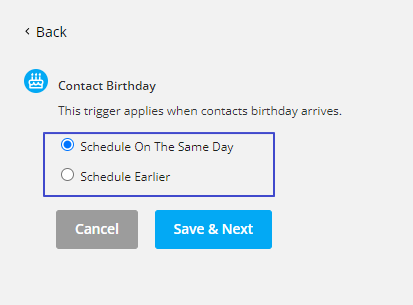
If the trigger is date-based, the further information would be whether to perform the action on the same day as the trigger date or on an earlier date.
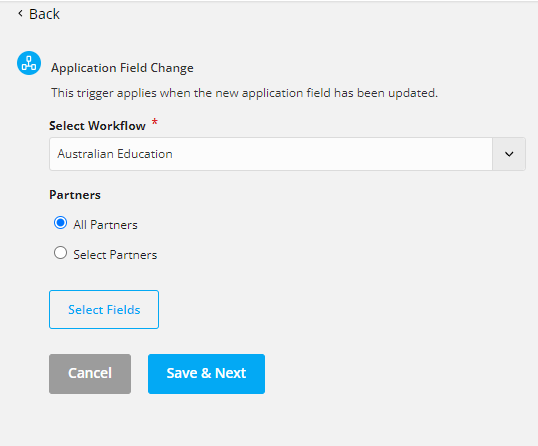
If the trigger is action-based the further information would be the event of the action.
Step 6: Once the details are selected select the “Save & Next” tab.

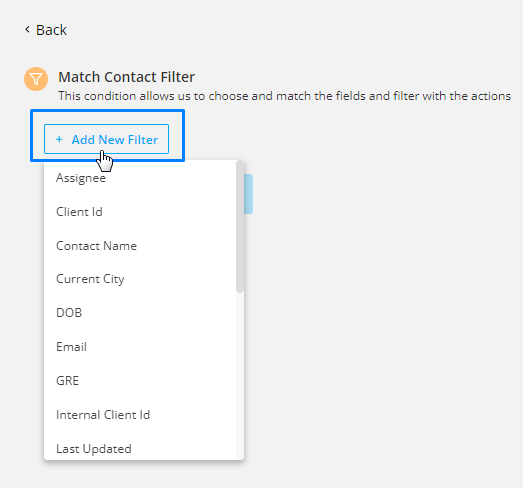
Step 7: Select a condition (if any).
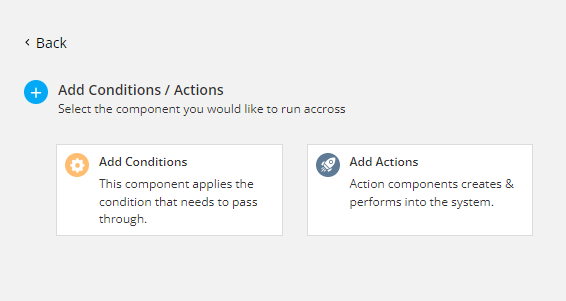
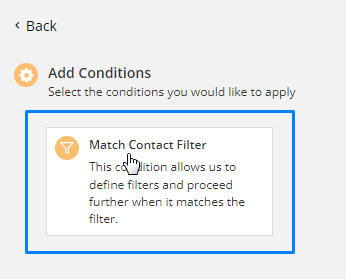
The conditions are used in Automation to filter the results that come from the trigger. Conditions are not compulsory but can help you to function your automation properly.
For example,
If you would like to send the birthday wishes only to the clients of a particular Assignee, you can select the Assignee from the condition filter.
Step 8: Select a delay action, if you want to wait for some time before the action is triggered.
Delay can come useful when you want to set a series of emails or sms to be sent in a certain interval of time after trigger is activated and conditions are met.
To select the delay option select the add action tab.
Then select Wait tab.
For example, you want to send an email 5 hours after a client’s birthday. Here, you can select to send the birthday email 5 hours after they have submitted the form.
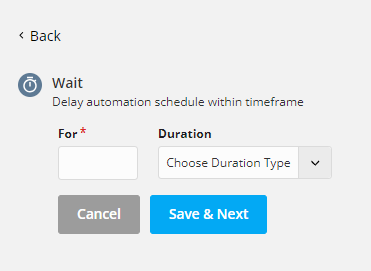
Note: To delay a certain action, the delay option has to be selected before the action.
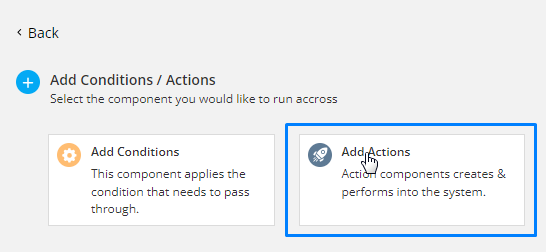
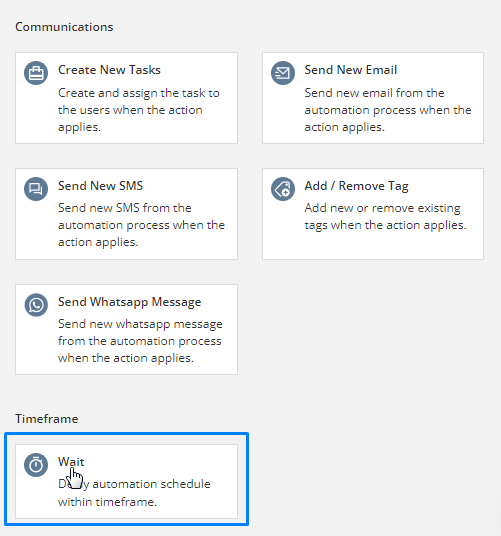
Step 8: Select an action which “ Send WhatsApp Message”
The automation is incomplete without Actions. Trigger will activate certain functions and provide results, conditions then filter those results and finally actions will be performed in those results.

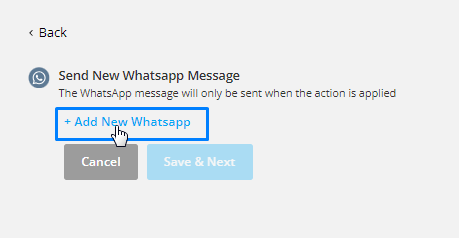
Step 9: Select Add New WhatsApp
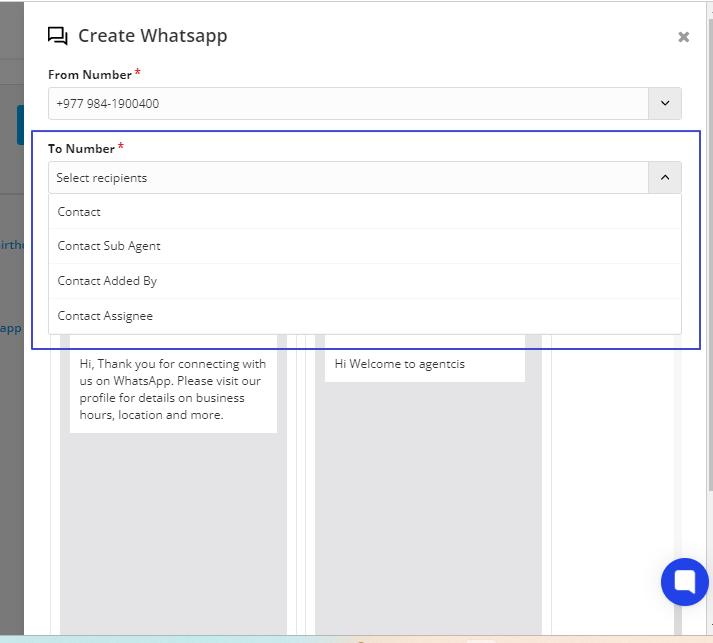
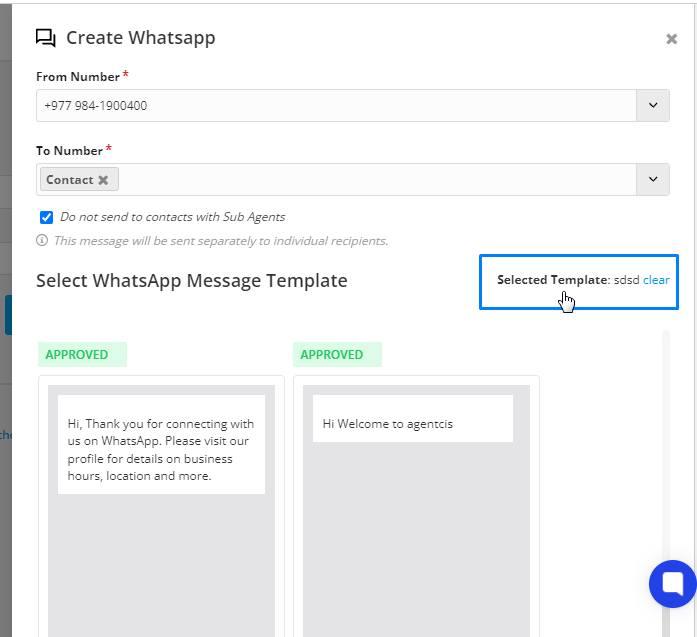
Step 10: Select the recipient of the automated WhatsApp Message.
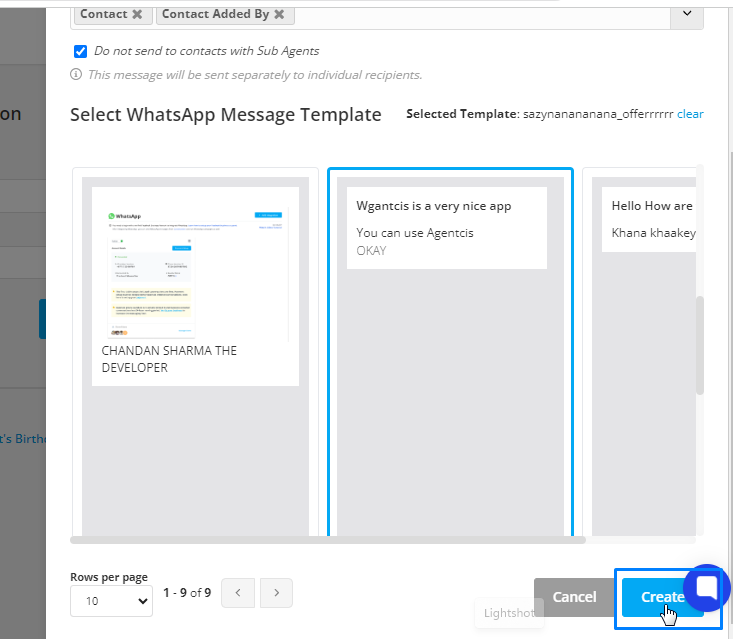
Step 11: Select the Approved template
(Please note: You can only send the approved WhatsApp Messages)
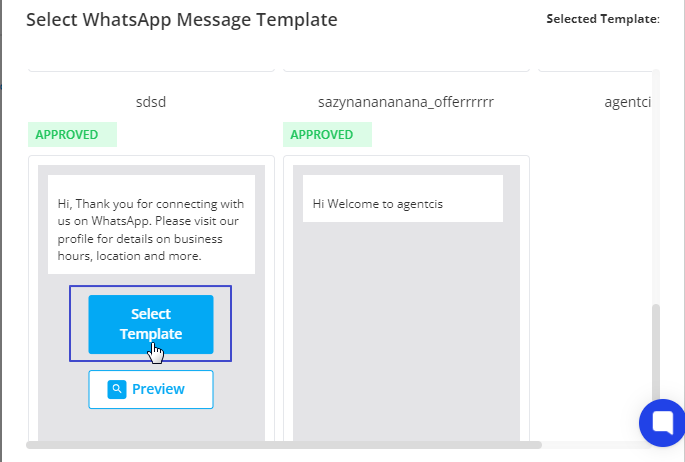
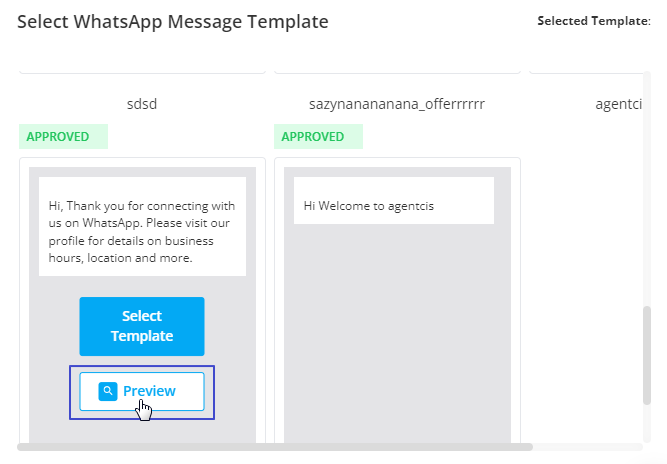
You can preview the template as well by clicking on Preview tab
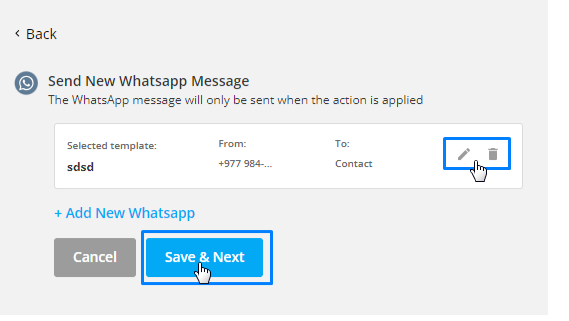
Step 12: The selected template will be shown on the right corner.,
Step 13: Select Create
Step 14: Select Save and Next.
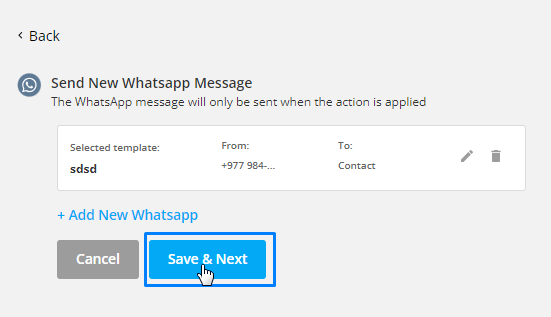
Step 15: If you want to delete the selected WhatsApp template then click on delete icon and if you want to edit the detail then click on edit icon.