In today’s fast-paced business environment, ensuring smooth communication and timely responses is critical—especially for companies managing multiple inquiries, clients, and team members. One essential practice that enhances operational efficiency is company email forwarding.
Company email forwarding helps centralize communication by automatically redirecting emails from your official email account (like Gmail, Outlook, etc.) to a centralized system like Agentcis. This ensures that all client-related communication is:
Easily accessible in one place
Trackable by your team
Not dependent on an individual team member's inbox
It improves collaboration, transparency, and productivity. For businesses in the education and migration consultancy sector, this also ensures that no client communication is missed, and follow-ups are streamlined across departments.
Now, let’s walk through the steps to forward your company email to Agentcis:
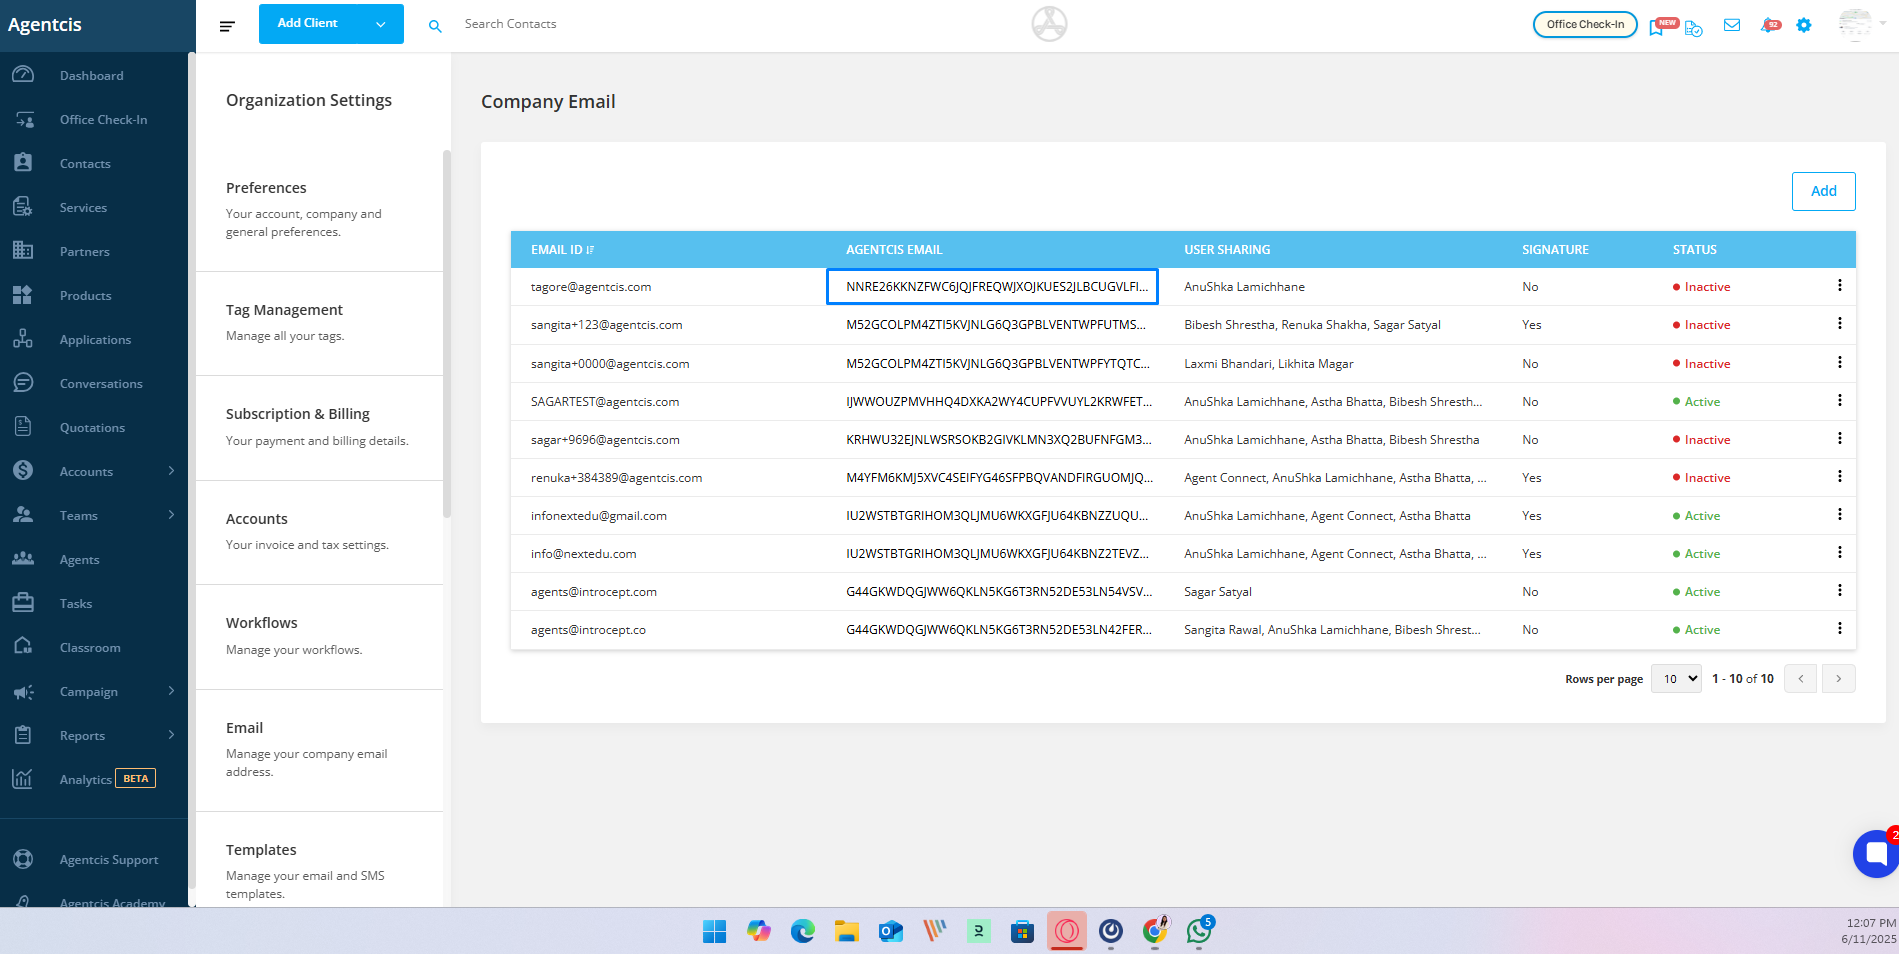
From the top information bar in Agentcis, click on the Settings tab.
Under Settings, choose Email to access your company’s email configuration section.

Click on the Agentcis Email of the specific company email address you want to forward incoming emails to. Copy this address.
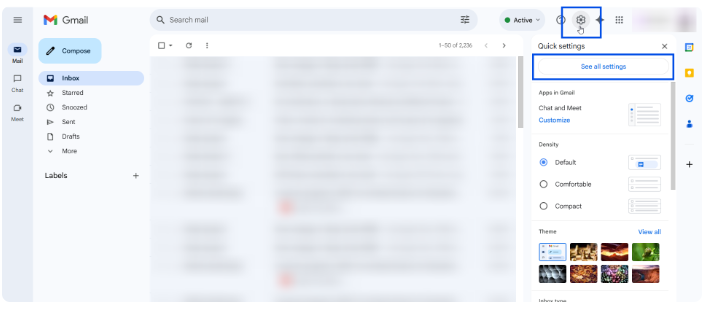
In a new browser tab, log in to your email provider (e.g., Gmail), and navigate to Settings.
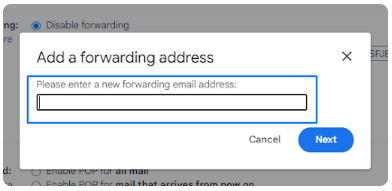
In the Gmail settings, go to the “Forwarding and POP/IMAP” tab. Click on “Add a forwarding address”.
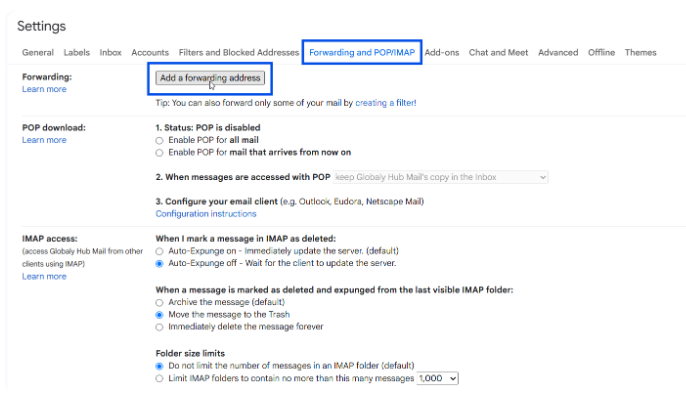
Paste the Agentcis Email address you copied earlier into the forwarding field.
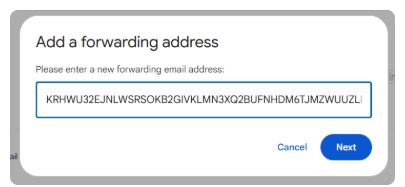
Step 11: Click on Next.
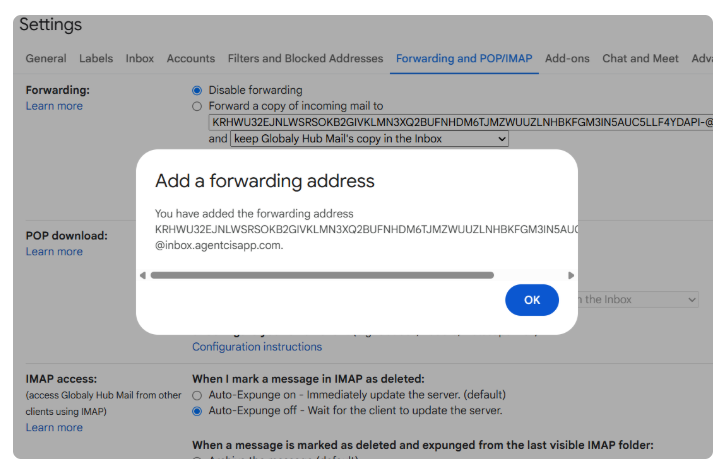
Once you click Next, a confirmation pop-up will appear indicating that a verification email has been sent to the forwarding address. This step confirms that the address is valid and owned by you.
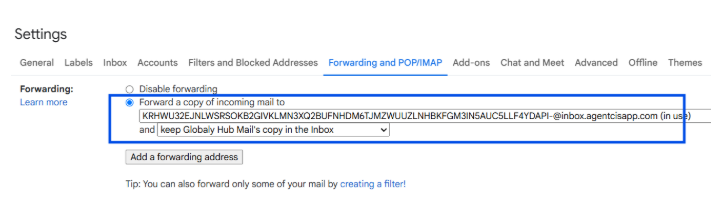
Step 12: Enable Mail Forwarding
After the forwarding address is added successfully, you’ll see it listed on the same settings page.
Now, make sure to enable the checkbox labeled:
‘Forward a copy of incoming mail to [your forwarding address]’
This ensures that all incoming emails will be forwarded as intended.
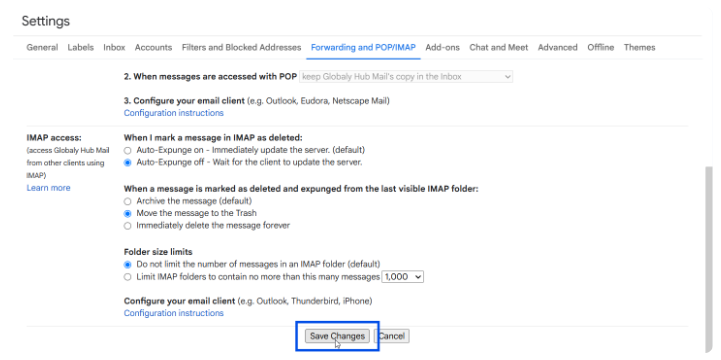
Step 13: Save Changes
Scroll down to the bottom of the page and click on “Save Changes” to apply the new forwarding settings.
If you skip this step, your changes will not be saved.
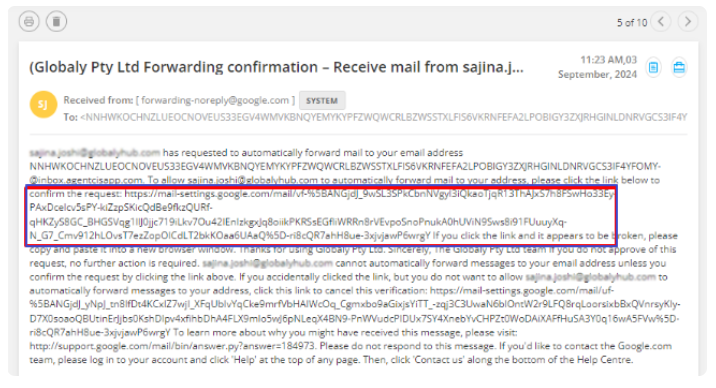
Step 14: Confirm the Forwarding Request
After saving your changes, a confirmation email will be sent to your forwarding address (e.g., your Agentcis inbox).
Check the inbox and look for an email from Google regarding the forwarding request.

Step 15: Click on the Confirmation Link
Open the confirmation email and click on the link provided to verify and approve the forwarding request.
Step 16: Final Confirmation
After clicking the link, you’ll be taken to a confirmation page. Click on “Confirm” to complete the process.
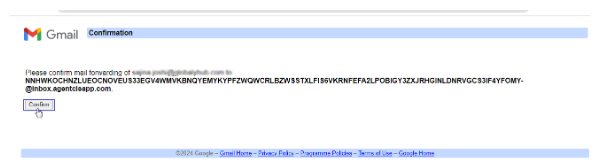
Once confirmed, your email forwarding setup will be active.
