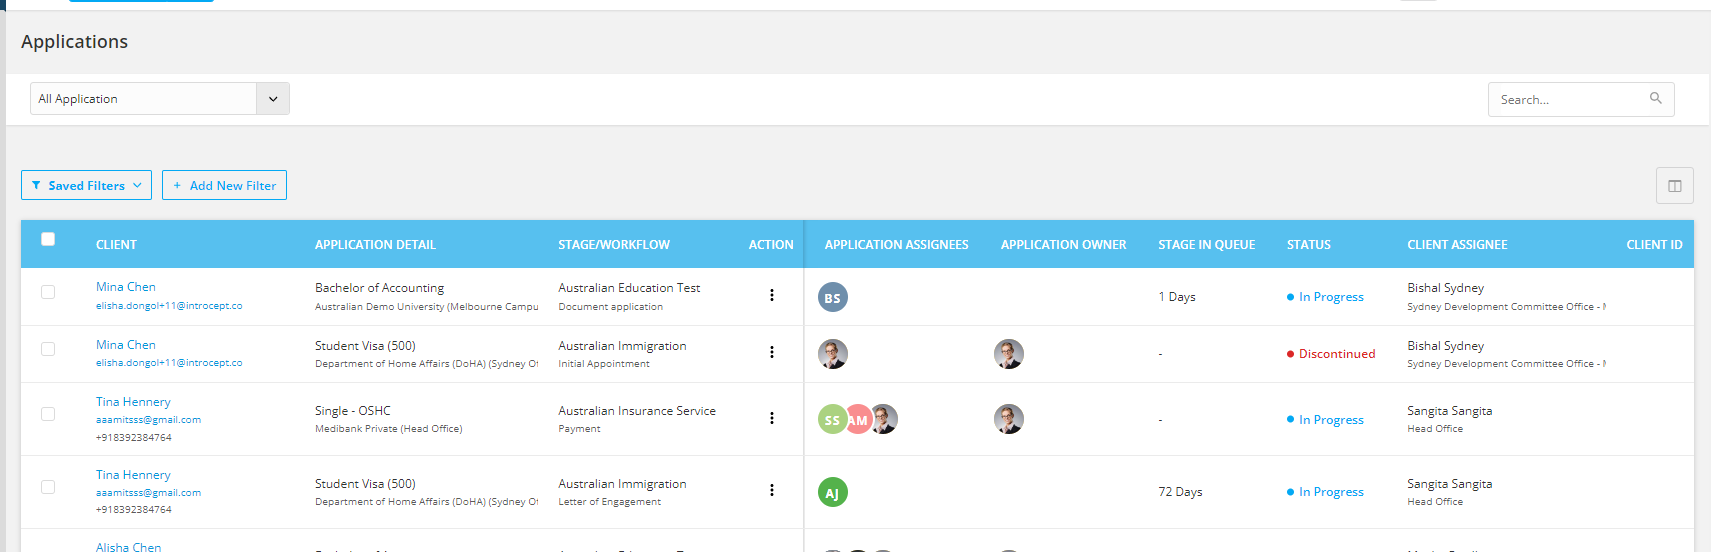
Application listing Page is now more organized, customizable, and easy to manage. With the latest update on the Application Listing page, it is easier for you to:
1. Re-arrange Columns the way you want.
2. Quick and Easy Action
3. Easy Filters
Follow the following steps for the actions on the listing page.
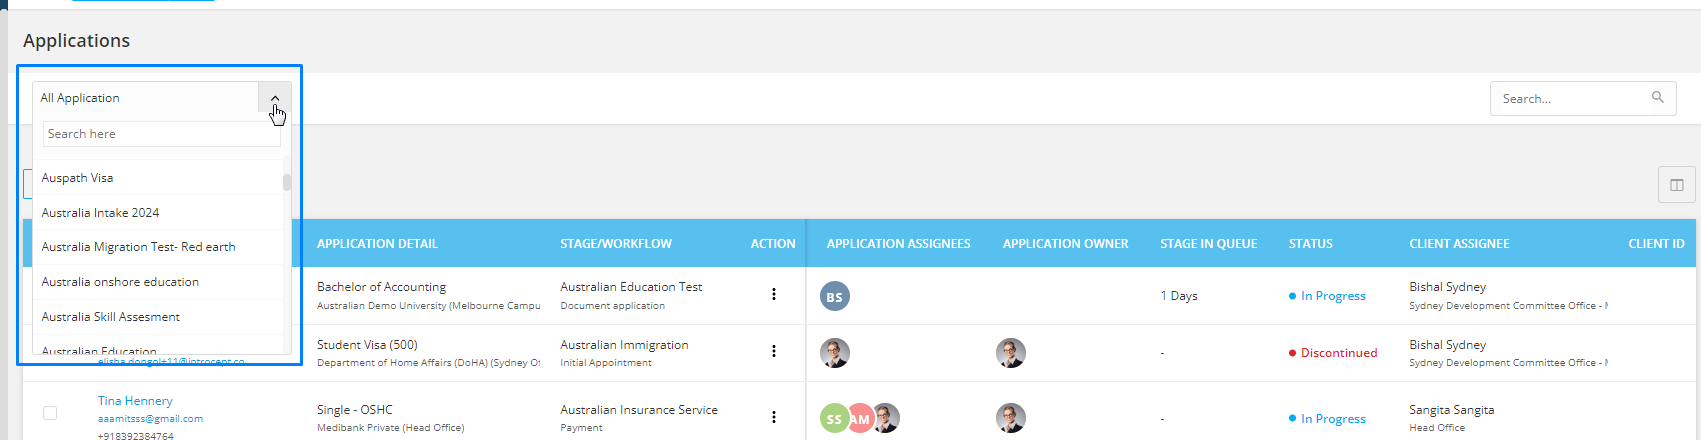
Step 1: Select the Workflow
Start by selecting the relevant workflow from the top-left corner of the page. This ensures you're only viewing applications related to a specific process, such as Admissions, Visa Processing, or Enrollment.
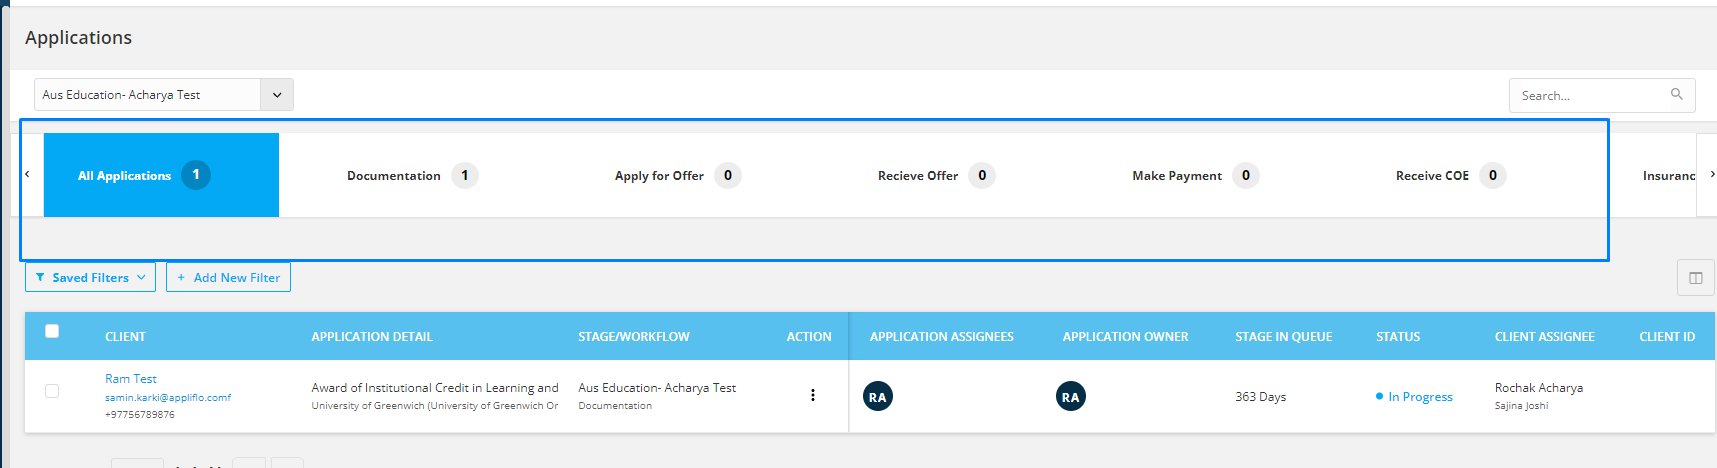
Step 2: Choose the Workflow Stage
Narrow down your view even further by selecting the specific stage of the workflow. This filters applications based on their current progress (e.g., Documents Pending, Submitted, Approved).This saves time by allowing you to work only with applications that need attention at a particular stage.
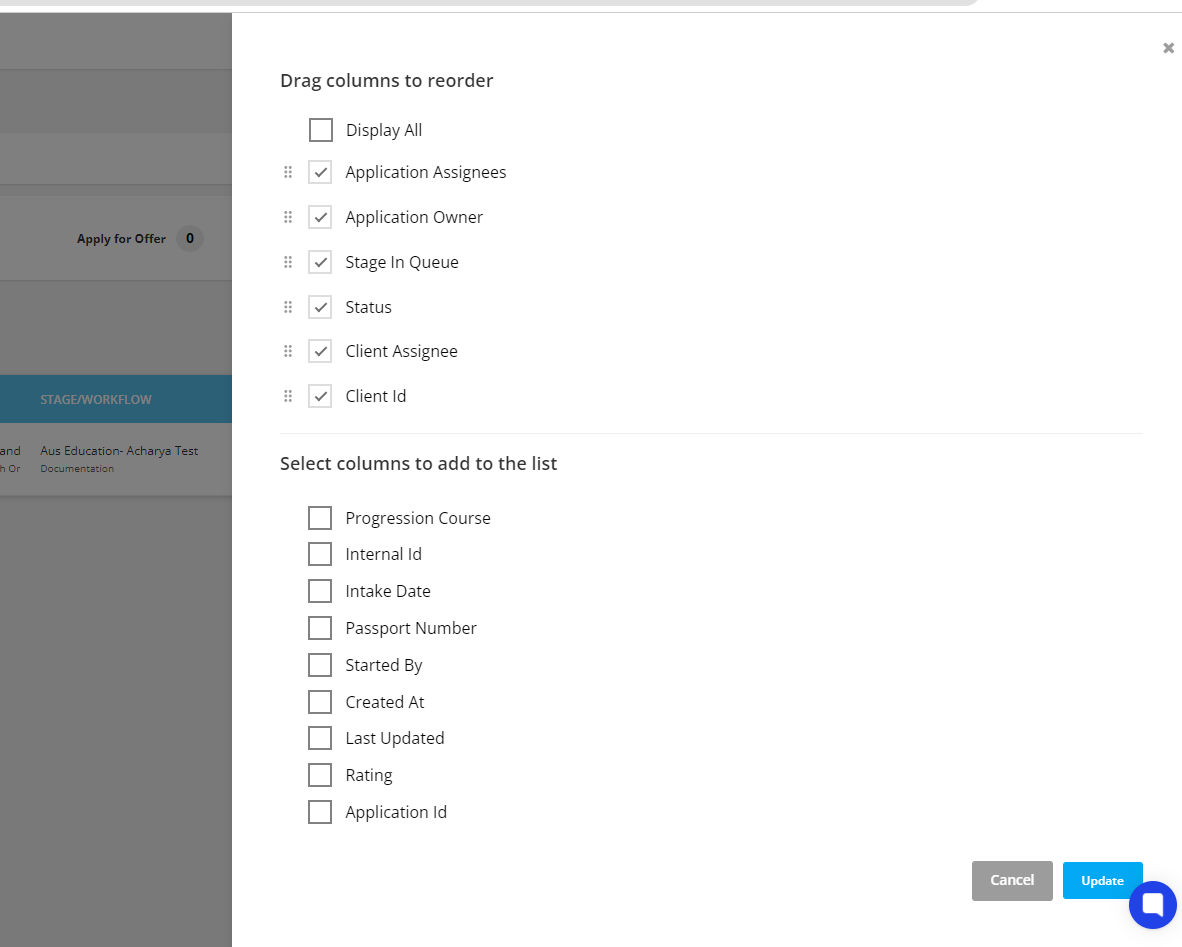
Step 3: Customize Displayed Columns
Click on the “Display Filter” icon to select which columns you want to see in the list. This improves clarity and reduces clutter by showing only what’s relevant to the workflow
Note: The first four columns which is(Client, Application detail, Stage/workflow, and Action) can not be controlled for the display.

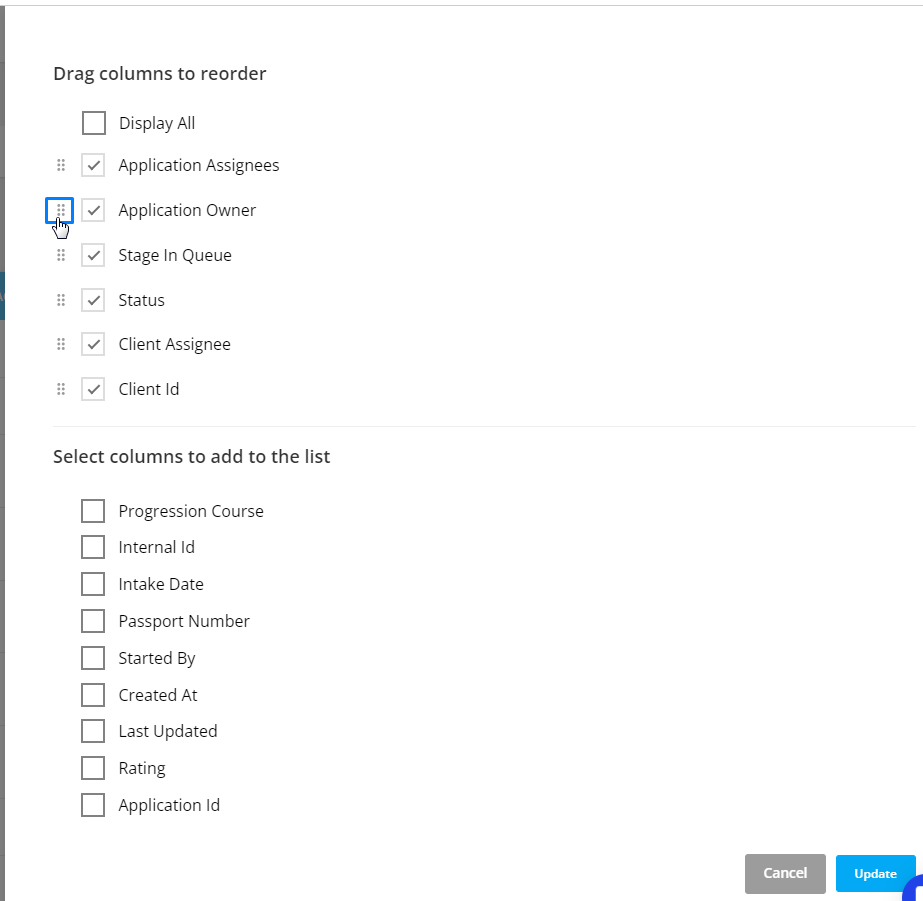
Step 4: Rearrange Columns with Drag and Drop
Use the New drag and drop feature inside the Display Filter to rearrange the columns in the way you want in the list. For this click on the dots icon then drag and drop to the place you want. This enhances visibility and efficiency by placing the most used columns where you want them.
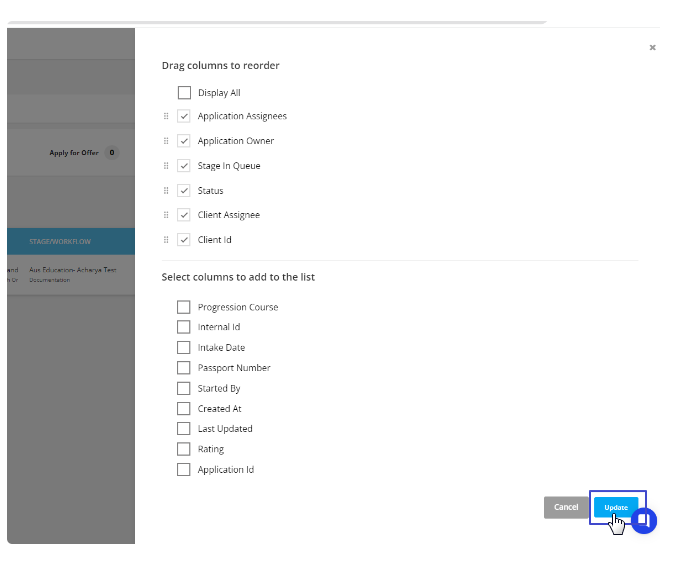
Step 5: Click “Update” to Apply Changes
Once you’re happy with your column arrangement, click Update to apply your settings.
Step 6: Use the Search Bar for Quick Access
Use the Search Bar at the top to find specific applications or contacts.
Searchable fields include: Client Name, Application Name, Phone Number, Internal ID, and Application ID.

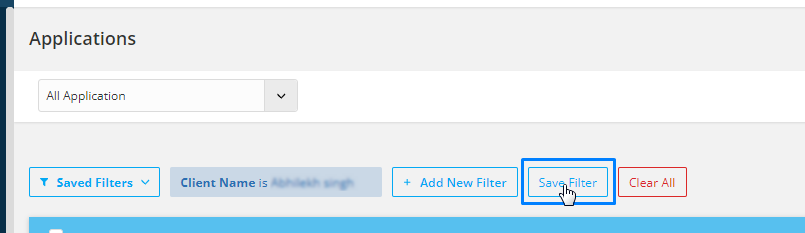
Step 7: Apply Filters to Refine Your View.
Click “Add New Filter” and select from the dropdown list to filter by Partner, Product, Stage, Assignee, and more. You can apply multiple filters as well.
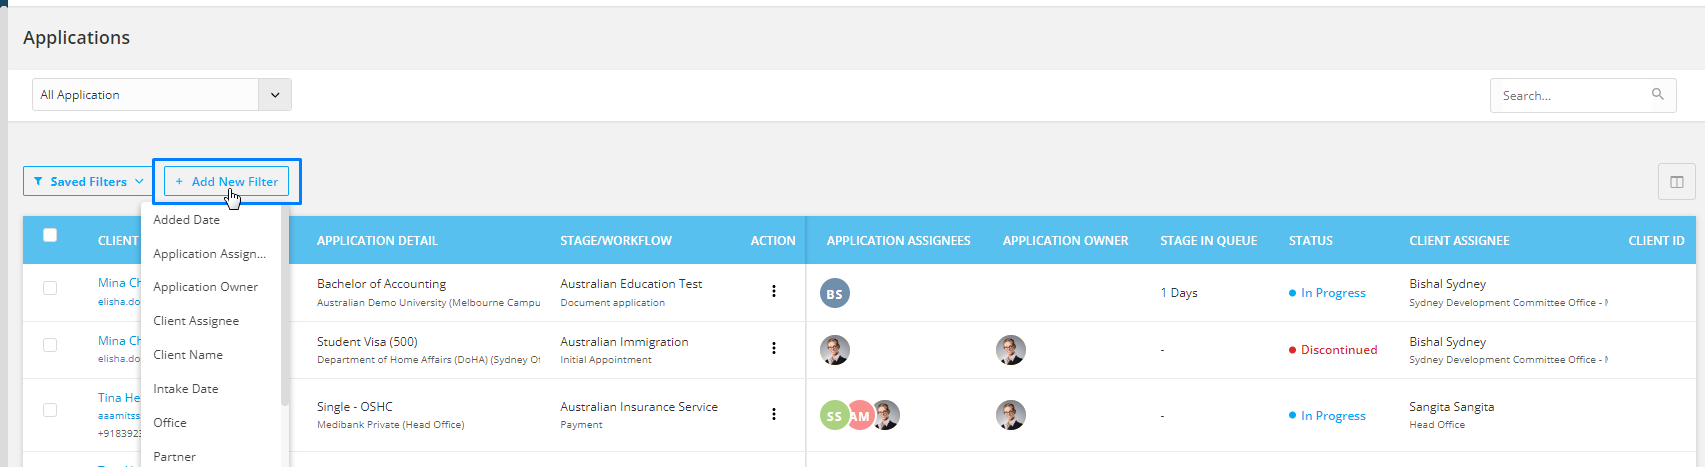
Note: You can also save frequently used filters by clicking "Save Filter" and naming your filter for quick access in the future.
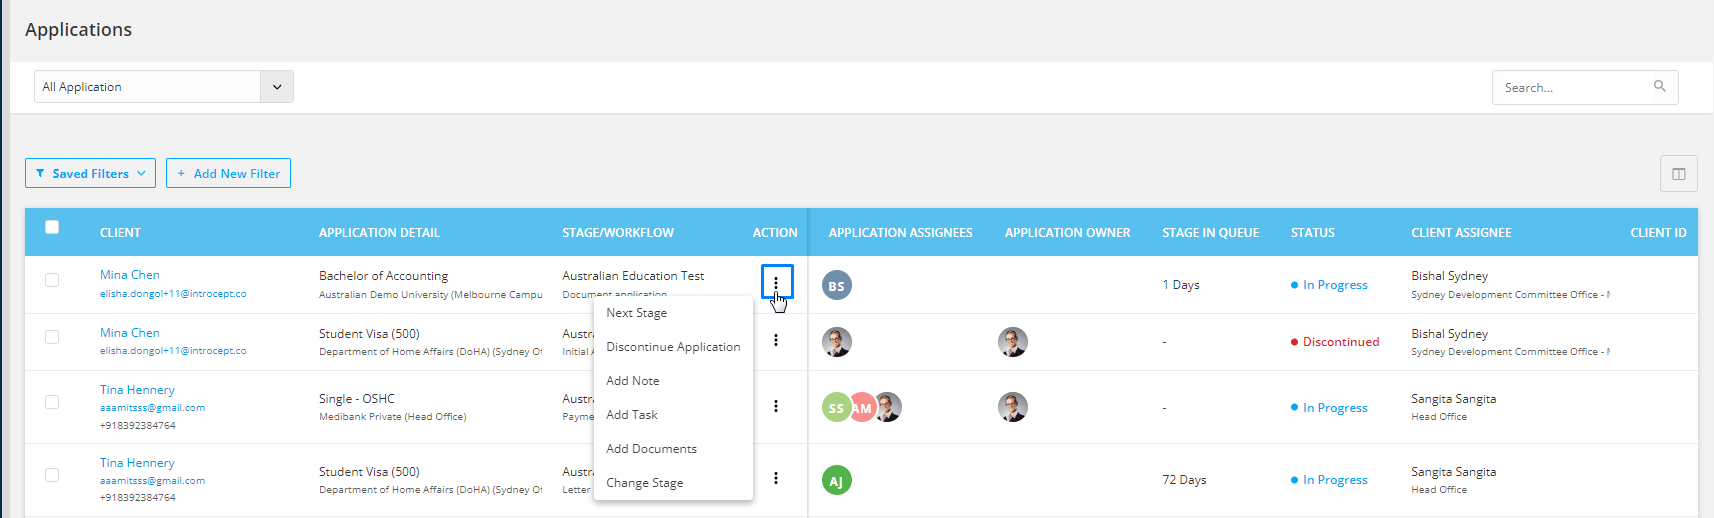
Step 8: Perform Actions Directly from the Listing Page
You can perform key actions like Add Task, Add Documents, Add Notes, and change the Application Stage without navigating to the full application profile. For this please click on the "three dots icon" and select the action from the dropdown you want to perform.