Once you've integrated Facebook Lead Ads with Agentcis, there are a few simple steps to make sure your leads are captured correctly and organized the right way. This guide walks you through what to do next, so everything runs smoothly from the start.
Connecting your Facebook Page to your forms can help you gather important data and connect with your clients better. In this guide, we’ll show you how to link your page and map your form fields, making everything work together smoothly and efficiently.
Here are the steps:
After the integration is successful, you'll need to link a specific Facebook Page and the corresponding Lead Form:
Choose the Facebook Page associated with your lead generation efforts.
Select the Lead Form that you've created in Facebook Ads Manager.


Proper mapping is crucial to ensure that the data from Facebook Lead Ads is accurately reflected in Agentcis.
Map each Facebook form field (e.g., Name, Email, Phone Number) to the corresponding Agentcis Contact Field.
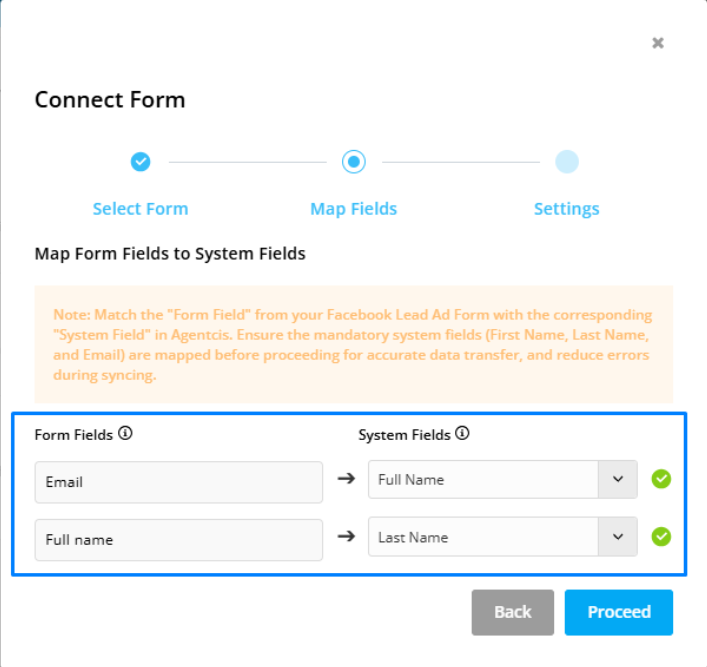
Click Proceed to save.
Decide how Agentcis should handle new leads with existing contact information:
Update Existing Contact: If a contact with the same email exists, their details will be replaced with the new form data. The form submission will appear under the 'Forms' tab in the contact’s profile.
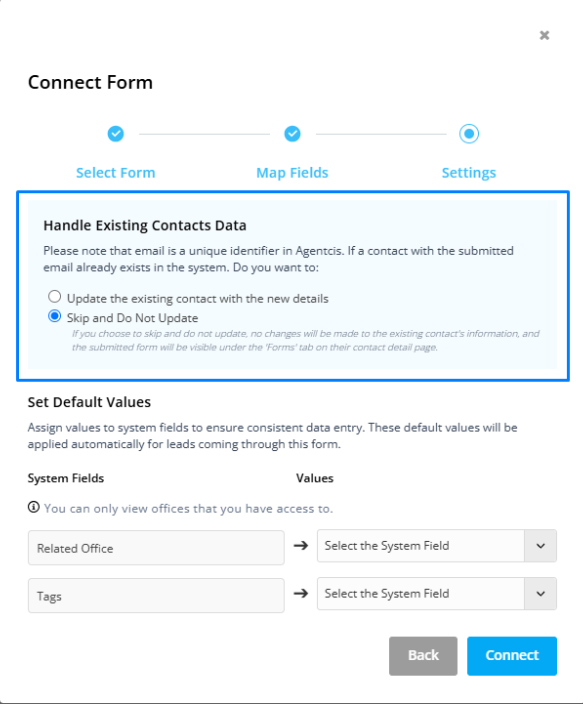
Skip Update: The existing contact information remains unchanged, and the new form submission will be added under the 'Forms' tab without altering the main contact details.
Organize and categorize your leads for better management:
Select the related office where the lead should be assigned.
Add relevant tags to help identify and segment your leads.
Click Connect to finalize the setup.
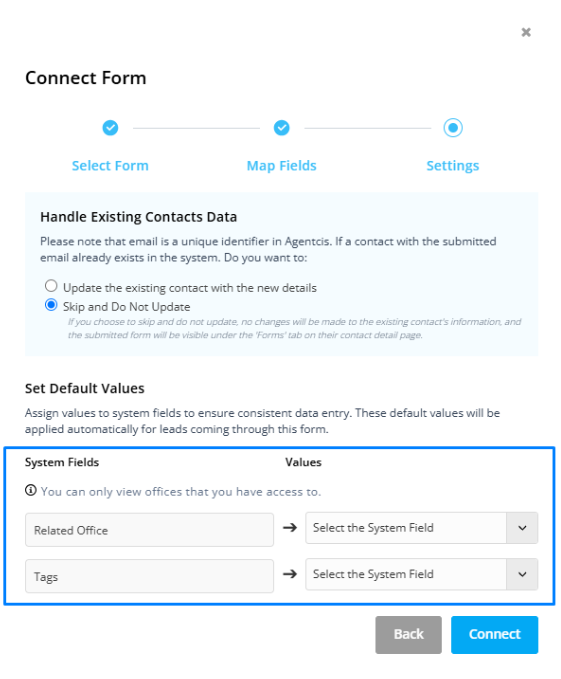
This step enhances your ability to filter and manage leads based on office location and specific attributes.
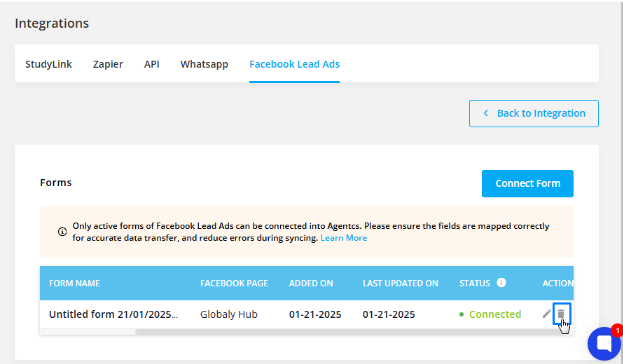
If you need to make changes to your integration settings:
Edit Mapping: Click the edit icon to modify field mappings if necessary.
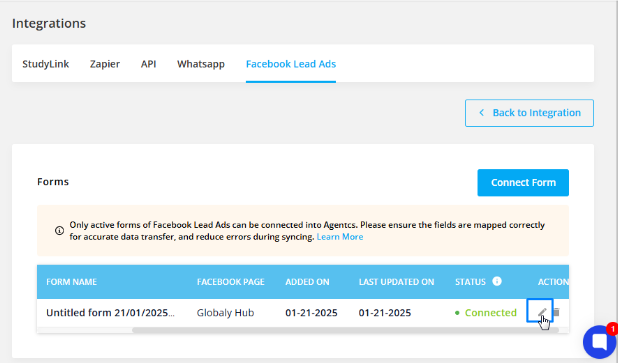
Delete Integration: Click the delete icon to remove the form.
Enable Leads Access in Meta Business Suite: Ensure that you've enabled lead access in Meta Business Suite to start receiving leads in Agentcis.
Email as Unique Identifier: Remember, email serves as a unique identifier in Agentcis. Ensure that your form captures email addresses to prevent duplication of leads.
Regular Monitoring: Regularly check the 'Forms' tab in contact profiles to review new submissions and ensure data
