This article explains how to automatically transfer leads generated through TikTok Lead Forms into Agentcis using Zapier. By connecting TikTok Lead Generation with Agentcis, newly submitted leads can be automatically created in Agentcis without any manual data entry.
Before starting the integration, ensure you have the following:
An active TikTok Ads account with Lead Generation forms configured.
Access to the TikTok account that owns the lead forms.
An active Zapier account.
Agentcis account with API access enabled.
Permission to create and manage Zaps in Zapier.
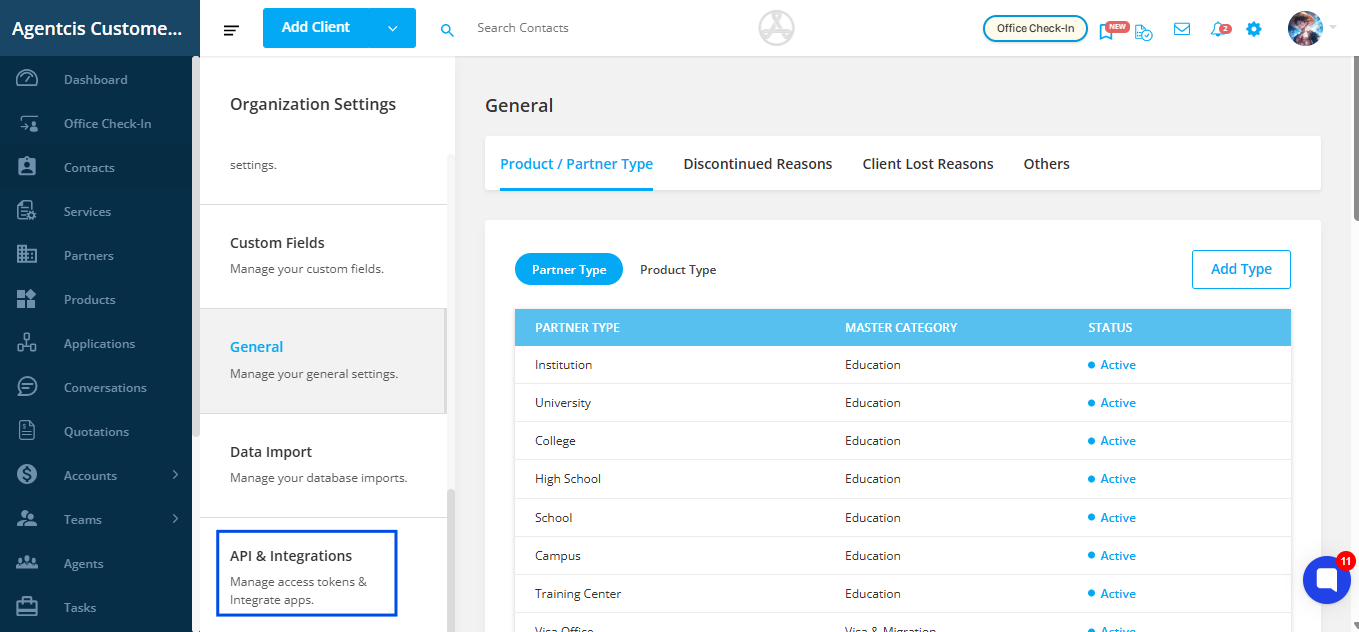
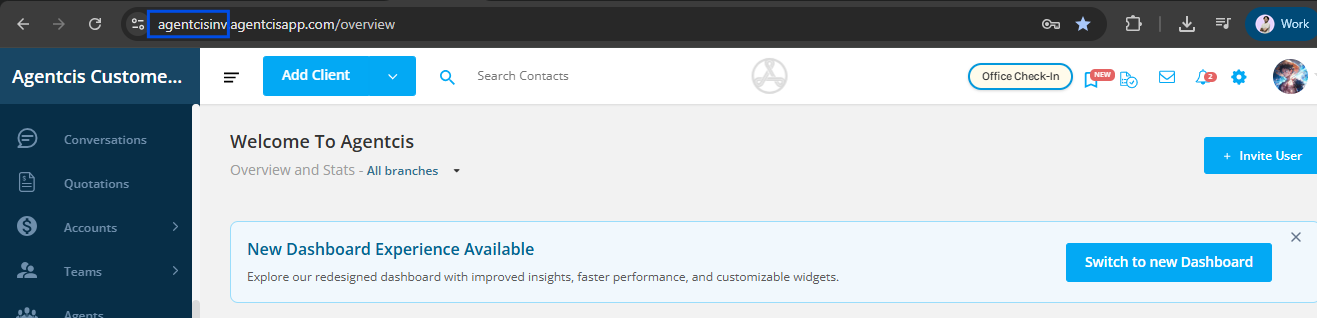
Step 1: Navigate to Settings from the Agentcis dashboard.
Step 2: Scroll down and locate API & Integration.
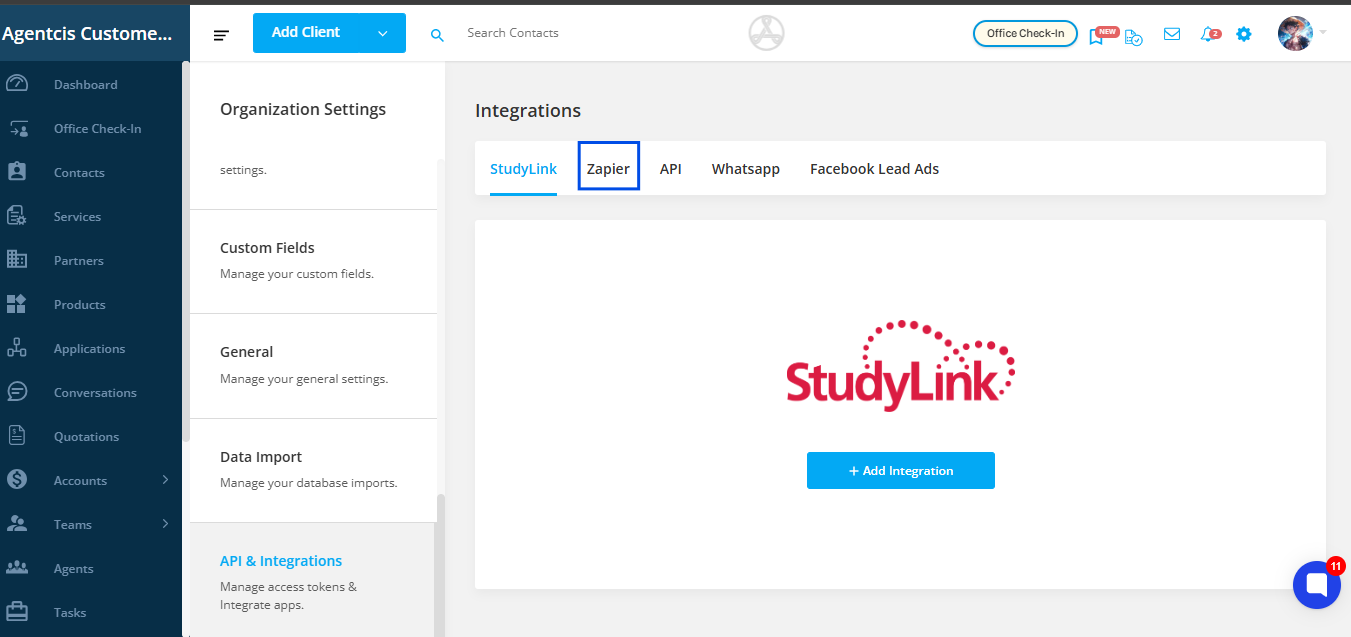
Step 3: Click Zapier.
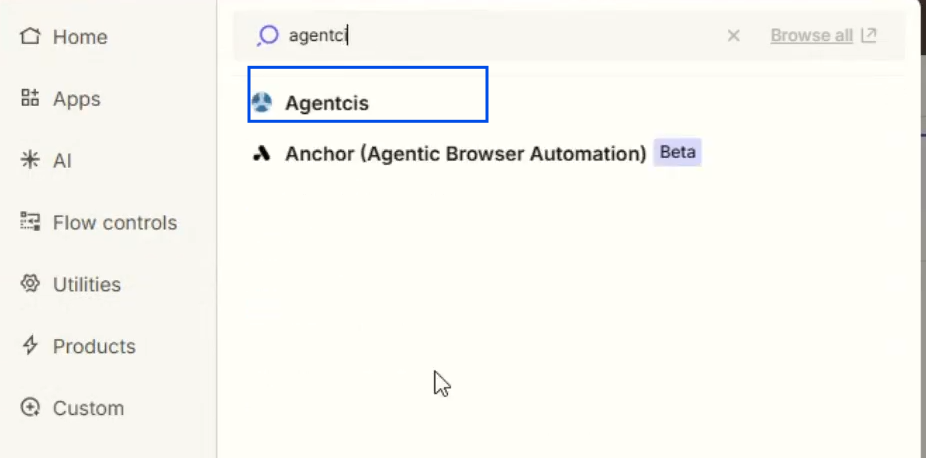
Step 4: In the Connect this app field, search for and select Agentcis.
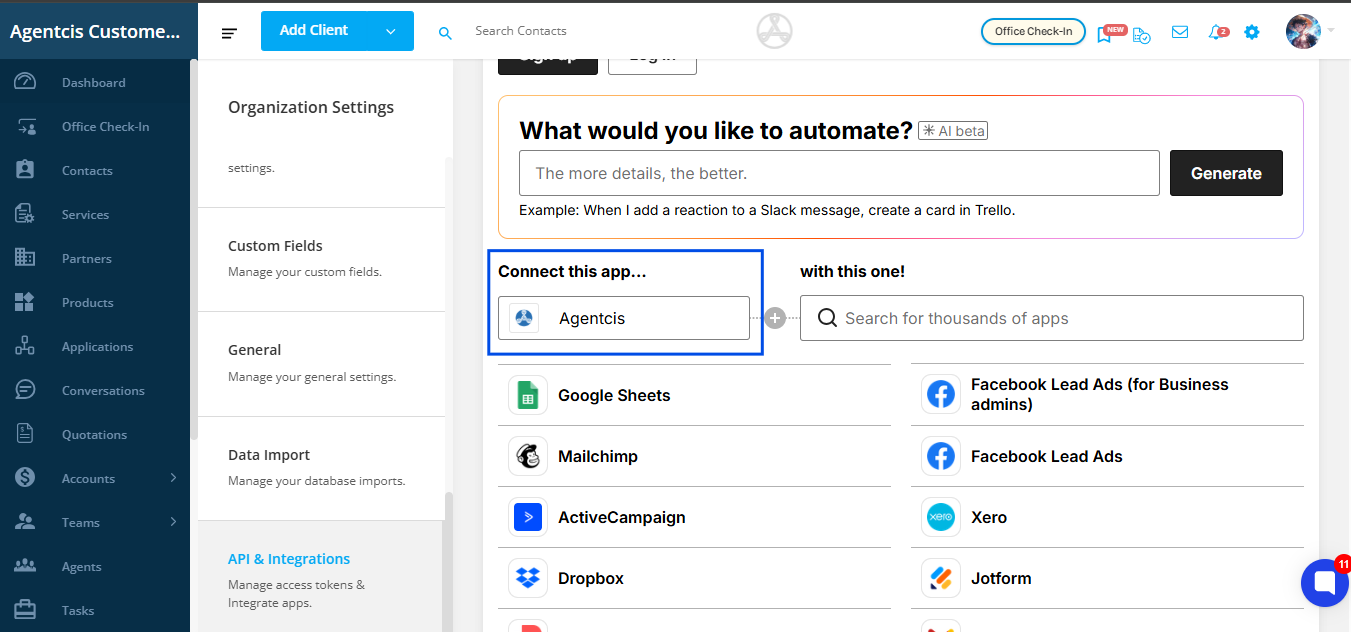
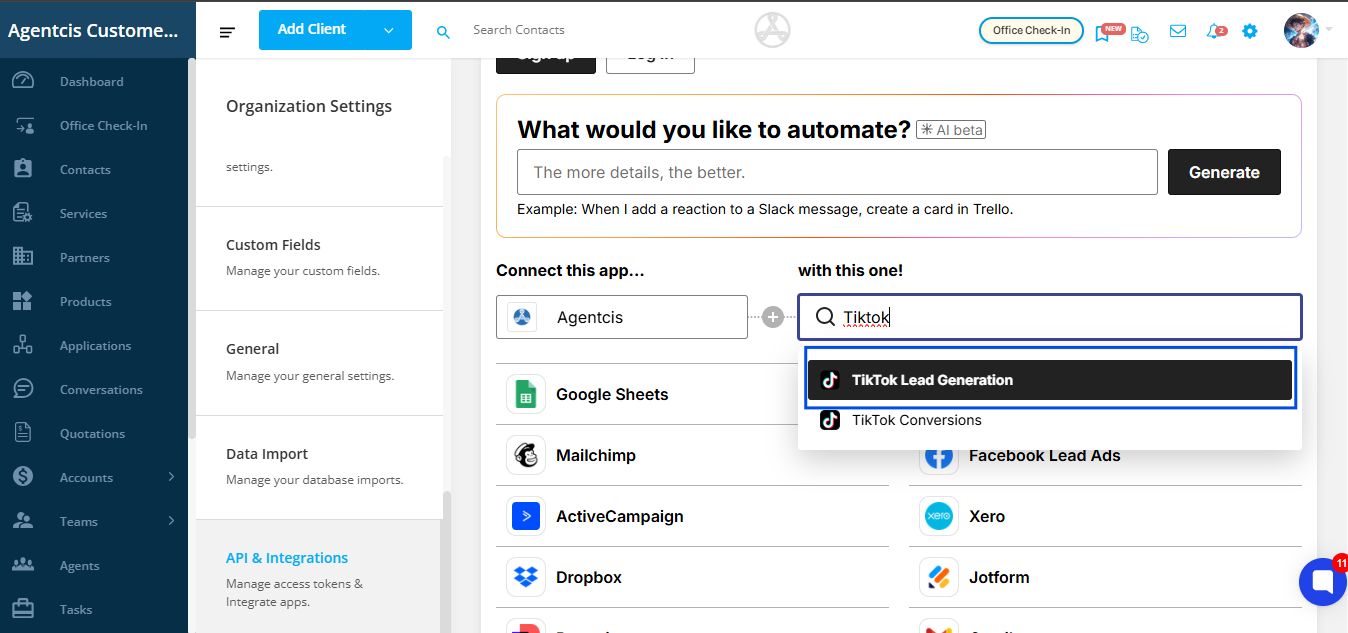
Step 5: In the with this one field, search for and select TikTok Lead Generation.
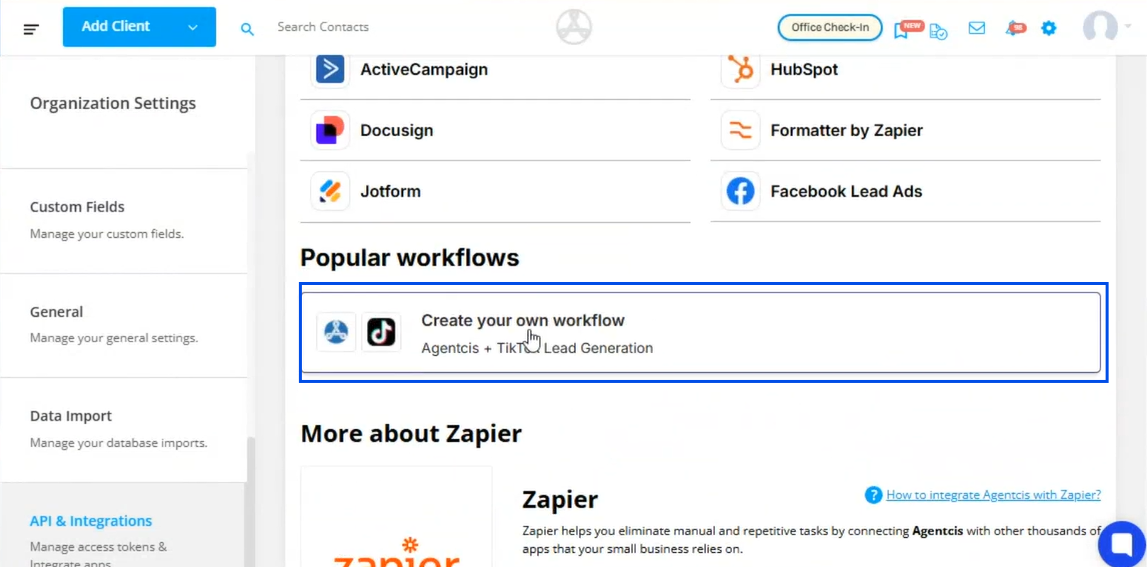
Step 6: Click Use your own workflow.
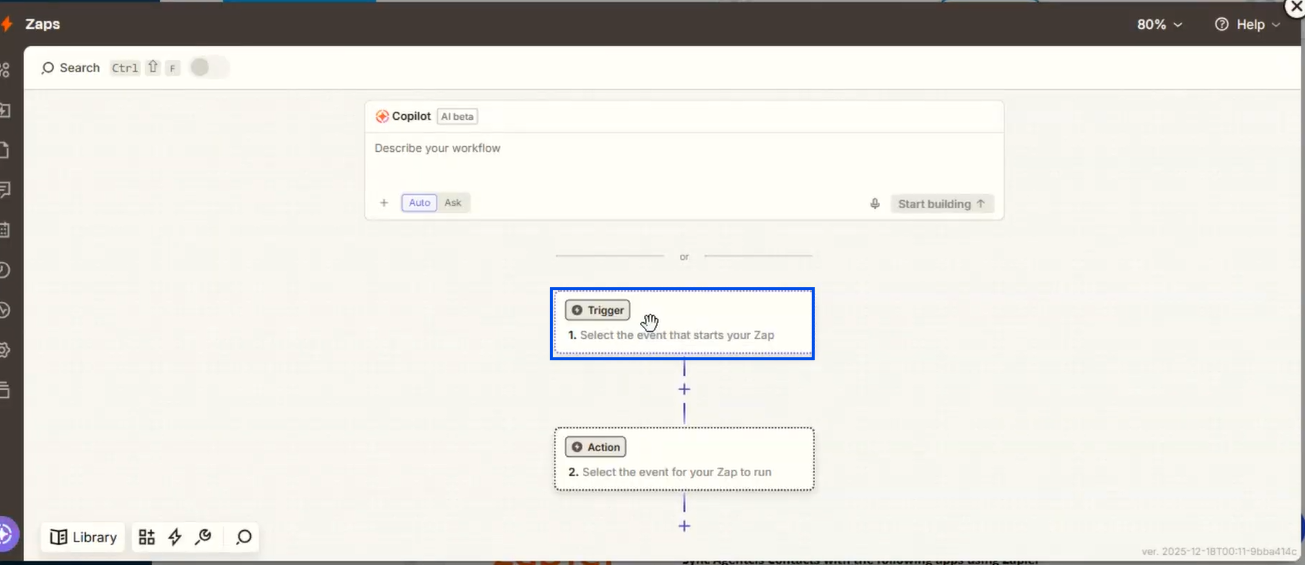
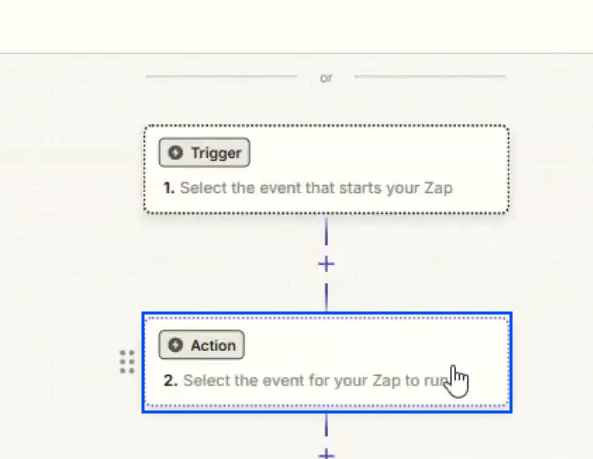
Step 7: Select Trigger.
Step 8: Search for and select TikTok Lead Generation.

Step 9: Select Action.
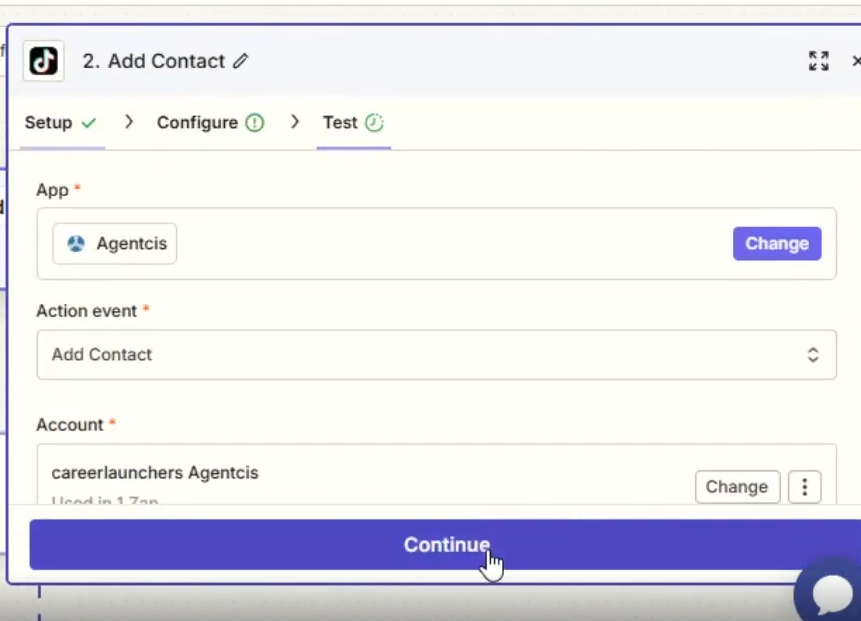
Step 10: Search for Agentcis and select.
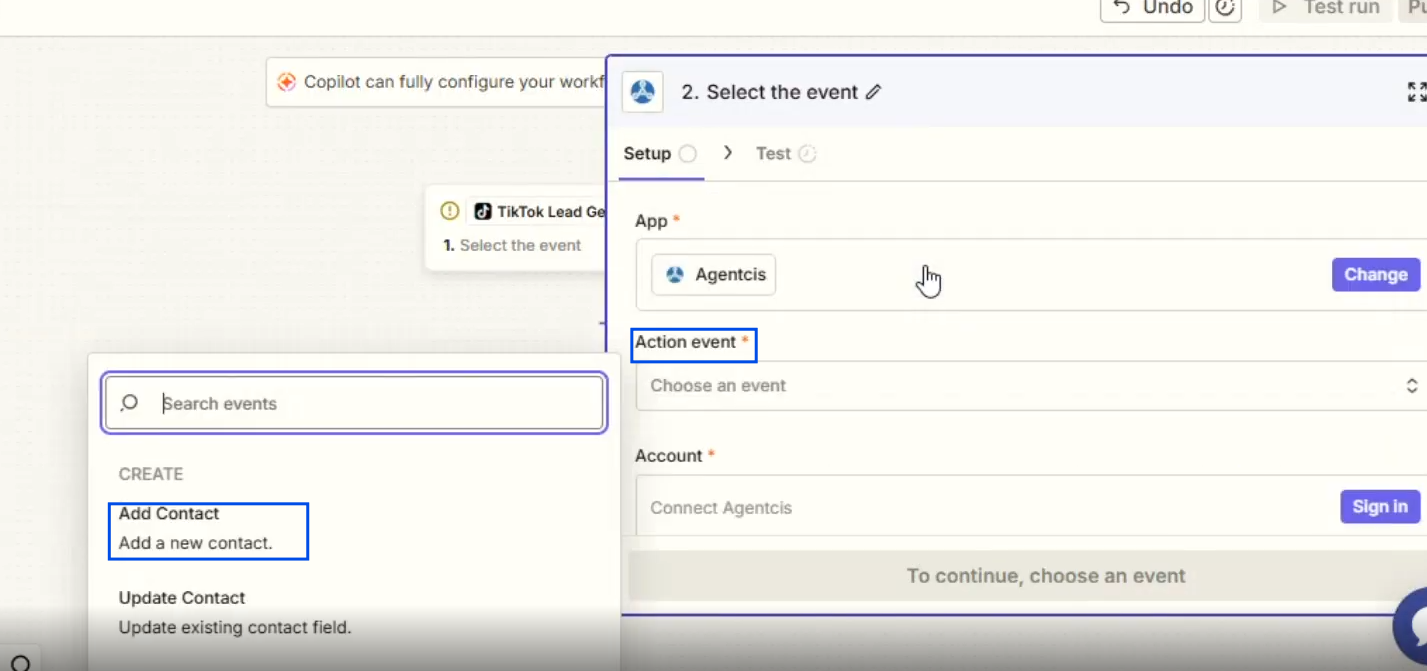
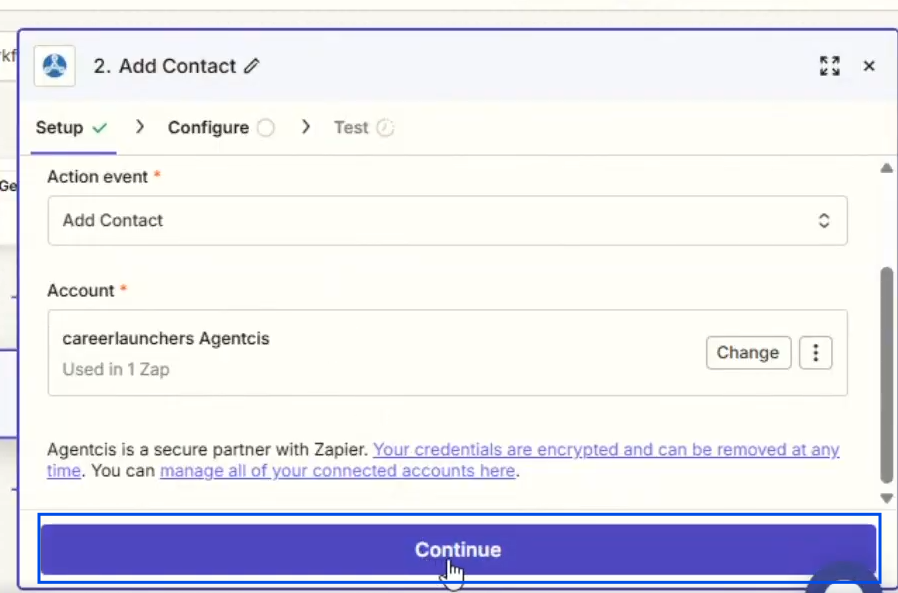
Step 11: Under Action Event, choose Add Contact.
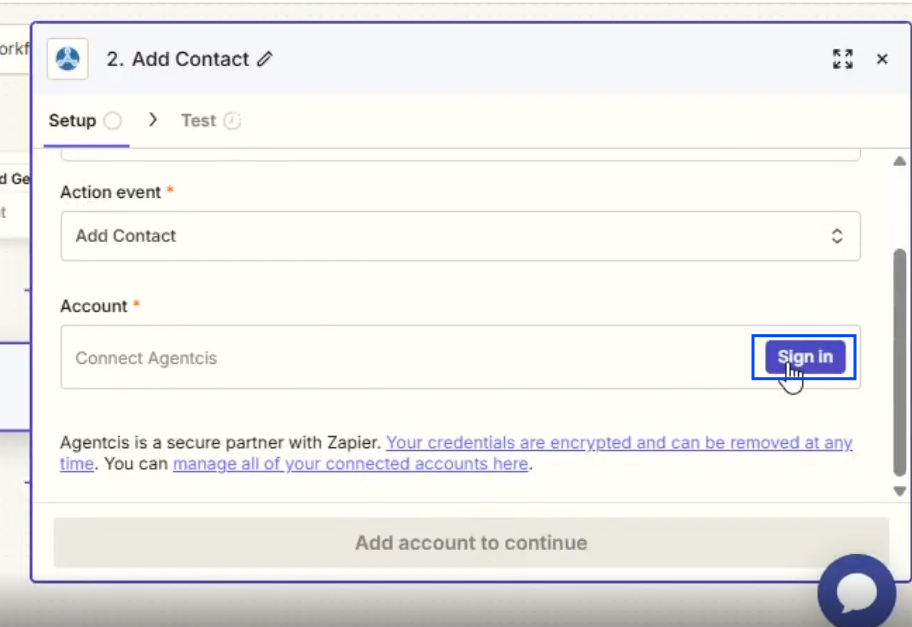
Step 12: Click Sign In.
Step 13: Enter your Agentcis Subdomain. The subdomain is the portion of your Agentcis URL that appears before agentcisapp.
Step 14: Navigate to Settings > API in Agentcis and generate a new API token.
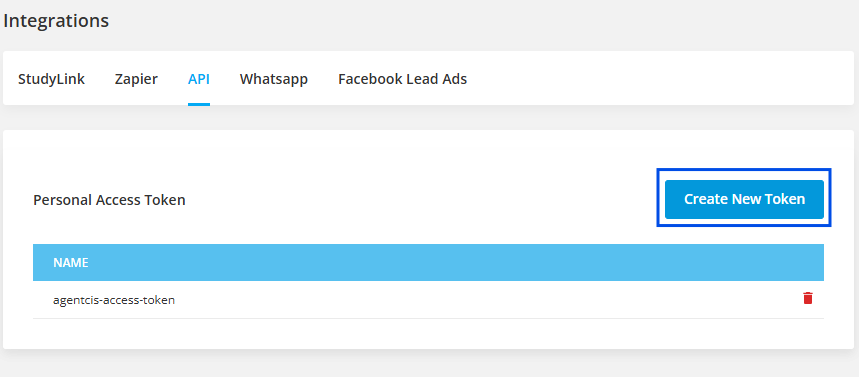
Step 15: Copy the generated API token and paste it into the API Key field.
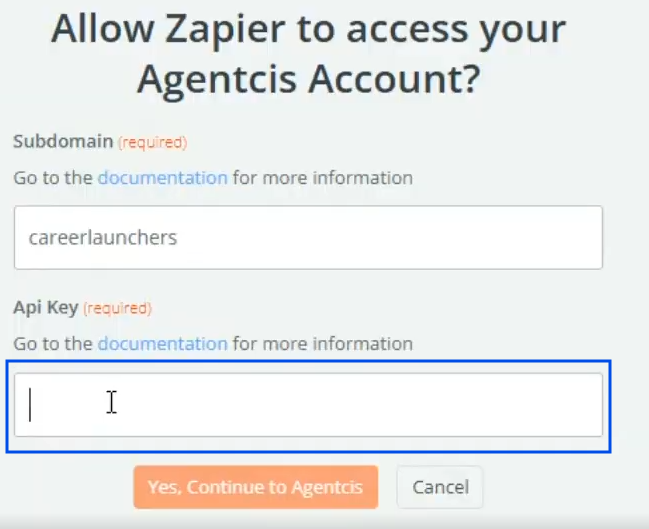
Step 16: Click Continue.
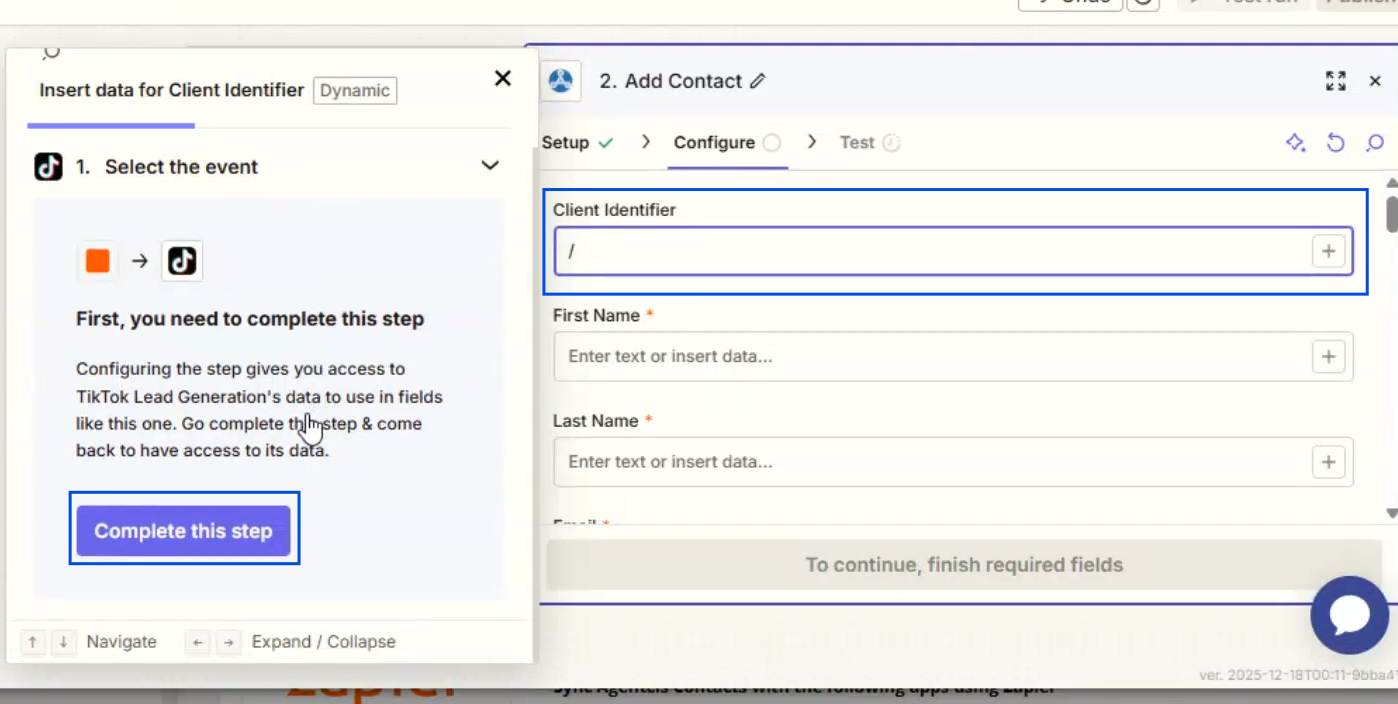
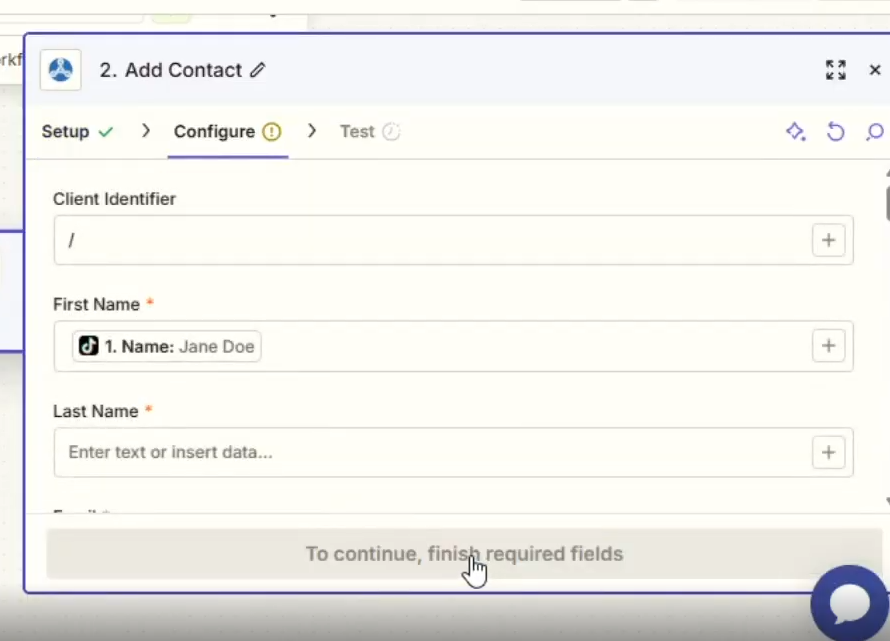
Step 17: In the Complete this Step field, enter / as the Client Identifier and select the suggested option.
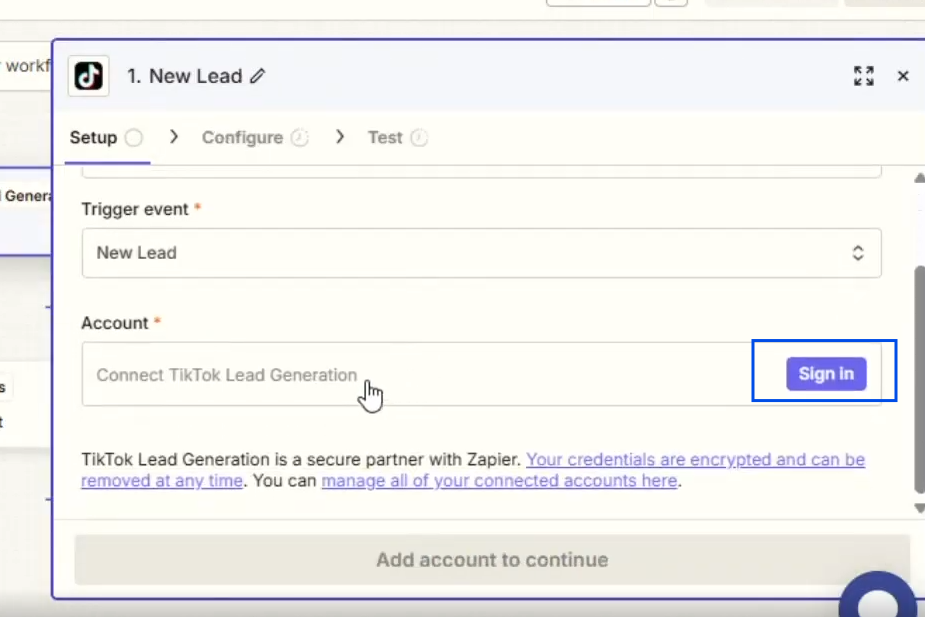
Step 18: Under Trigger Event, select New Lead.

Step 19: Click Sign In and complete the authorization process for your TikTok Lead Generation account.
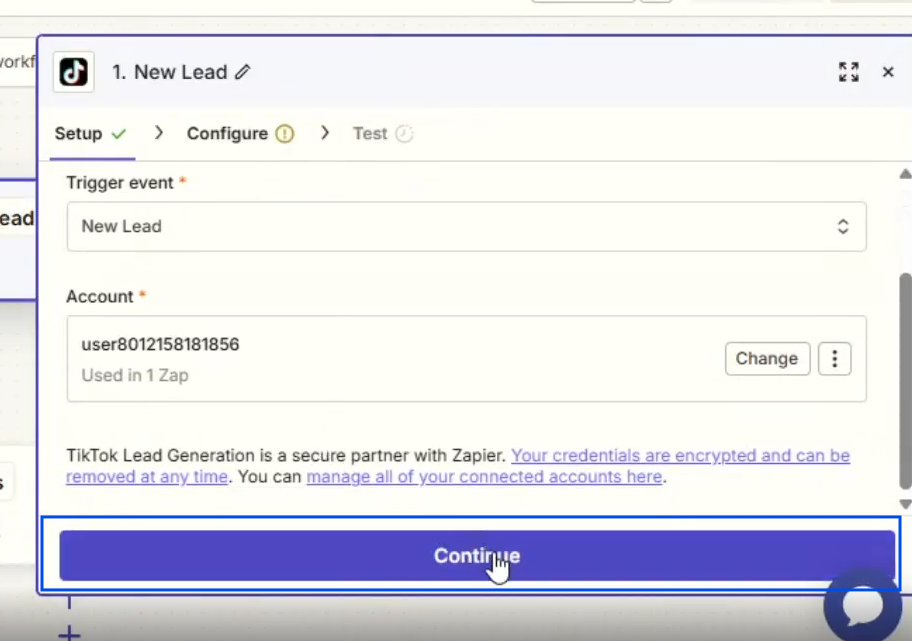
Step 20: Once the account has been connected successfully, click Continue.
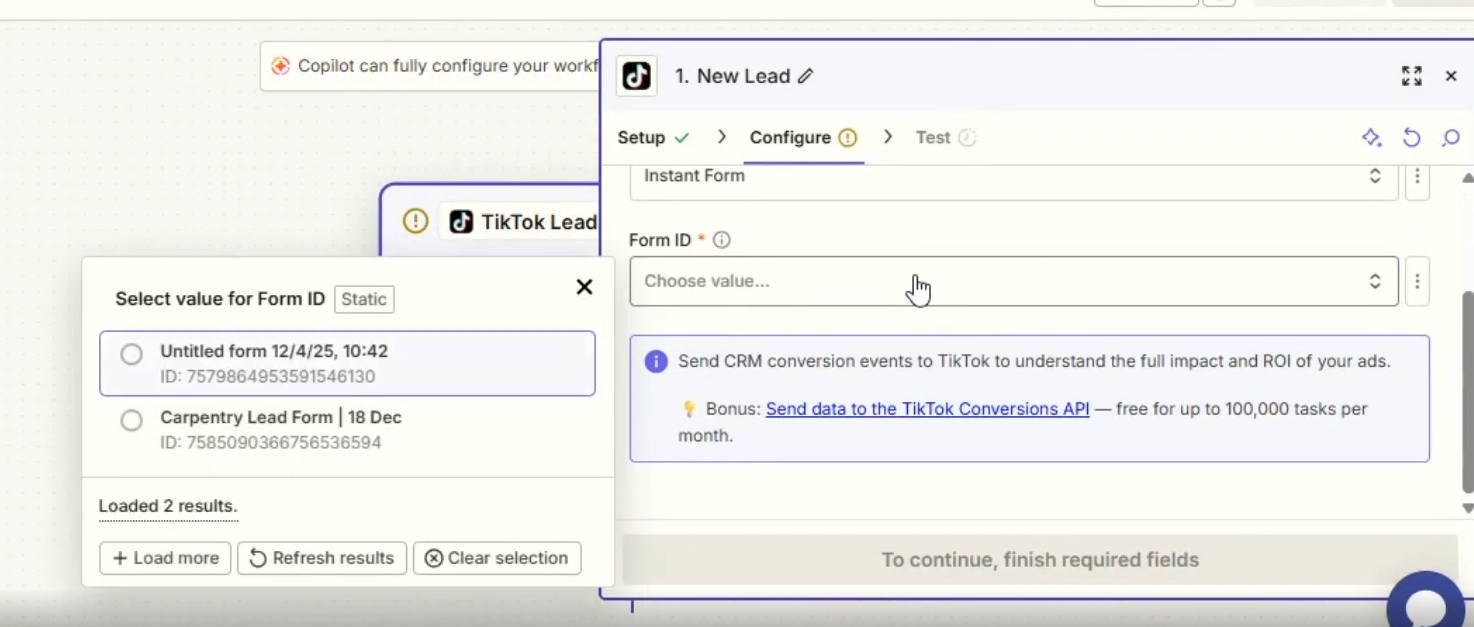
Step 21: Configure the required settings, including the Advertiser Account and Lead Source.
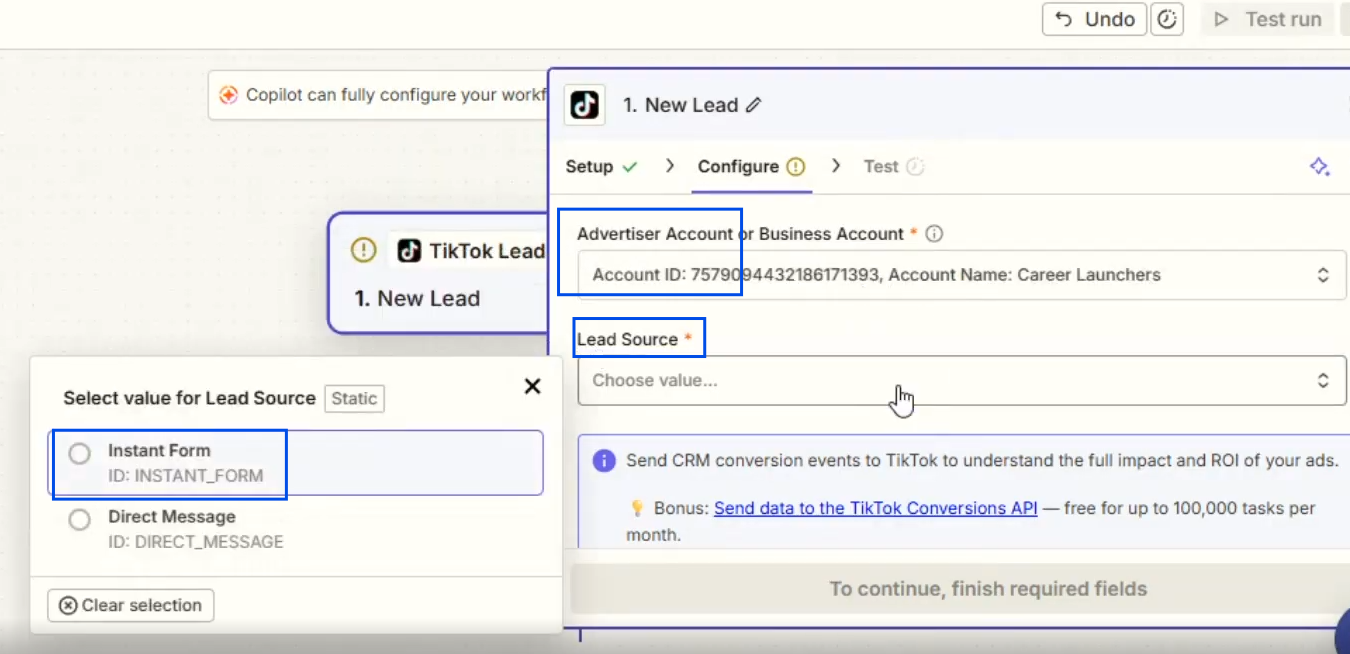
Step 22: Select the lead form you wish to connect.
Step 23: Click Test Trigger to verify the connection.
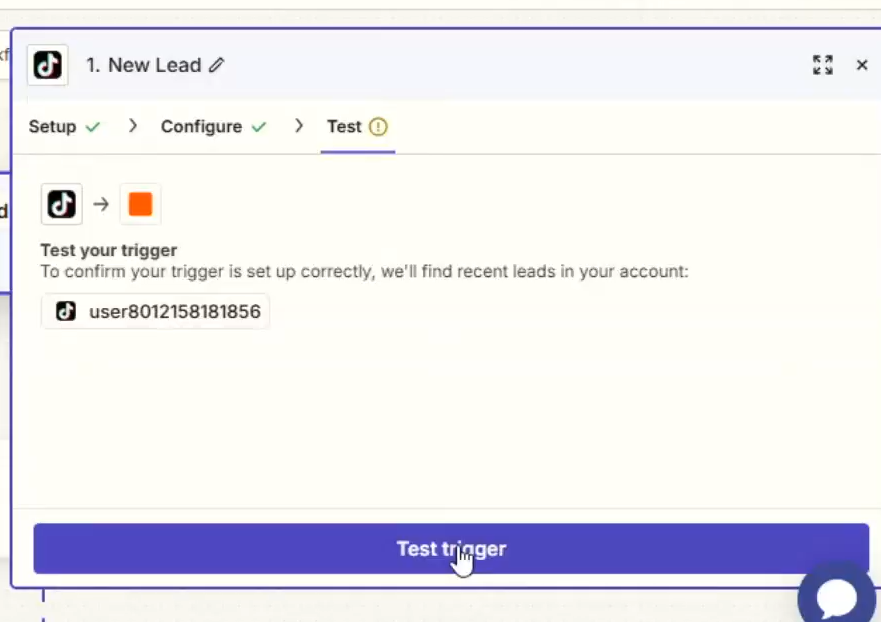
Step 24: Once the test is successful, click Continue.
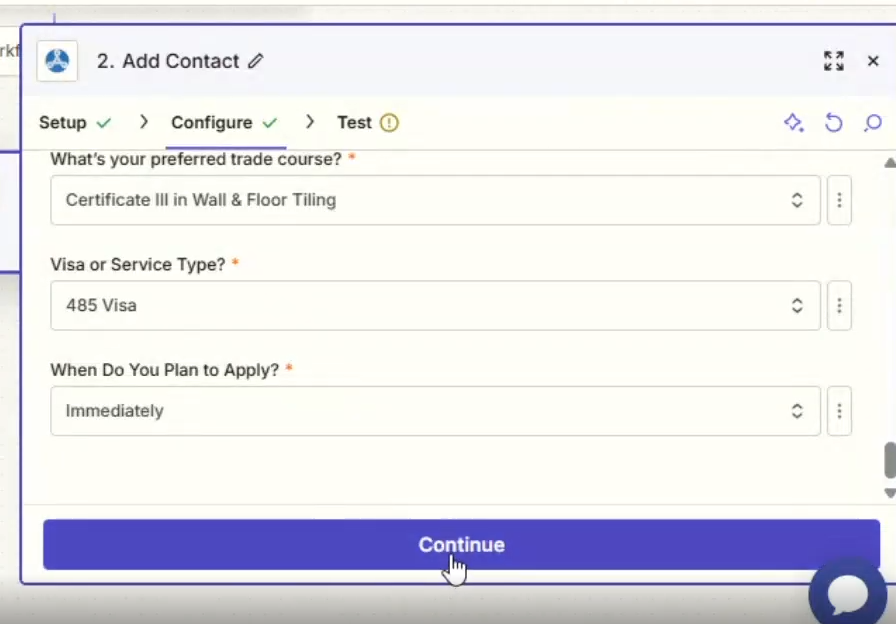
Step 25: Map the TikTok lead form fields to the corresponding Agentcis contact fields.
Step 26: After completing the field mapping, click Continue.
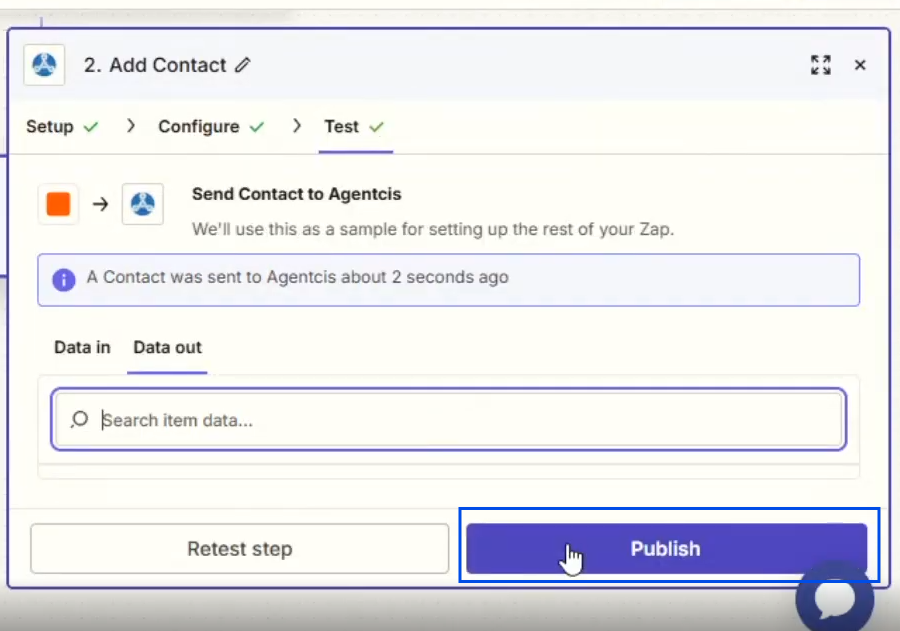
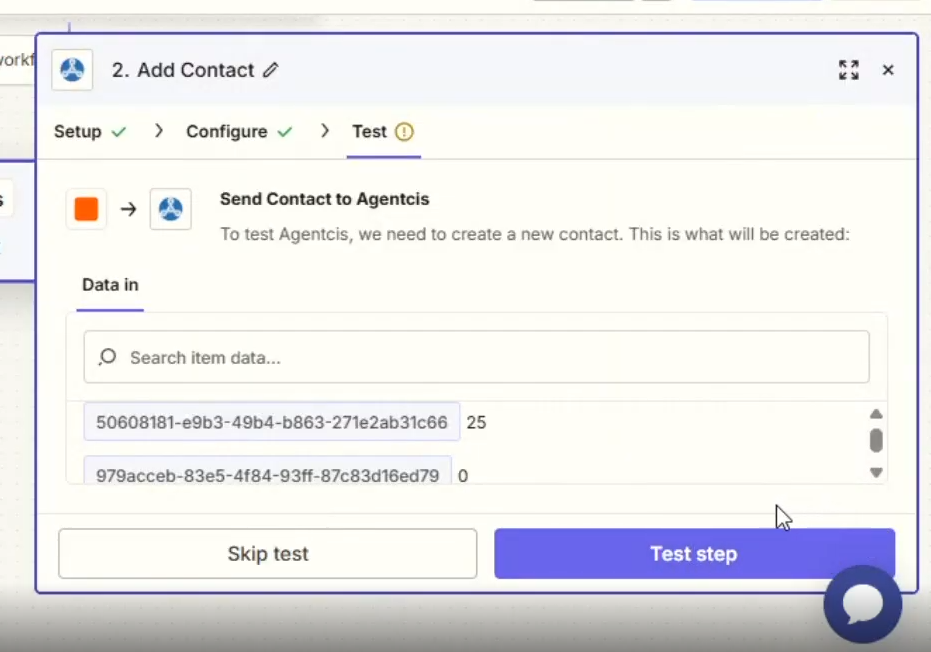
Step 27: Select either Skip Test or Test Step, as required.
Step 28: Click Publish to activate the workflow.