Managing client payments efficiently is key to ensuring a smooth experience for both your team and your clients. With the Payment Schedule feature, you can easily track upcoming payments, communicate deadlines to clients, and notify your accounts team about when commissions can be claimed.
This guide walks you through the step-by-step process of setting up a payment schedule for an application.
Stay Organized: Clearly outlines all payment dates and amounts.
Client Communication: Helps your clients stay informed about their financial commitments.
Accounts Coordination: Enables your accountant to know when to claim commissions.
Before setting up a payment schedule, make sure the Product Fee section in the application is correctly filled out.
For example: If the Product Fee section lists a total fee of $12,000 split into 3 installments of $4,000 each, the payment schedule will automatically reflect this breakdown.
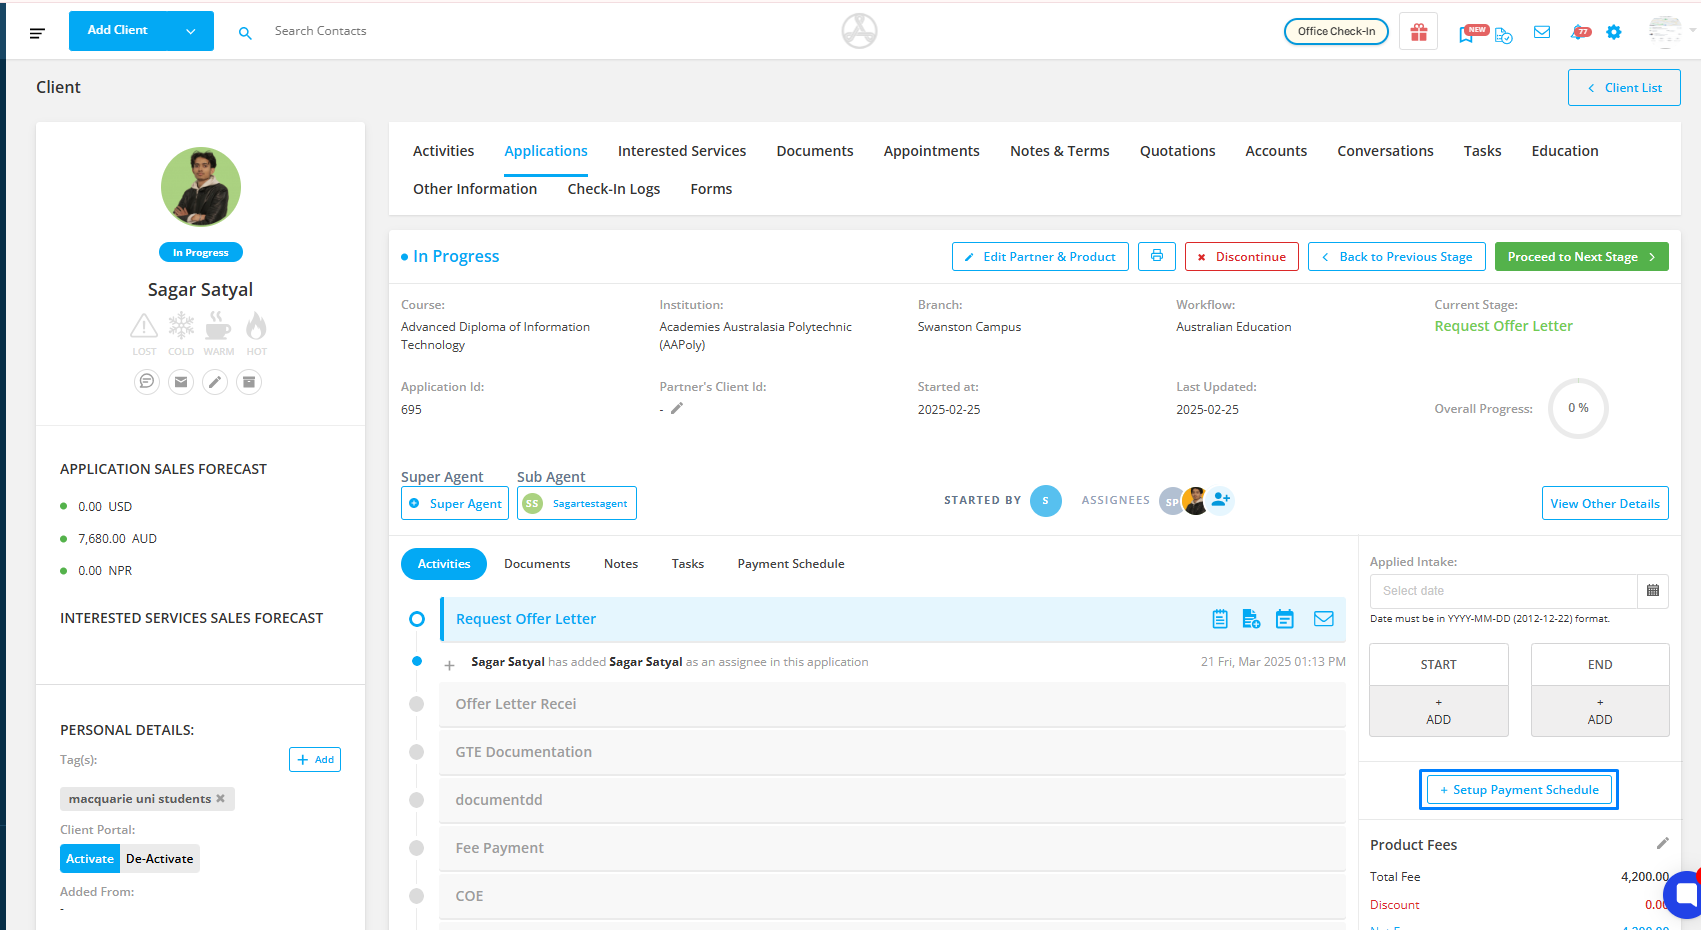
Step 1: Access the Application
Go to the application page of the client for whom you want to create a payment schedule.
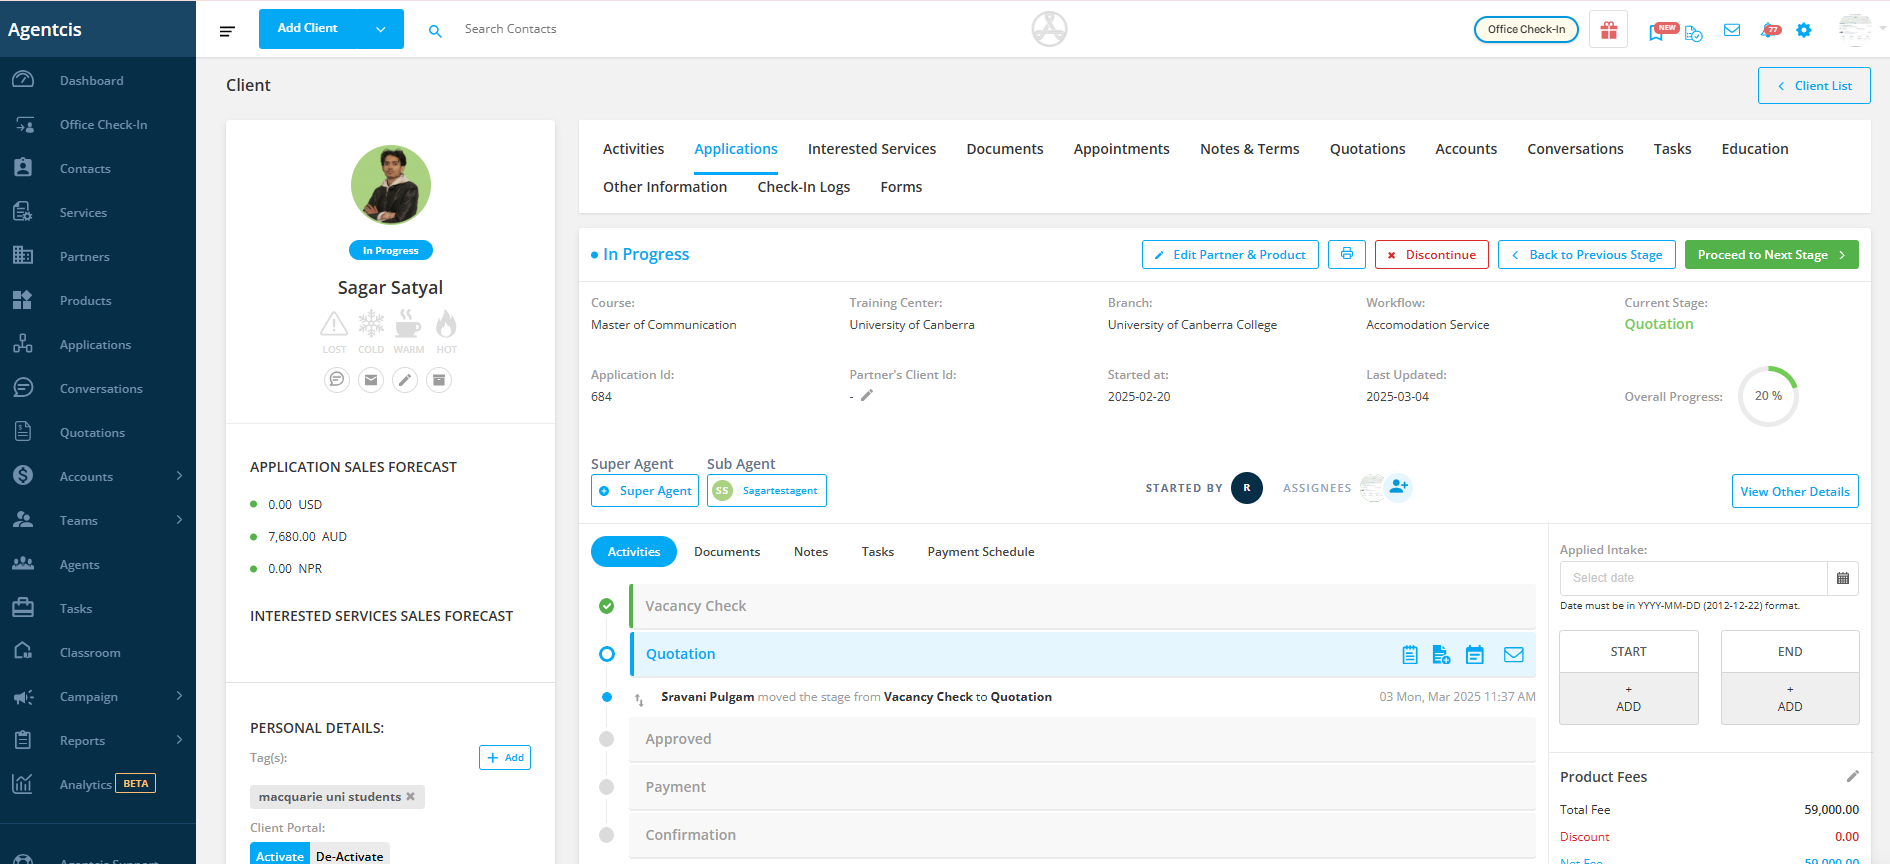
Step 2: Click “Setup Payment Schedule”
Under the Applied Intake section, click on Setup Payment Schedule.

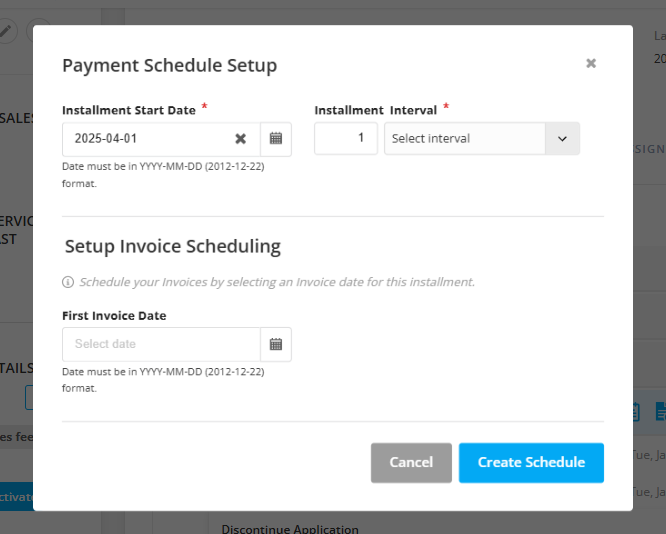
Step 3:Set Up the Payment Schedule
A pop-up titled “Payment Schedule Setup” will appear. Here, you can set up all future payments at once.
Example: You want to split $12,000 tuition fee into three equal payments.
Then,
Step 4: Define Installment Start Date
Choose the Installment Start Date, which is the due date for the first payment by the client.
Example: You set the first payment due date to April 1, 2025—two months before the course begins.

Step 5: Set the Installment Interval
Select the Installment Interval—the time gap between each installment.
Example: You choose a 2-month interval. So the second payment will be due on September 1, 2025, and the third on November 1, 2025.


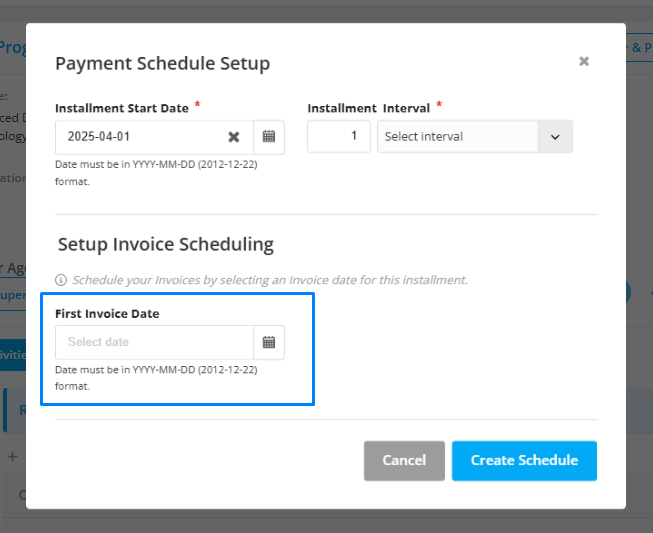
Step 6: Set Up Invoice Scheduling (Optional)
If you also need to prepare an invoice from the payment schedule, turn on “Setup Invoice Scheduling” and pick a date for the first invoice.
Example: Installment is due April 1, but the commission invoice is usually issued after he makes the payment. So, you set the first invoice date to April 10.
Step 7: Create the Schedule
Click on “Create Schedule” to generate the full schedule based on the Product Fee details.
You now have a clearly defined payment timeline for John, including dates and amounts, and your accountant knows when to invoice for commissions.

The three statuses are shown in the payment schedule: Scheduled, Non-claimable, Claimable Invoiced and Expired.
Scheduled means the payment has been scheduled
Non-claimable means the commission is not claimable in the payment sche.duled.
Claimable means the commission adjusted in thee schedule/invoice is claimable.
Invoiced means the payment schedule that has been invoiced.
