Managing daily activities efficiently is key to productivity—and that’s where task management in Agentcis comes into play. Whether you're coordinating with your team, following up with clients, or handling internal work, tasks help you stay organized and in control of your time.
Agentcis allows you to create, assign, and track tasks with ease, ensuring nothing slips through the cracks. Plus, with built-in reminders and team collaboration features, managing your workflow becomes seamless and effective.
Here are some key benefits of using the Task feature in Agentcis:
Centralized Planning: Tasks can be linked directly to contacts, applications, or partners, making follow-ups and documentation easy to manage.
Team Collaboration: You can assign tasks to team members and add followers for better coordination.
Automated Reminders: Get notified via system or email before tasks are due.
Custom Categories: Organize your tasks based on purpose (e.g., call, meeting, email, support, follow-up).
How to Create a Task in Agentcis
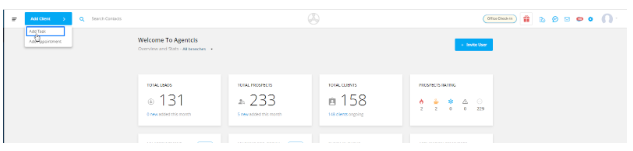
You can create tasks from various parts of Agentcis: the top bar, contact profile, application detail page, partner profile, or dashboard.
Step-by-Step Guide to Creating a Task
Step 1: Access the Task Creation Option from Multiple Locations
Agentcis offers multiple entry points to create a task, so you can conveniently assign and manage tasks from wherever you're working in the system:
Click the dropdown icon beside “Client” on the top-right info bar of any page.
Select “Tasks” to open the task creation panel from anywhere in the system.
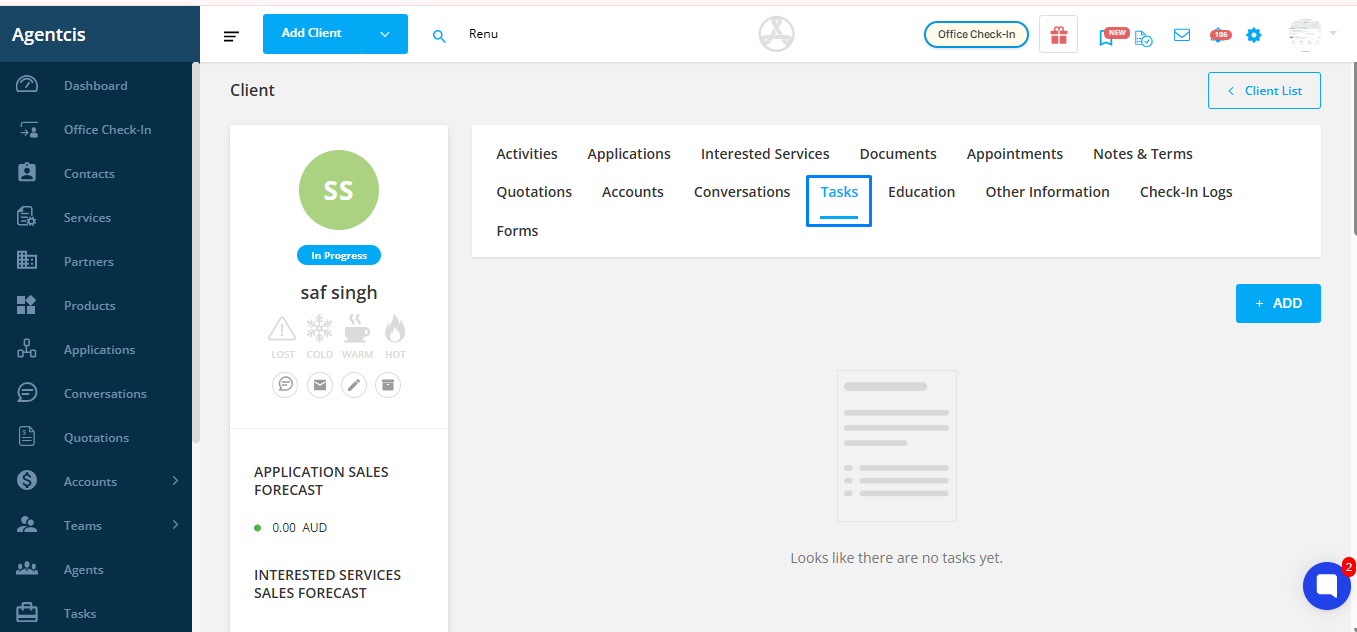
From a Contact Profile
Navigate to the Contact’s profile.
Click the “Task” tab or the “+ Add Task” button.
The task will automatically be linked to the selected contact.
Use Case: Set a reminder to follow up with the client after a consultation.
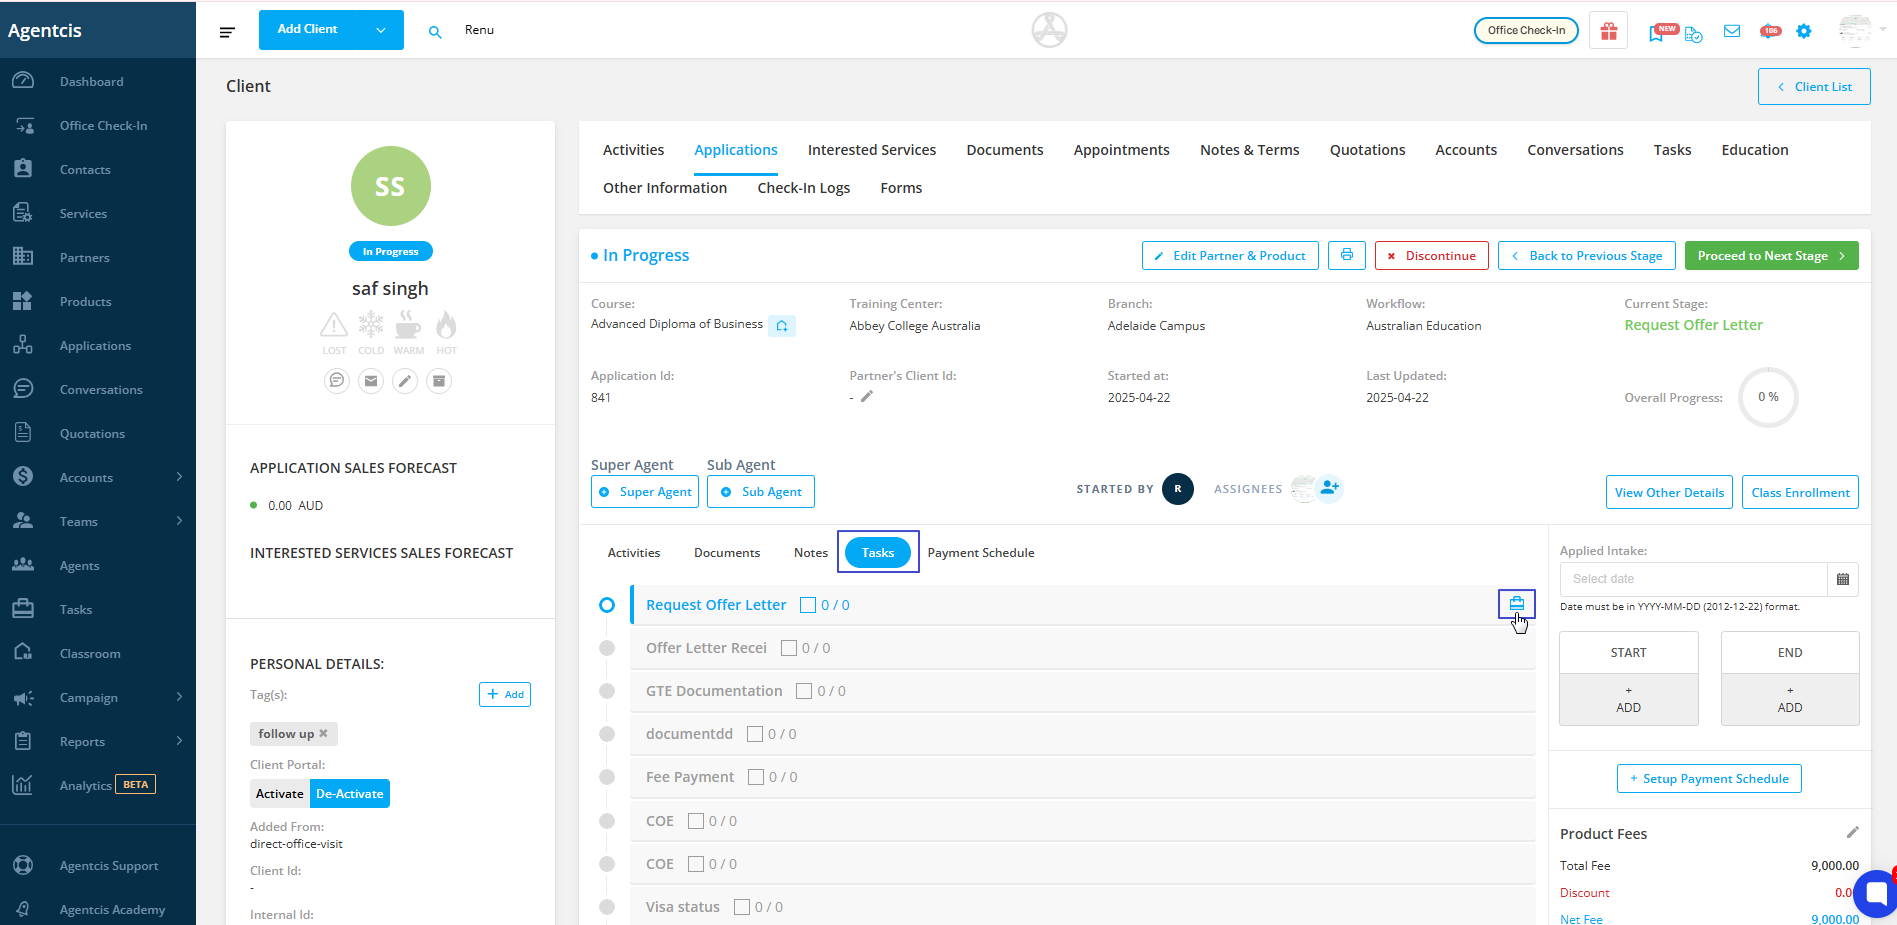
From an Application Detail Page
Open the desired Application.
Click the “Tasks” tab inside the application dashboard or use the “+ Add Task” button.
The task will automatically relate to the client and the specific application.
Use Case: Create a task to track pending documents for a visa submission.
From a Partner Profile
Go to the Partner’s profile.
Select the “Tasks” tab and click “+ Add Task.”
This links the task to the partner for tracking follow-ups, document collection, or agreements.
Use Case: Set a task to follow up on a pending invoice or partner agreement.

For Internal Tasks
Go to the task from the side navigation bar or select add task from the top info bar.
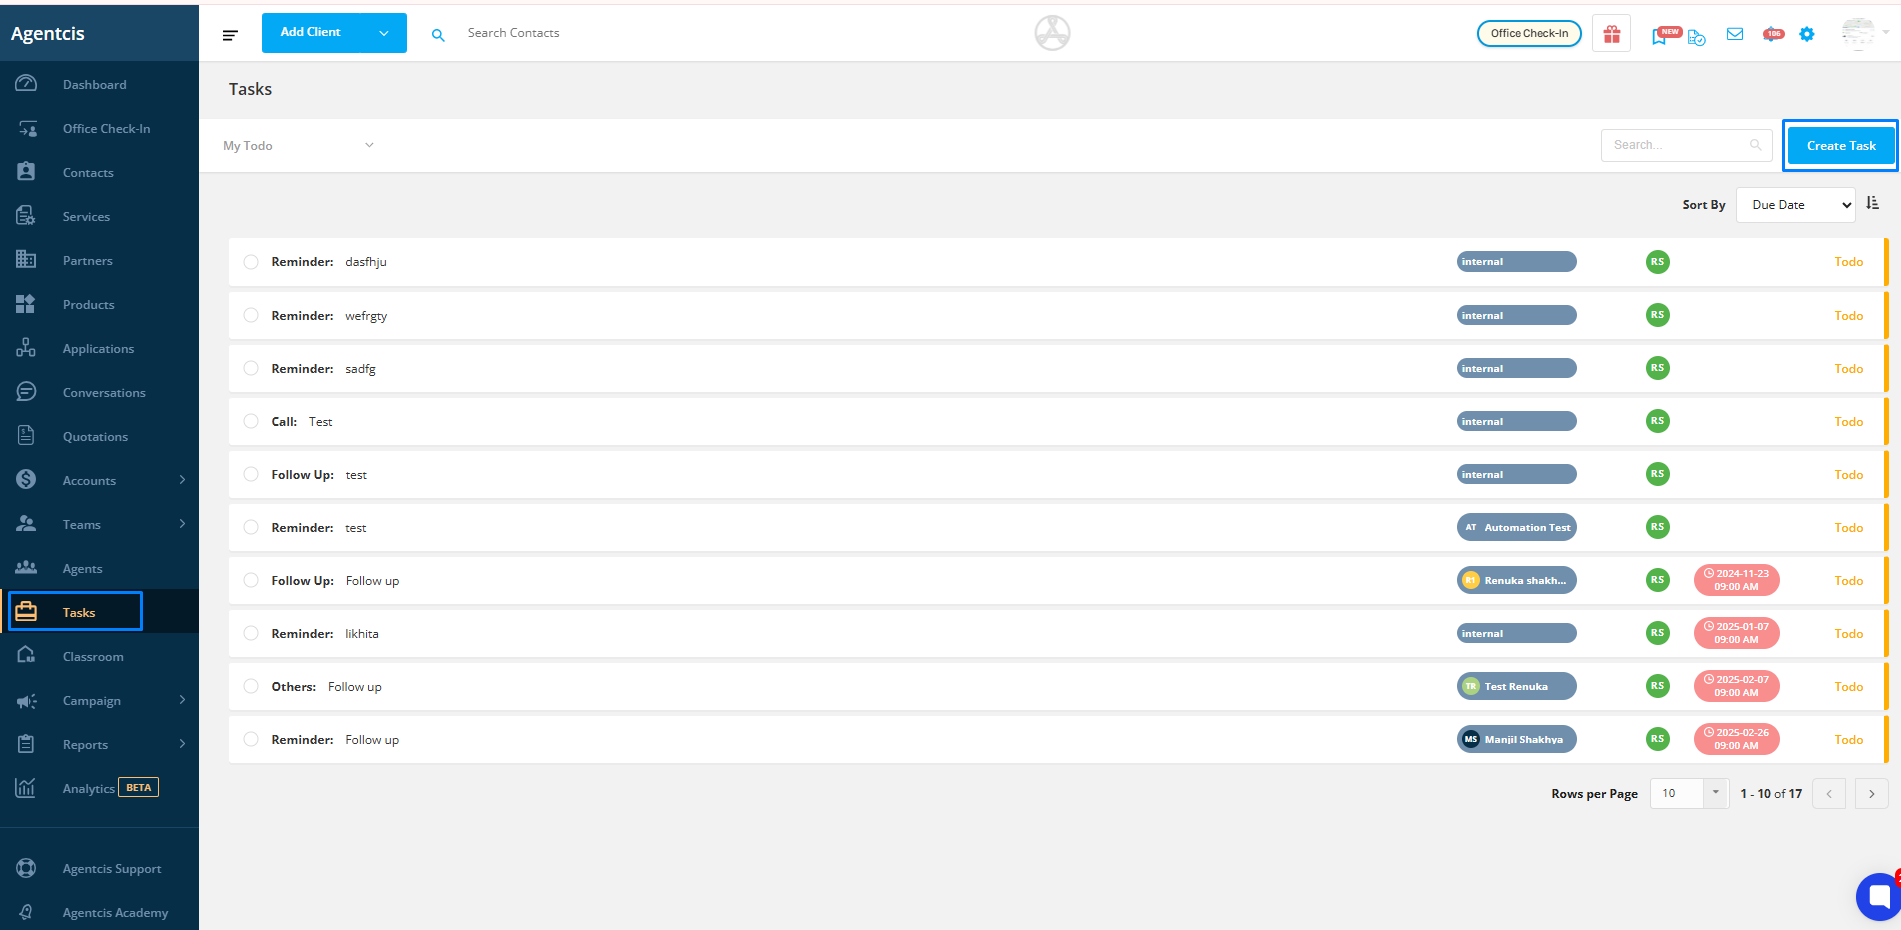
When creating a task, choose “Internal” under the “Relate To” section.
This is ideal for tasks that aren’t linked to any contact, application, or partner—like meetings, admin tasks, or team reminders.
Use Case: Schedule a weekly internal team sync or assign a checklist update.
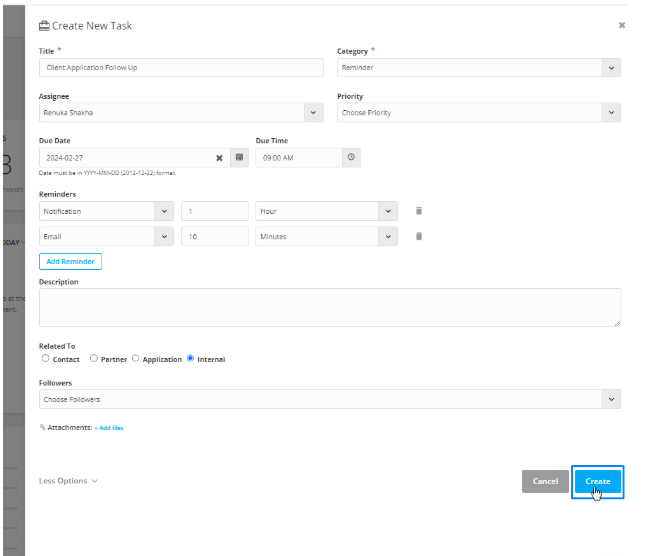
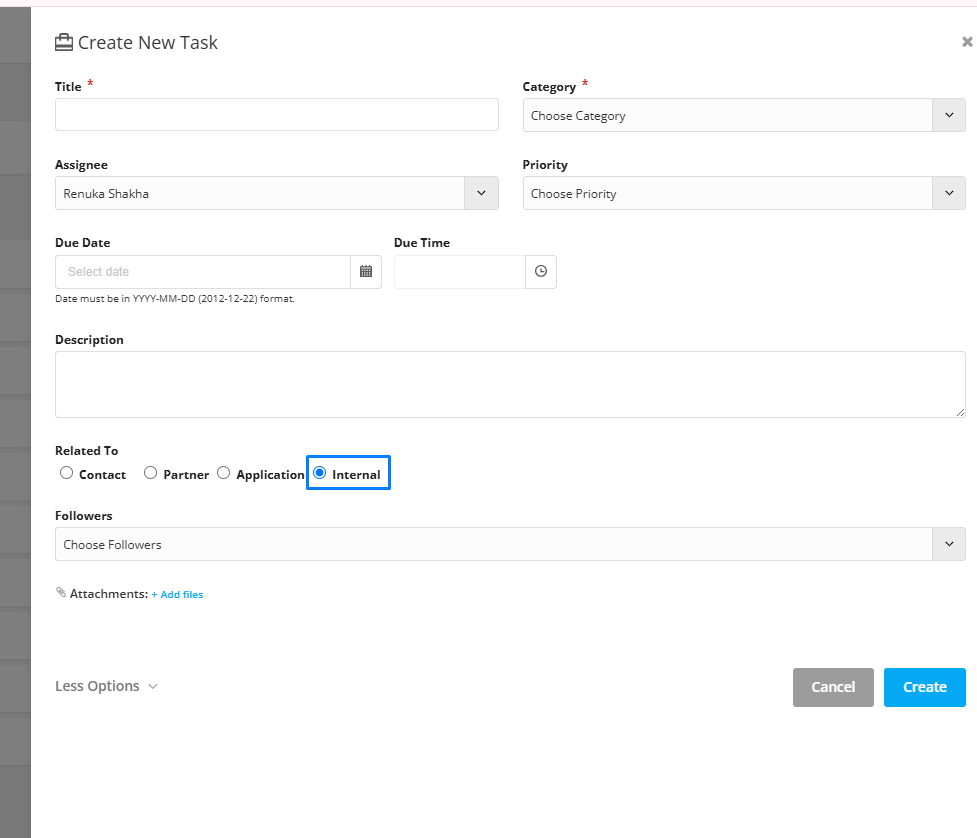
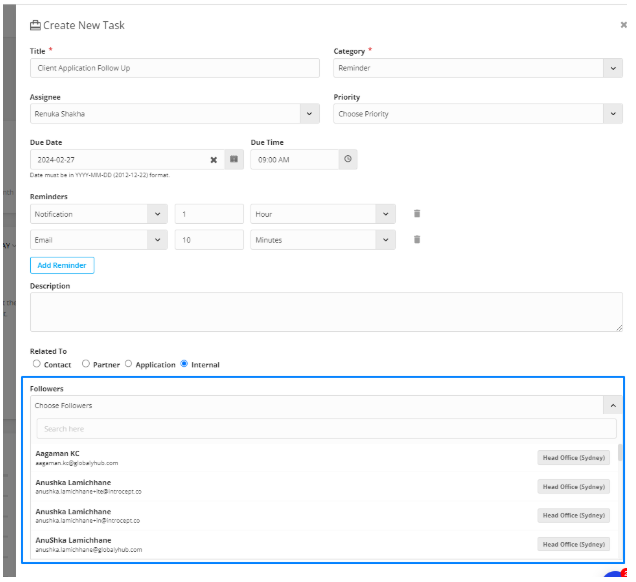
Step 2: Open the Create New Task Panel
This action will slide in the Create New Task panel from the right-hand side.
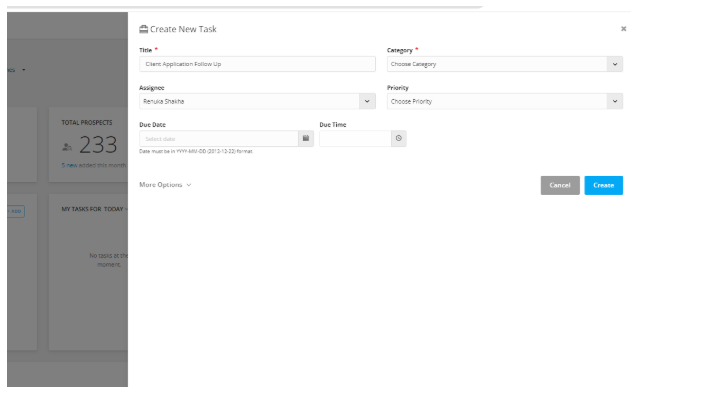
Step 3: Add a Task Title
Give your task a clear, specific title, like:
🔹 “Email offer letter to James (Canada Intake – September)”

Step 4: Select a Task Category
Choose from categories like:
Reminder
Call
Follow-up
Meeting
Support
Other
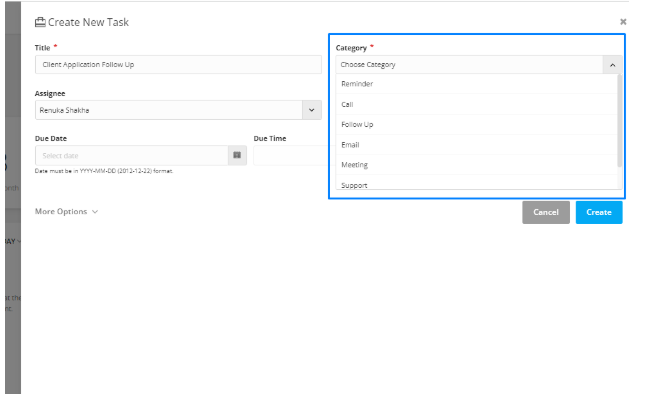
This helps you organize your daily activities by type.
Step 5: Assign the Task
By default, the task is assigned to you.
To assign it to a team member, select their name from the Assignee dropdown.

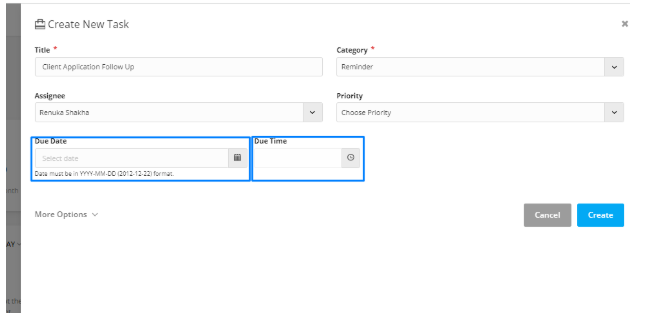
Step 6: Set Priority
Choose from Low, Medium, or High based on urgency.
Example: A visa deadline might need to be marked as High Priority.

Step 7: Add Due Date and Time
Specify when the task should be completed.
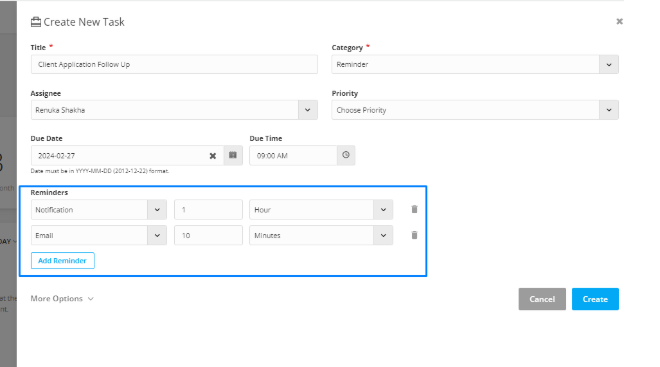
Step 8: Set Reminder
Enable reminders by email or system notification—e.g., 30 minutes before due time.
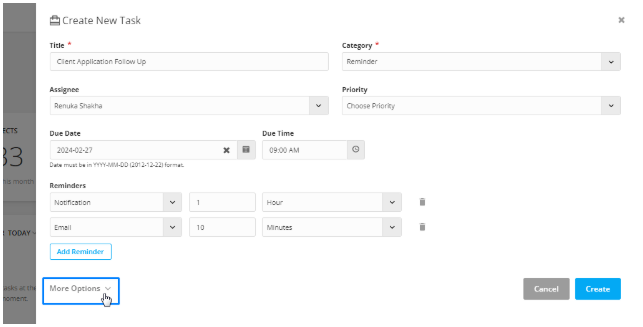
Step 9: Click “More Options” (Optional)
If needed, expand the form to enter additional details.
Step 10: Add Task Description
Use this field to give more context or instructions.
Example: “Include updated document checklist. Confirm preferred intake.”

Step 11: Relate the Task
Link the task to:
Contact
Application
Partner
Or select Internal for internal matters.

Step 12: Add Followers
Include other team members to collaborate or supervise the task.
Followers can view, comment, and edit the task.
Step 13: Attach Documents
Upload supporting files such as forms, offer letters, or instructions.

Step 14: Click “Create”
Once everything is filled in, click Create to save your task.