As an international education counselor, handling and organizing client documents is a crucial part of the admission process. From academic transcripts and identity proofs to offer letters and visa documents, managing these files efficiently is essential for accuracy, accessibility, and timely processing.
Agentcis simplifies this process through its Document Management feature, allowing you to store, access, and manage client documents directly within the system—whether for contacts, applications, partners, or tasks.
Uploading documents in Agentcis ensures:
Centralized Record Keeping: All files are organized under relevant profiles or applications, reducing the risk of losing important information.
Faster Accessibility: Counselors and team members can instantly retrieve any document when needed.
Better Compliance: Keeps records aligned with institutional and legal requirements.
Professional Workflow: Reduces dependency on external tools and keeps everything in one place.
You can upload and manage documents in:
Contact profiles (for individual clients or leads)
Application pages (for course/university applications)
Partner profiles (educational institutions or agents)
Tasks (to attach supporting files for assigned responsibilities)
Additionally, if a lead submits documents through a Lead Form, those documents are automatically saved under the Documents tab of the respective contact profile.

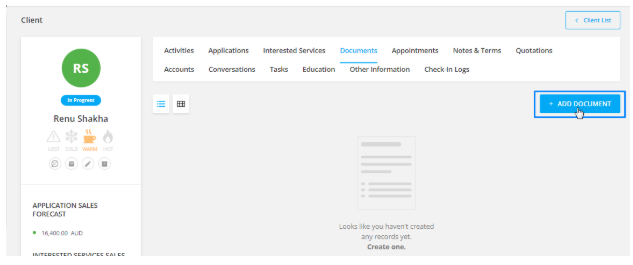
Go to the contact or partner profile, and click on the Documents tab.

This gives you two options:
Agentcis Document – Upload from existing documents within Agentcis.
Select from Device – Upload from your local computer.
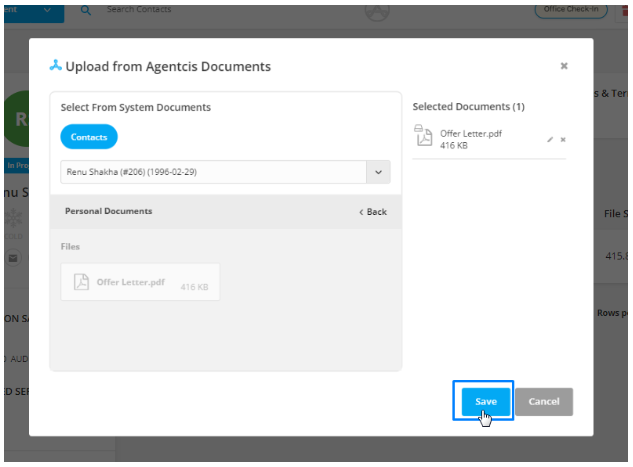
This method allows you to re-use documents already uploaded in the system. It’s ideal when the same file (e.g., passport copy) is needed across multiple applications or tasks.
A new window will open to allow document selection.

Choose the contact whose documents you wish to retrieve.
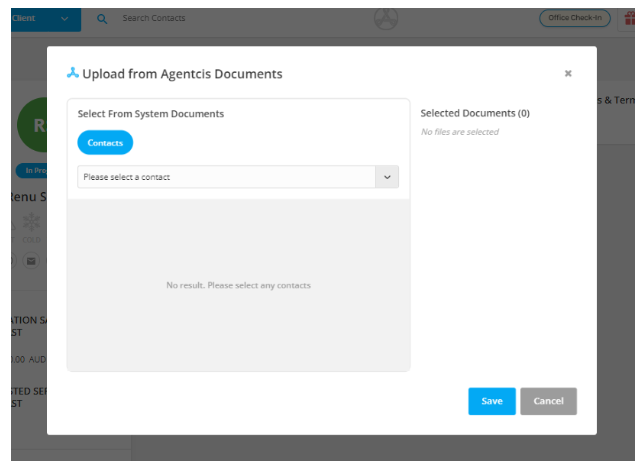
You’ll see three folders:
Personal Documents – Files saved directly in the contact’s profile.
Application Documents – Organized under each application the contact has undertaken.
Task Documents – Files attached to specific tasks related to that contact.

Click on the required documents to move them to the Selected Documents section.
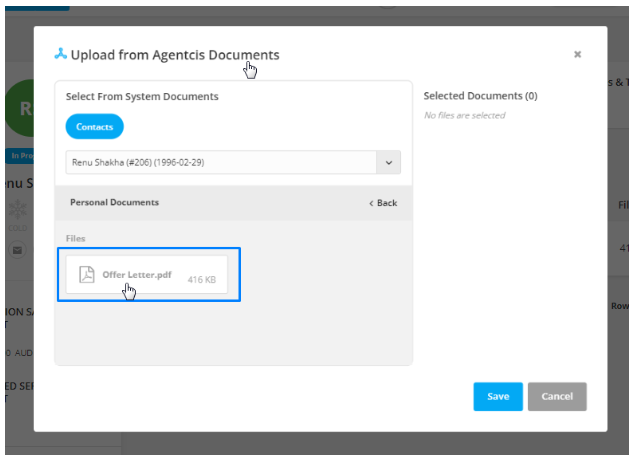
Rename documents using the pen icon or remove them using the cross icon.
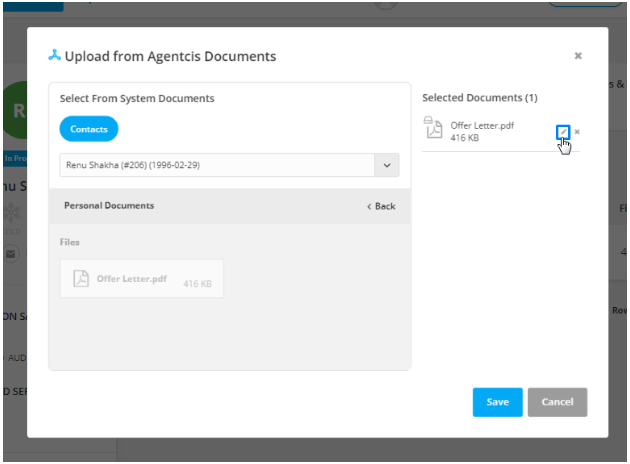

Once finalized, click Save to add the document to the profile.
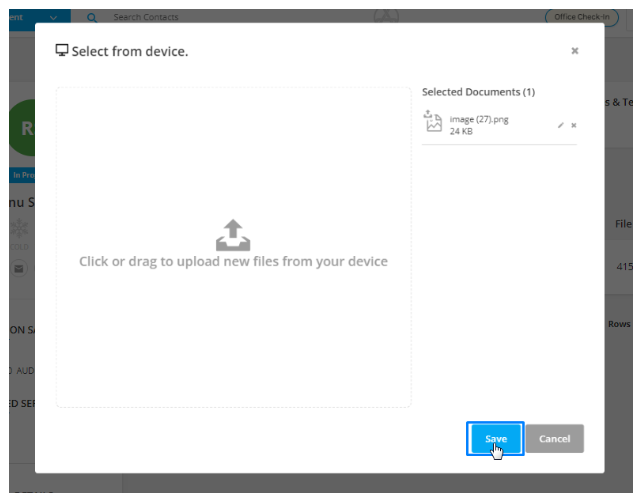
This method is used to upload new documents from your computer.
A window will appear for file upload.

You can drag and drop files or click to open your system’s file browser.

Uploaded files will appear in the Selected Documents section. Use the pen icon to rename and cross icon to remove.

Once reviewed, click Save to add them to the profile.