

Version 5.5.3 R1
Payment Schedule & Auto Invoicing
Payment Schedule & Auto Invoicing
Are you tired of finding ways to schedule payments to your clients?
Worry no more! The Payment Schedule feature in Agentcis application will help you to schedule payments to your clients in bulk or individually, without any hassle. You can even send the payment schedules directly to the client via email, from Agentcis. Furthermore, you can manage its invoicing manually or automate it and make your life so easy.
Please follow the steps below to schedule the payment and manually set the invoice or automate it.
For Payment Schedule in Bulk (You can schedule payments in bulk only if there are no other payments already scheduled.)
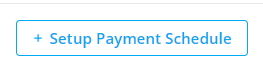
Step 1 - Go to the Client's Application page and click on " + Setup Payment Schedule" to schedule payments in bulk and setup invoices manually or automate.
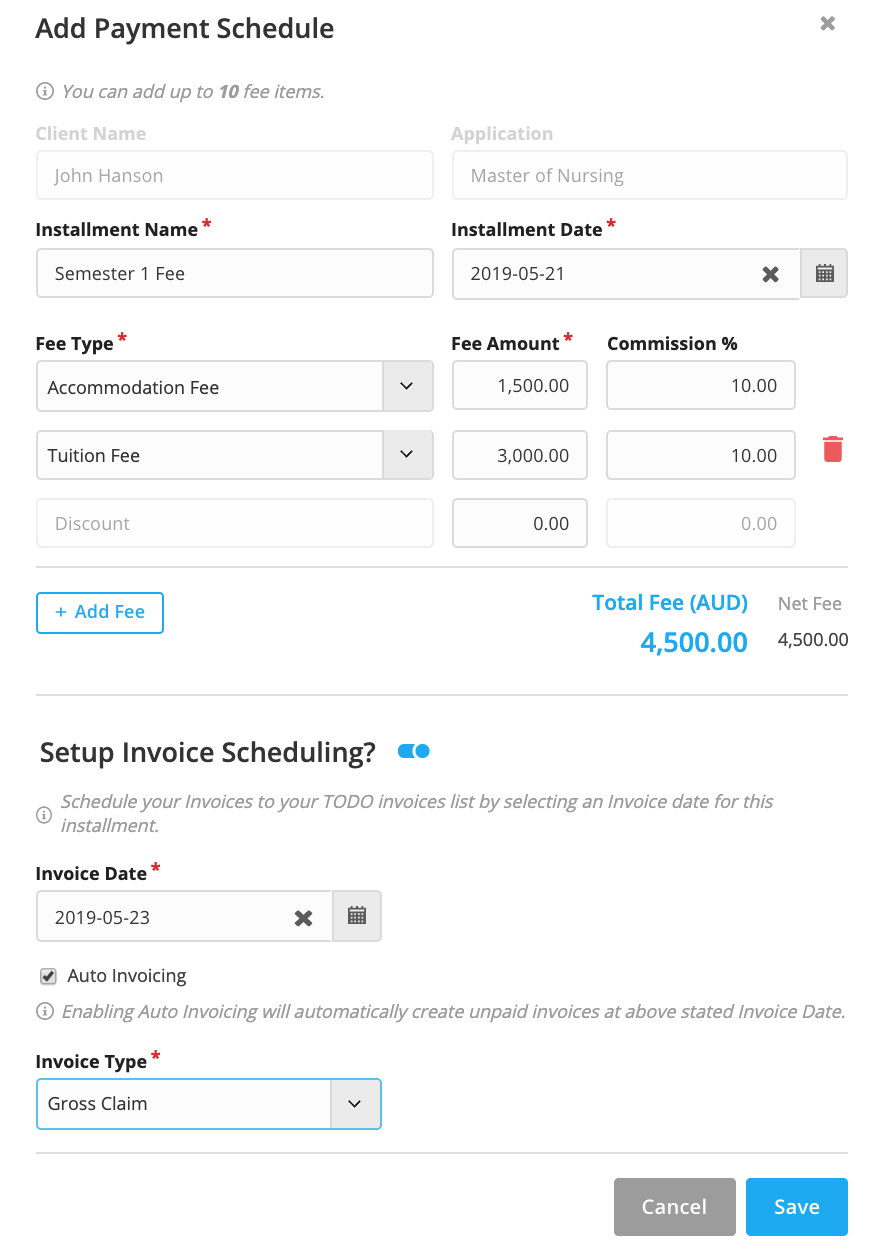
Step 2 - Select the Instalment Start date from when you want to start the payment scheduling and set the Instalment Interval to reoccur the payment schedule.
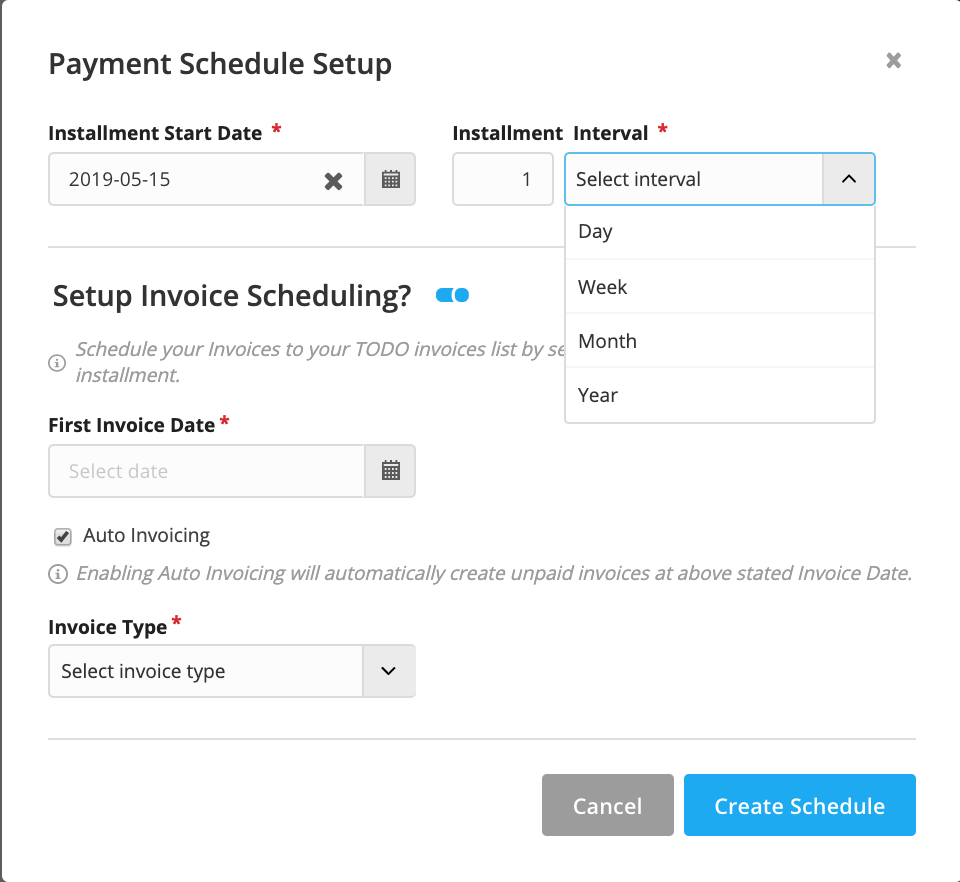
Step 3 - Now, by clicking on the "Setup Invoice Scheduling?" toggle, you will be able to set the invoices. Only payment schedules with claimable terms can be invoiced.
Step 4 - Input the First Invoice Date to set from when you want to start invoicing and the intervals will reoccur according to the intervals set earlier. If you skip the part of Auto Invoicing and click on "Create Schedule" then all the payments and invoices will be scheduled which will be listed under the Payment Schedule Tab of Client's Application and Invoice Schedule under Accounts, respectively.
Please note that if scheduled invoices are not automated then it needs human attention to create an invoice.
Step 5 - Similarly, if you click on the Auto Invoicing and set the Invoice Type, then the invoices shall be automatically generated on the scheduled date.
For Individual Payment Schedule
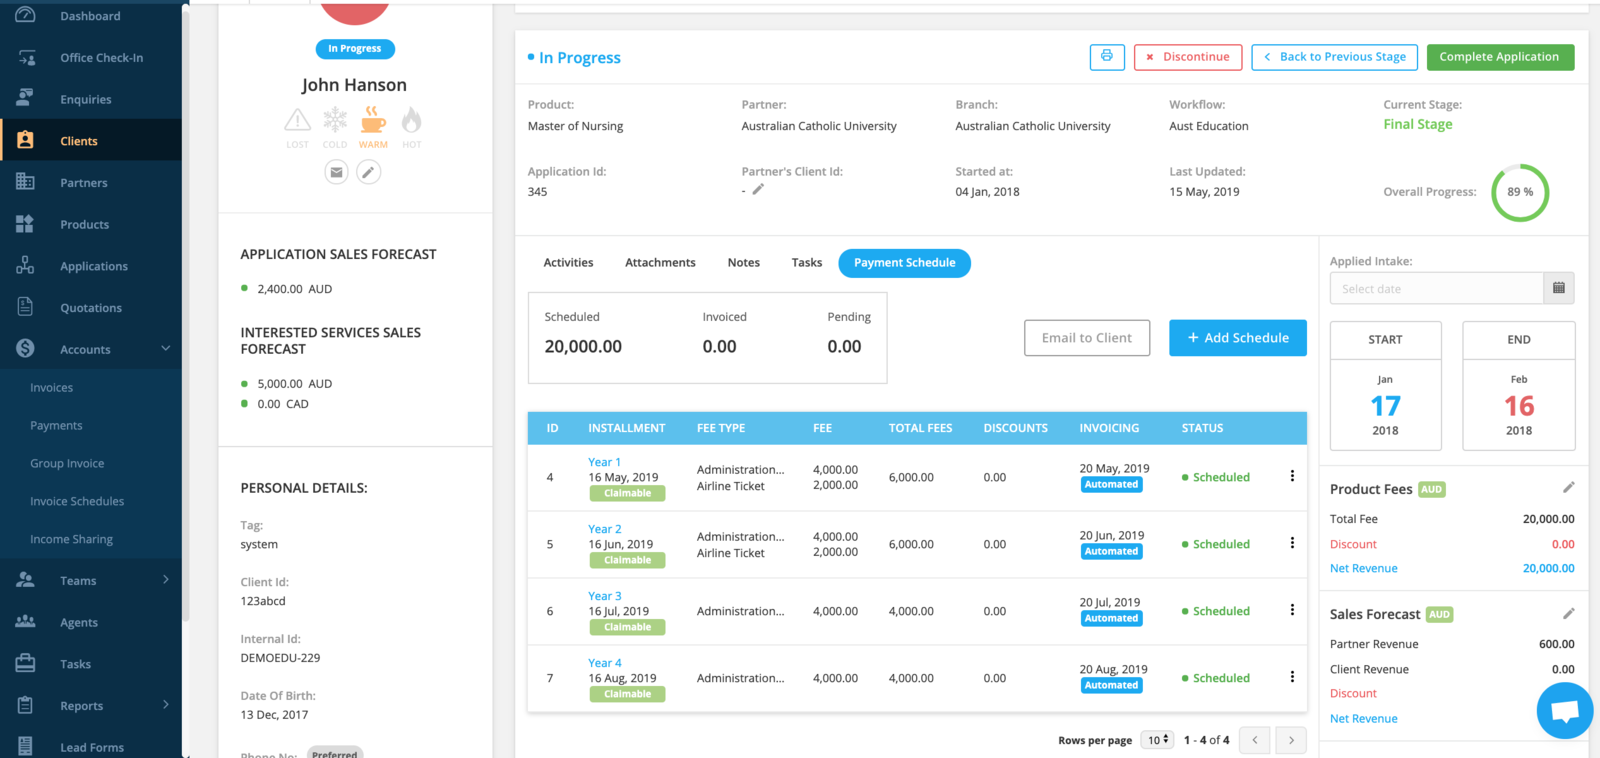
Step 1 - Go to the Client's Application detail page and click on the "Payment Schedule" Tab.
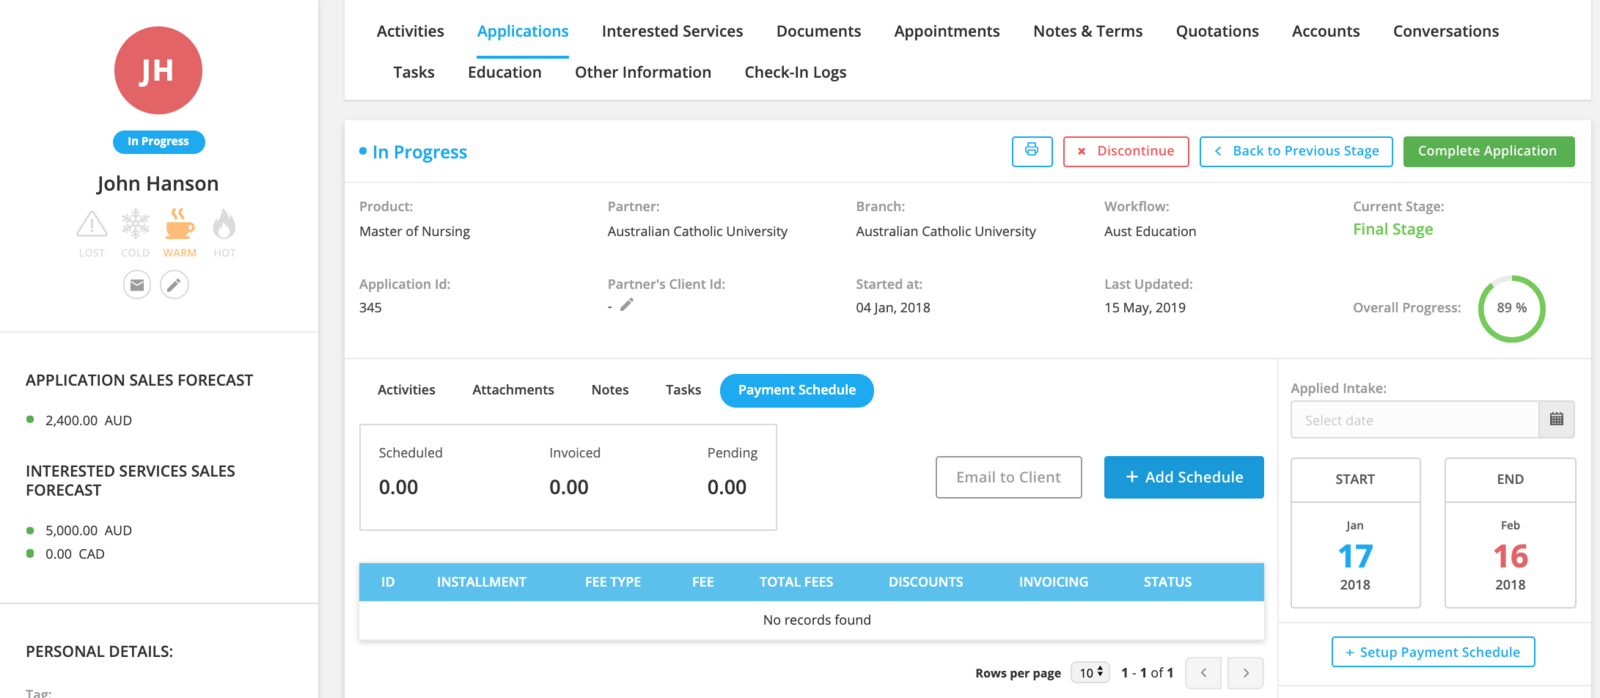
Step 2 - Click on the "Add Schedule" and enter the payment schedule details to add a new payment schedule.
Step 3 - Now, the payment scheduled will be seen on the list. The payment schedule status without any claimable terms will be displayed as "Non-Claimable". The payment scheduled status with claimable terms but without invoice setup will be displayed as "Pending", where the user needs to set up the invoice schedule for it. The payment schedule status with claimable terms and invoice date but without Auto Invoicing will be displayed as "Scheduled". Whereas, if the Auto Invoicing is enabled then a tag will be displayed as "Automated". When these invoices are invoiced, then the payment schedule status will be displayed as "Invoiced".
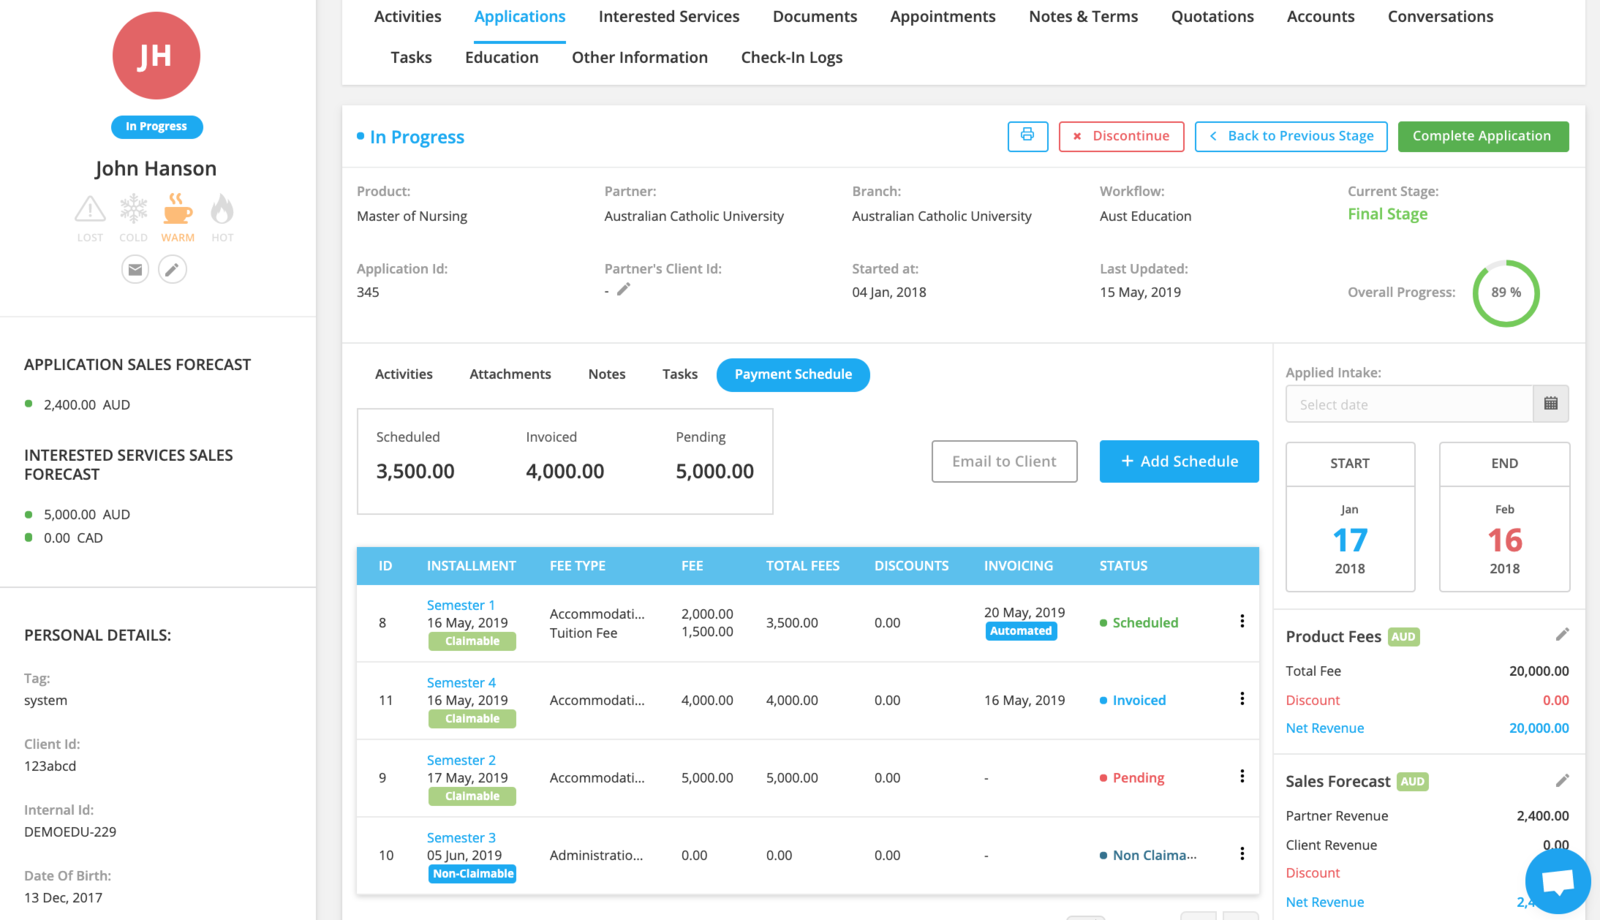
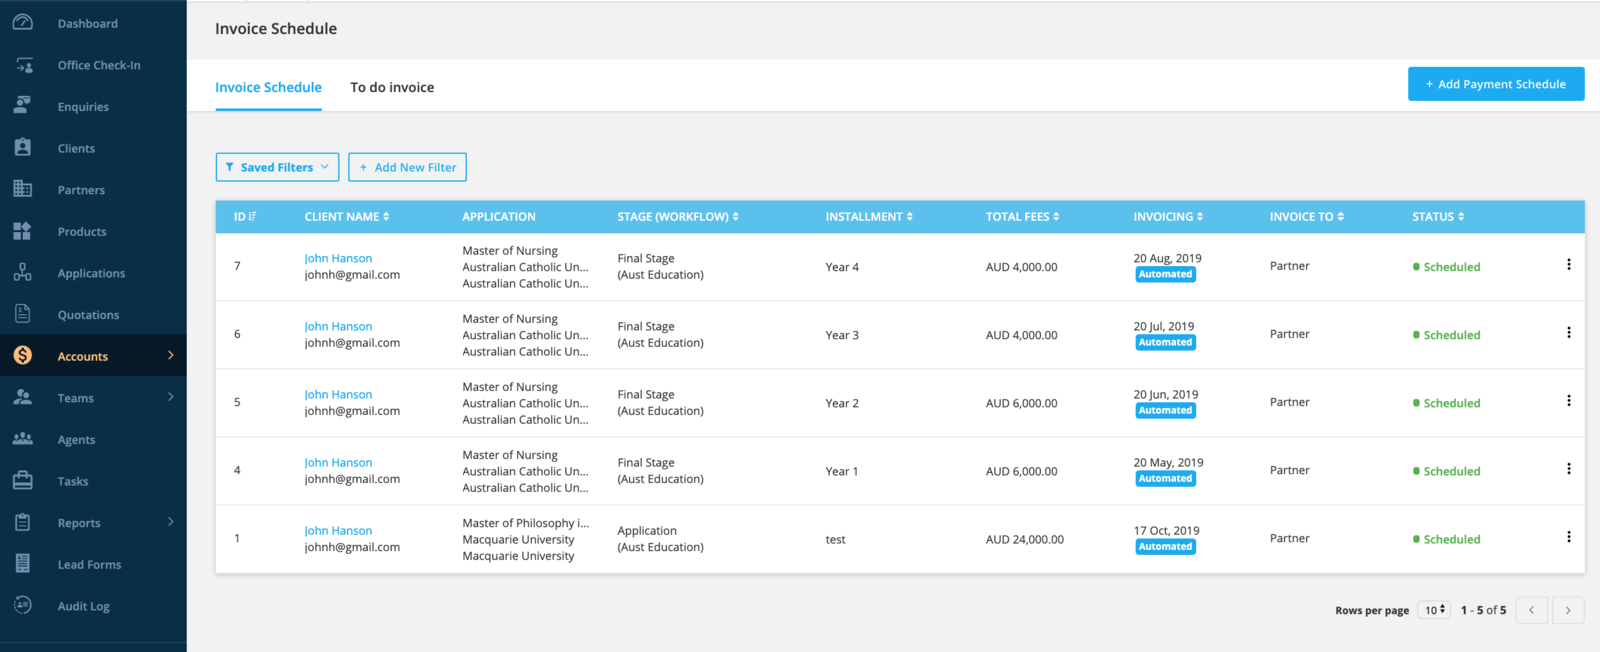
Step 4 - The payment schedules will be listed under Payment Schedule Tab of Client's Application and Invoice Schedules under Accounts, respectively.
Step 5 - You can click on the action button of each payment schedule to Edit, Delete, Link with Invoice, Create Invoice or View Invoice depending upon their status.
Filters in Task Report
The Filters introduced in Task report will help you search, segregate and see only required data rather than going through the entire list to find your preferred data. You can also set your preferred filters and save it for quick access, every time you visit Task Report.
Please follow the steps below to use the filters on Task Report Page.
Step 1 - Click on the "Tasks" under Reports from the sidenav.
Step 2 - Now on the Task Report Page, select the filters as you prefer to generate the report accordingly.
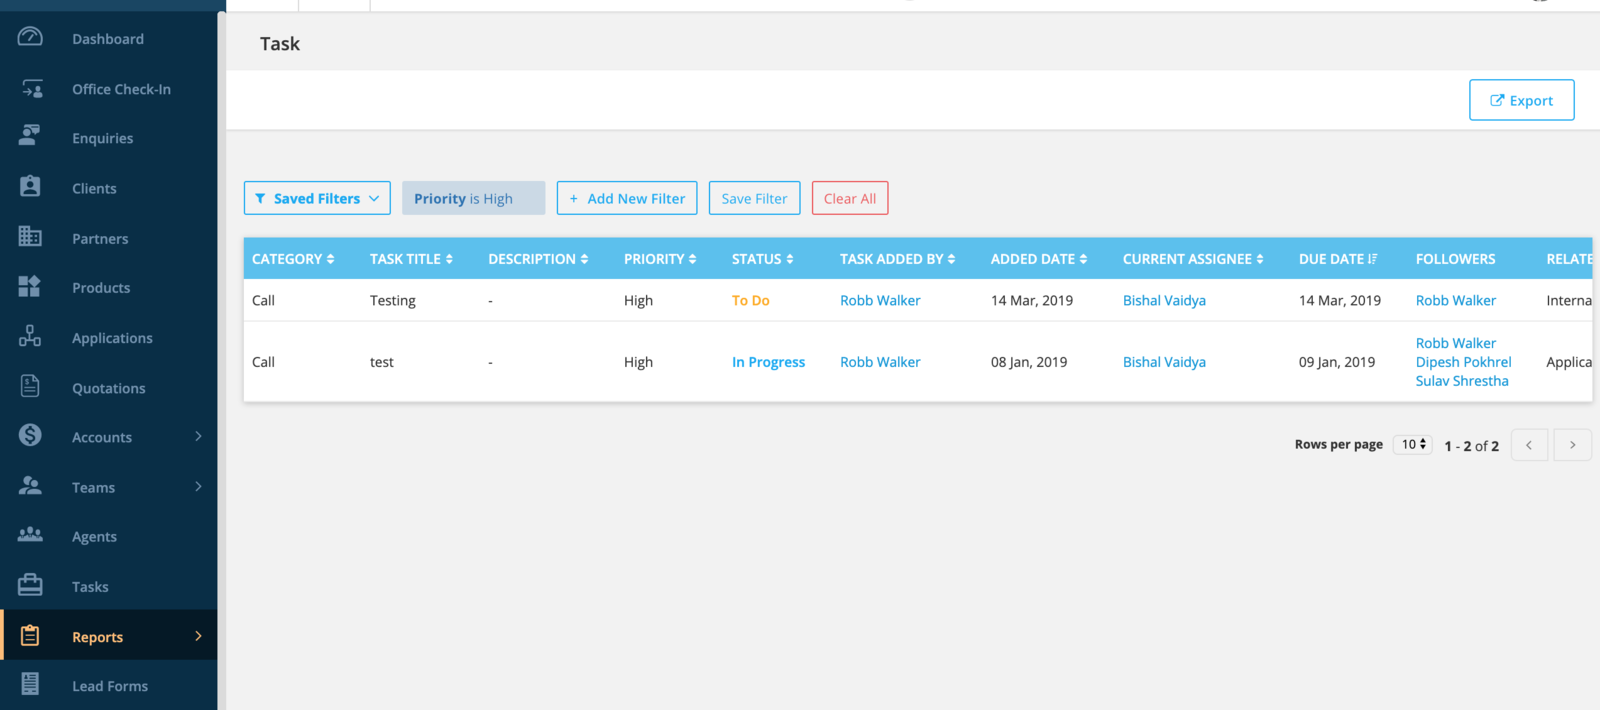
Step 3 - You can click on the save button and save the filter for your daily use.