Managing your partners efficiently is key to streamlining your operations. Agentcis makes it easy by allowing you to import all your partners along with their products and branch offices directly from our master database. This article will walk you through the steps to successfully import partner data into your system.
Before You Begin
Before proceeding, please confirm that you have the necessary permissions to import partners and products from the Agentcis database. If you’re unsure about your access rights, kindly check with your system administrator.

To better understand how partners, products, and revenue types work in Agentcis, you can refer to this article:
Understanding Partners, Products and Revenue Types in Agentcis
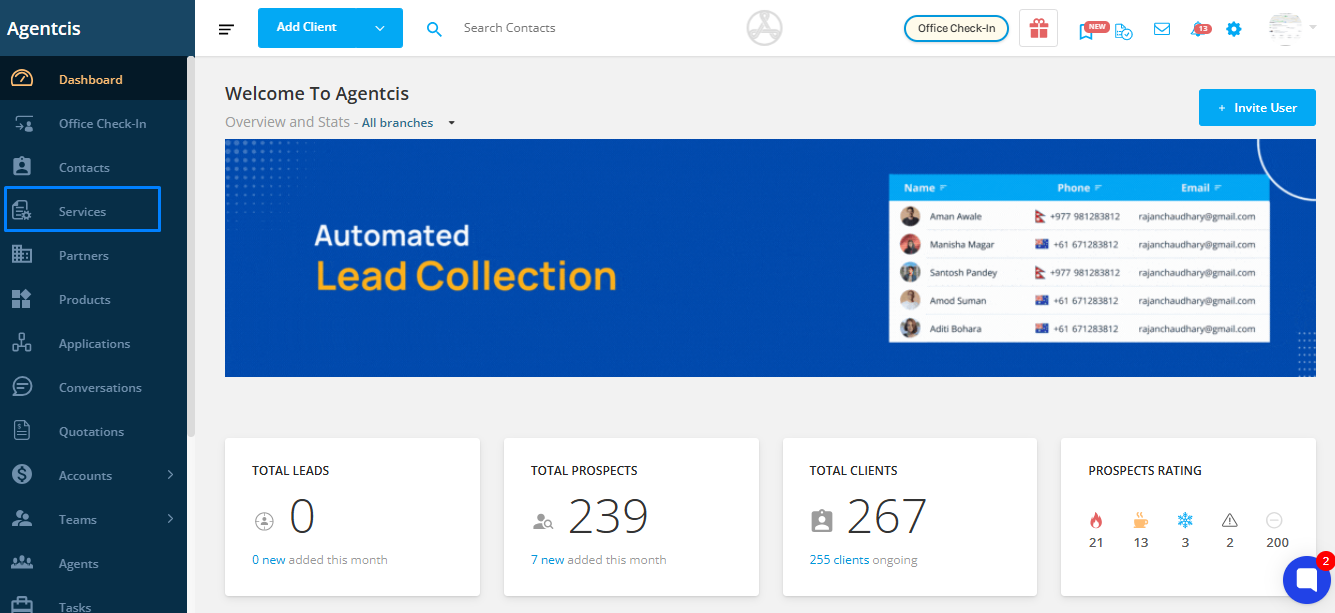
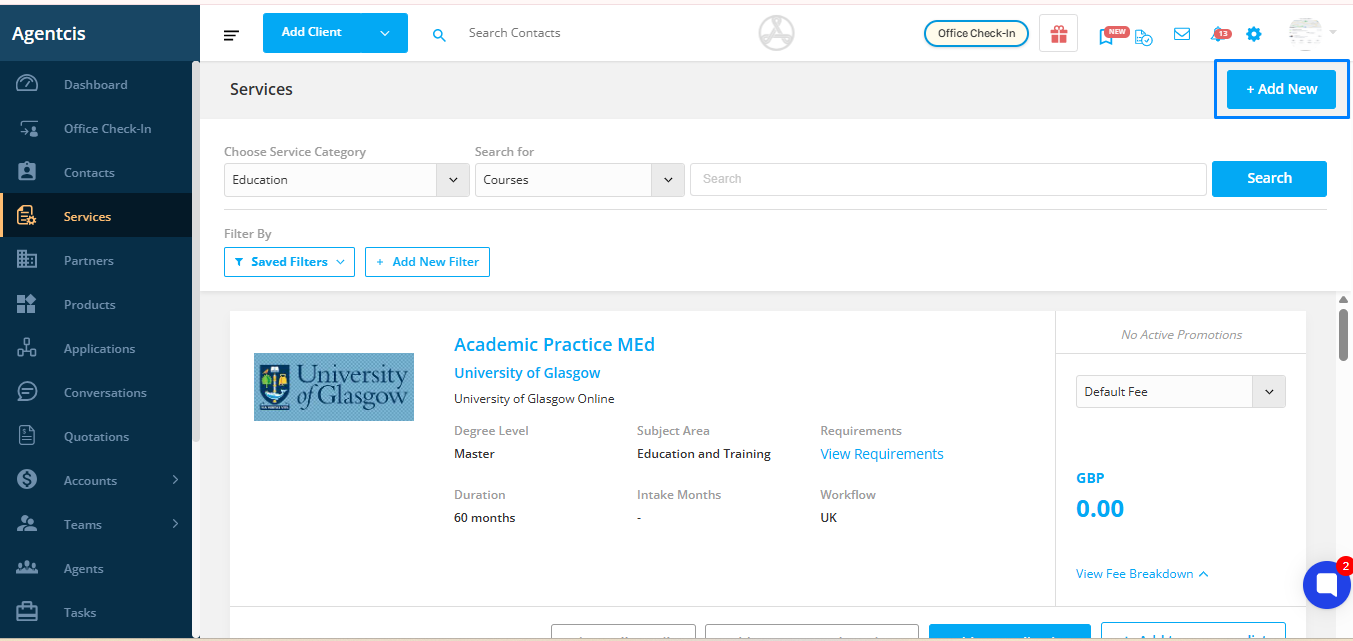
From your Agentcis Dashboard, go to the Services page.
Step 2: Click “Add New”
Click the “Add New” button to begin the import process.
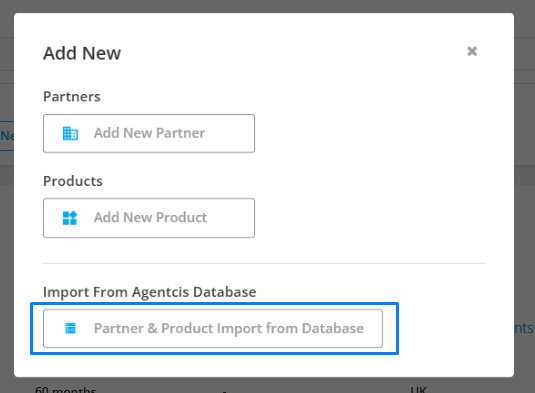
Once you click “Add New”, you will see three options:
Add New Partner – Select this if you want to add a partner manually.
Add New Product – Choose this option to manually add a product to an existing partner.
Import from Agentcis Database – Select this option if you want to import a partner and their products directly from the Agentcis master database.
To proceed with the import, choose “Import from Agentcis Database.”
Choose the appropriate Workflow that will be used to process the partner’s application.
Learn more about the workflow from the following link: https://support.agentcis.com/en/articles/103-workflow
Note: If the relevant workflow is inactive or missing, you can create a new one directly from this screen.
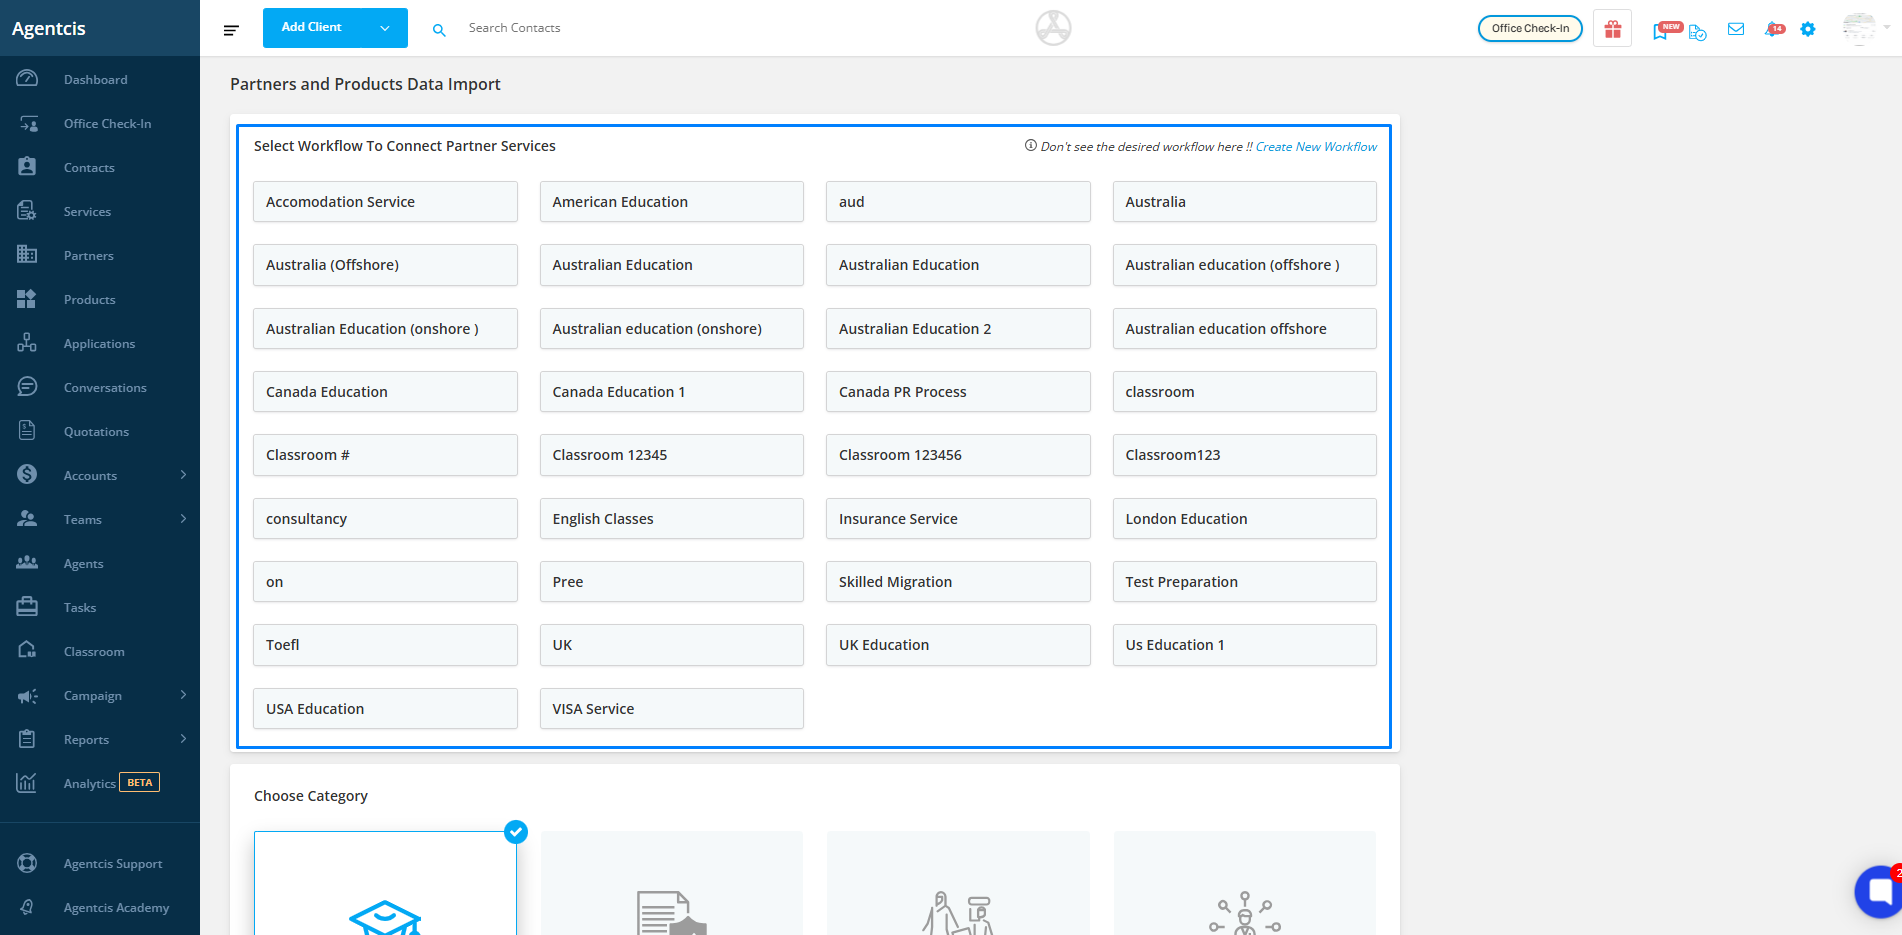
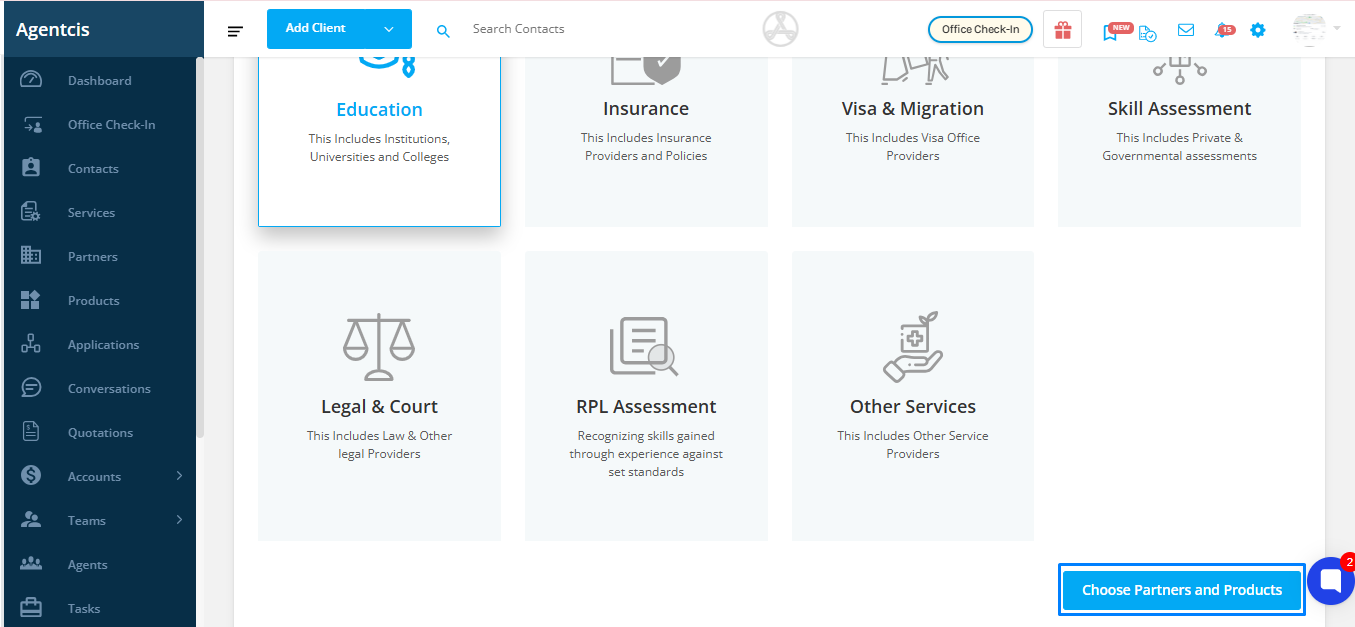
In Agentcis, Partner Category refers to the type of service the partner provides. Categorizing partners helps you organize them better and apply the correct workflows, products, and revenue structures during application processing.
Select the category that best represents the partner type — Education, Insurance, Visa & Migration, Skill Assessment, legal & Court , RPL Assessment or other services.
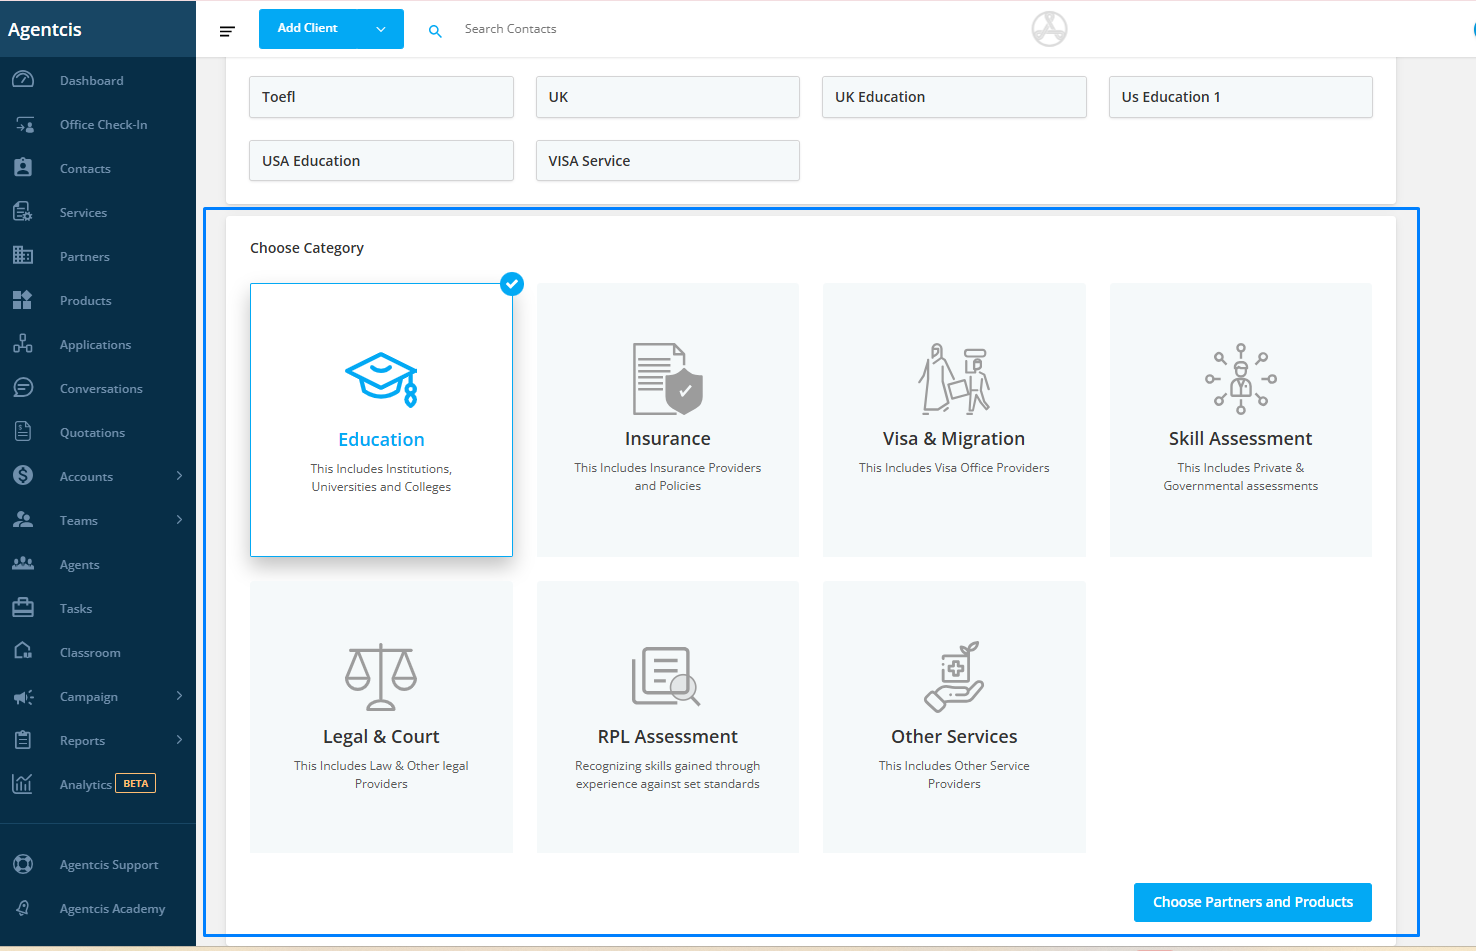
Click on the “Choose Partner and Product” button to proceed to the next step.

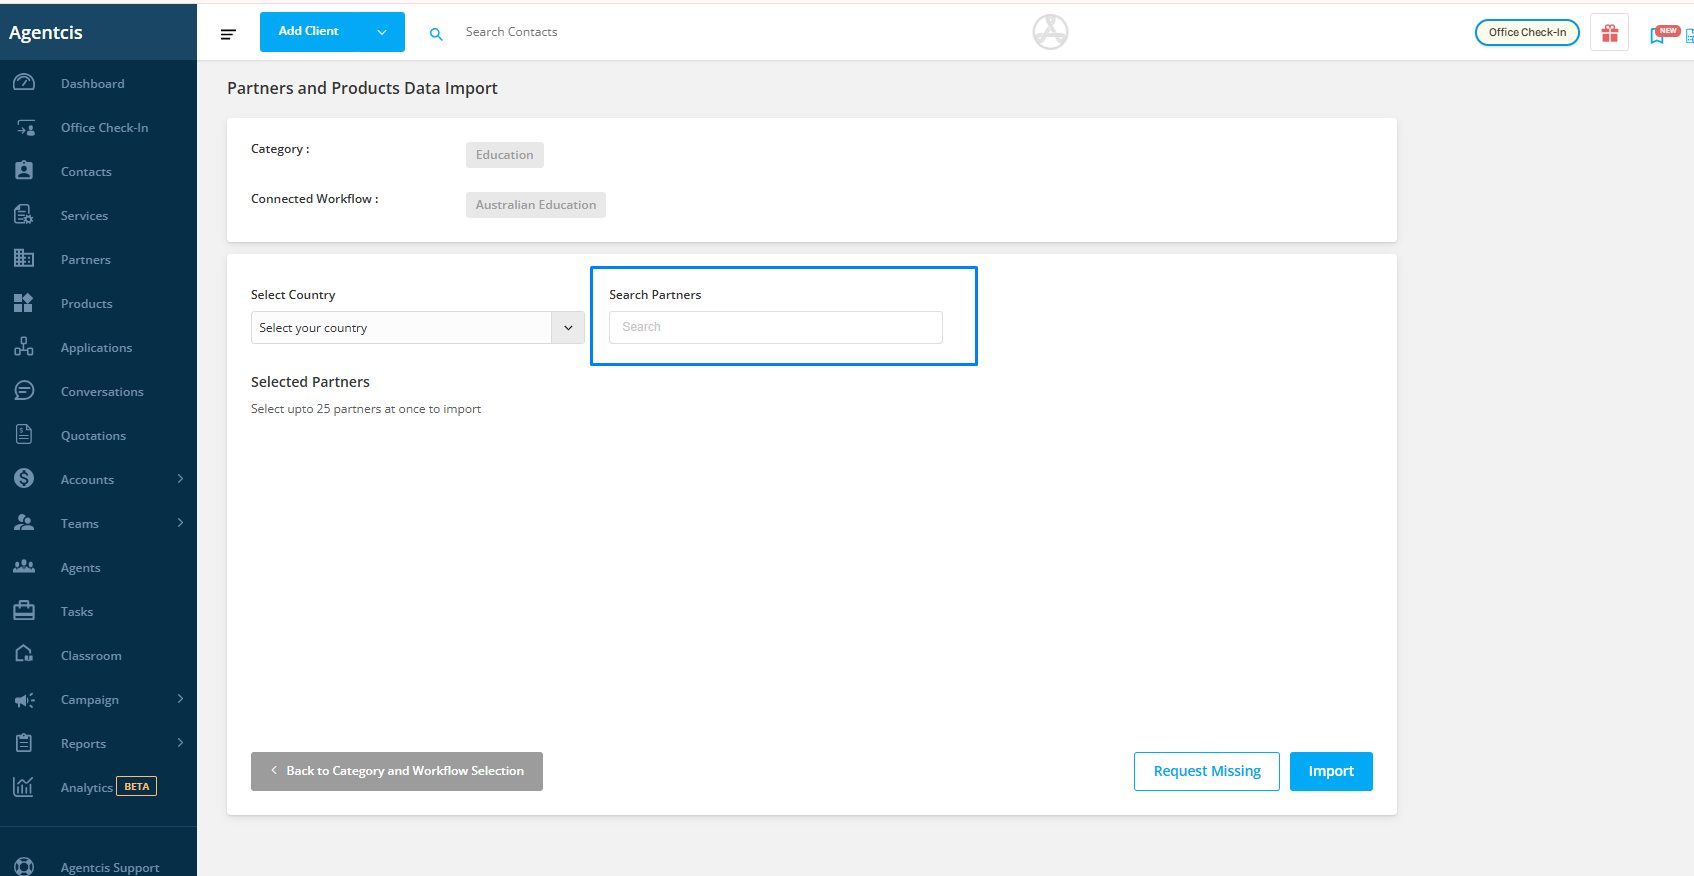
Choose the Country where your partner is located. This will filter the available partner list accordingly.
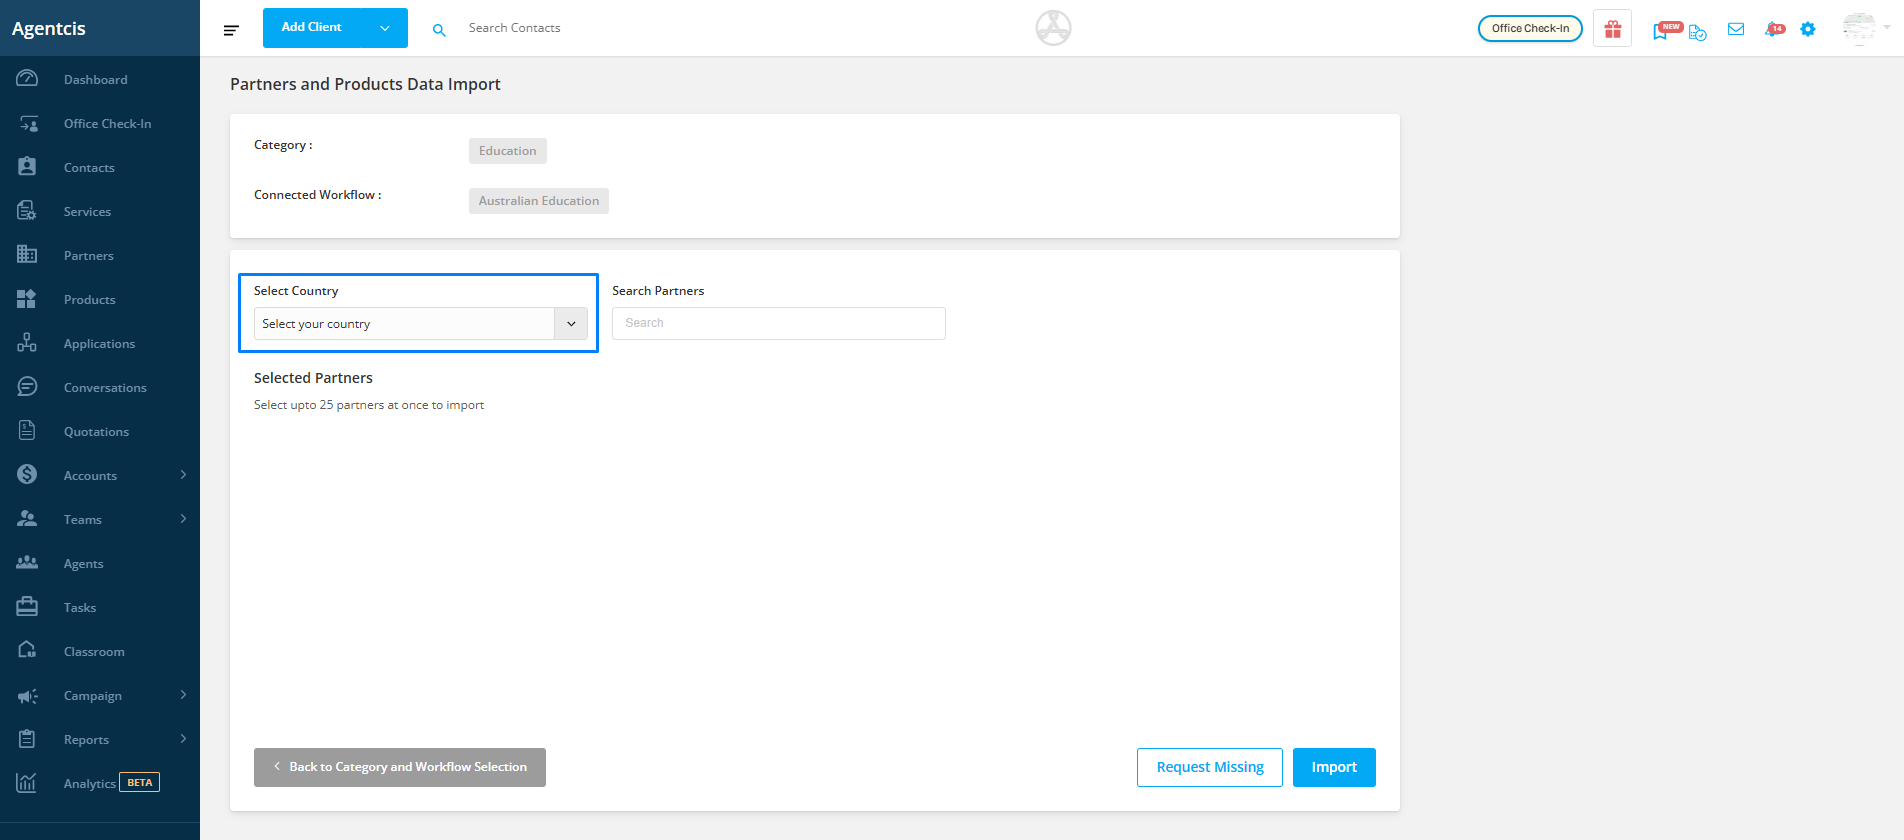
From the filtered list, select the partner(s) you want to import into your system or you can search the partner from the search bar as well.
Specify the Revenue Type associated with the partner’s services.

Finally, click on “Import” to add the selected partner(s), their products, and branch offices to your Agentcis account.
After the import is initiated, you will receive an email confirming whether the import was successful or if there were any errors during the process.
Note: If a specific partner is missing, please click on the “Request Missing” at the bottom of the page to notify our data team.
