Integrating Facebook Lead Ads with Agentcis provides significant value by streamlining the lead capture and management process. This integration ensures that leads generated through Facebook are automatically added in Agentcis eliminating manual data entry.
With this integration, leads generated through Facebook Lead Ads are directly imported into the Agentcis. Users can view, manage, and take action on these leads, enabling quick follow-ups and improved customer engagement.
Sync leads from Facebook Lead Ads directly into Agentcis
Improve lead conversion rates
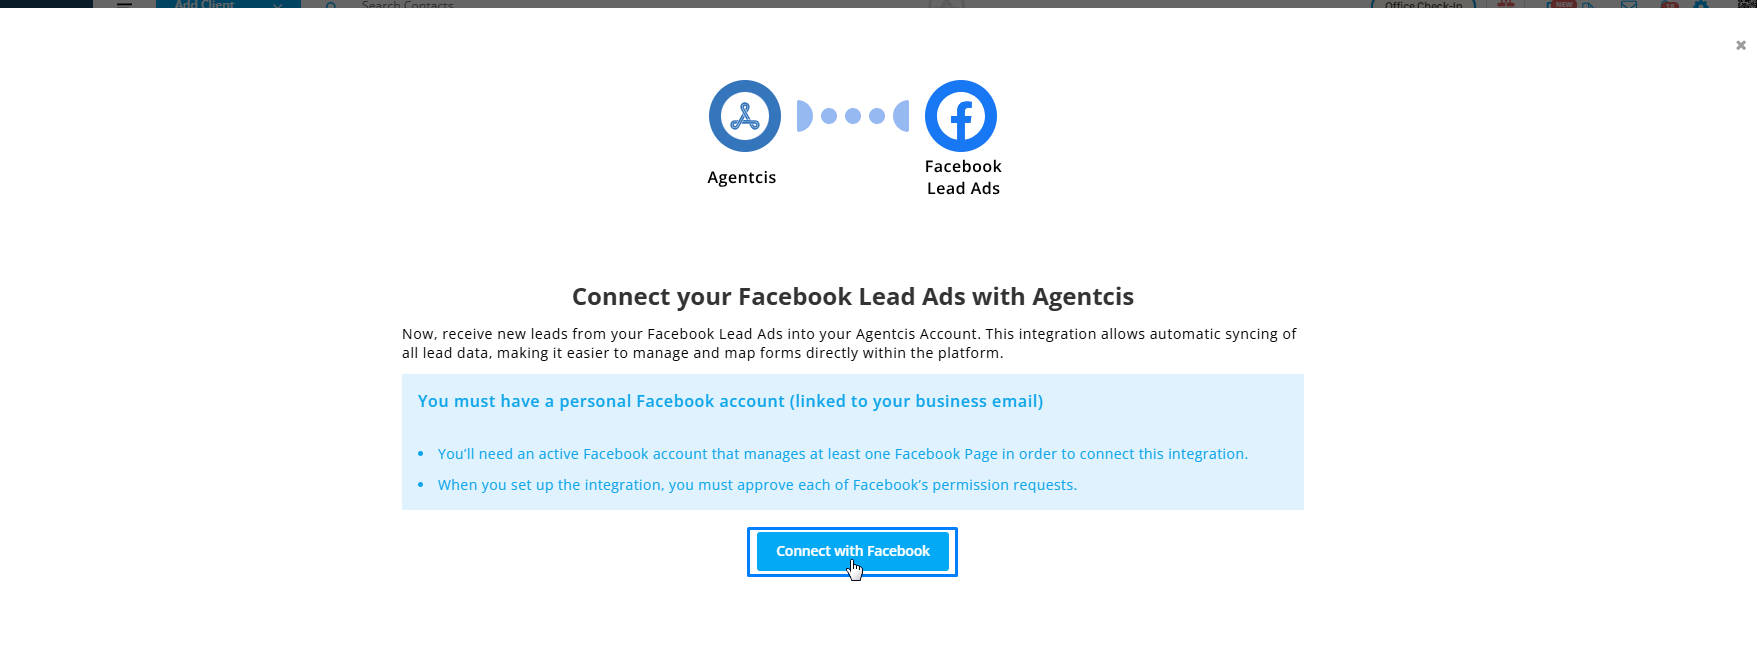
You must have a Facebook account (linked to your business email)
Facebook Business Account: Ensure you have a Facebook Business Manager account with admin access.
Active Facebook Lead Ad Campaign: Create your Lead Ad campaign in Facebook Ads Manager.
Agentcis Admin Access: You must be an admin in Agentcis to configure integrations.
When you set up the integration, you must approve each of Facebook’s permission requests.
After successful integration, you will need to Enable leads access in Meta Business Suite. You won’t receive those leads in Agentcis until you enable this in Meta.
Please go through this link to enable lead access in Meta Business Suite:
Facebook Article Link: https://www.facebook.com/business/help/618808448980683
Step-by-step guide: https://support.agentcis.com/en/articles/355-enable-leads-access-in-meta-business-suite
Let’s now integrate Facebook with Agentcis. Follow the following steps to integrate Facebook successfully with Agentcis.
Step 1: Select Settings from the top info bar.
Step 2: Select API and Integration From the list
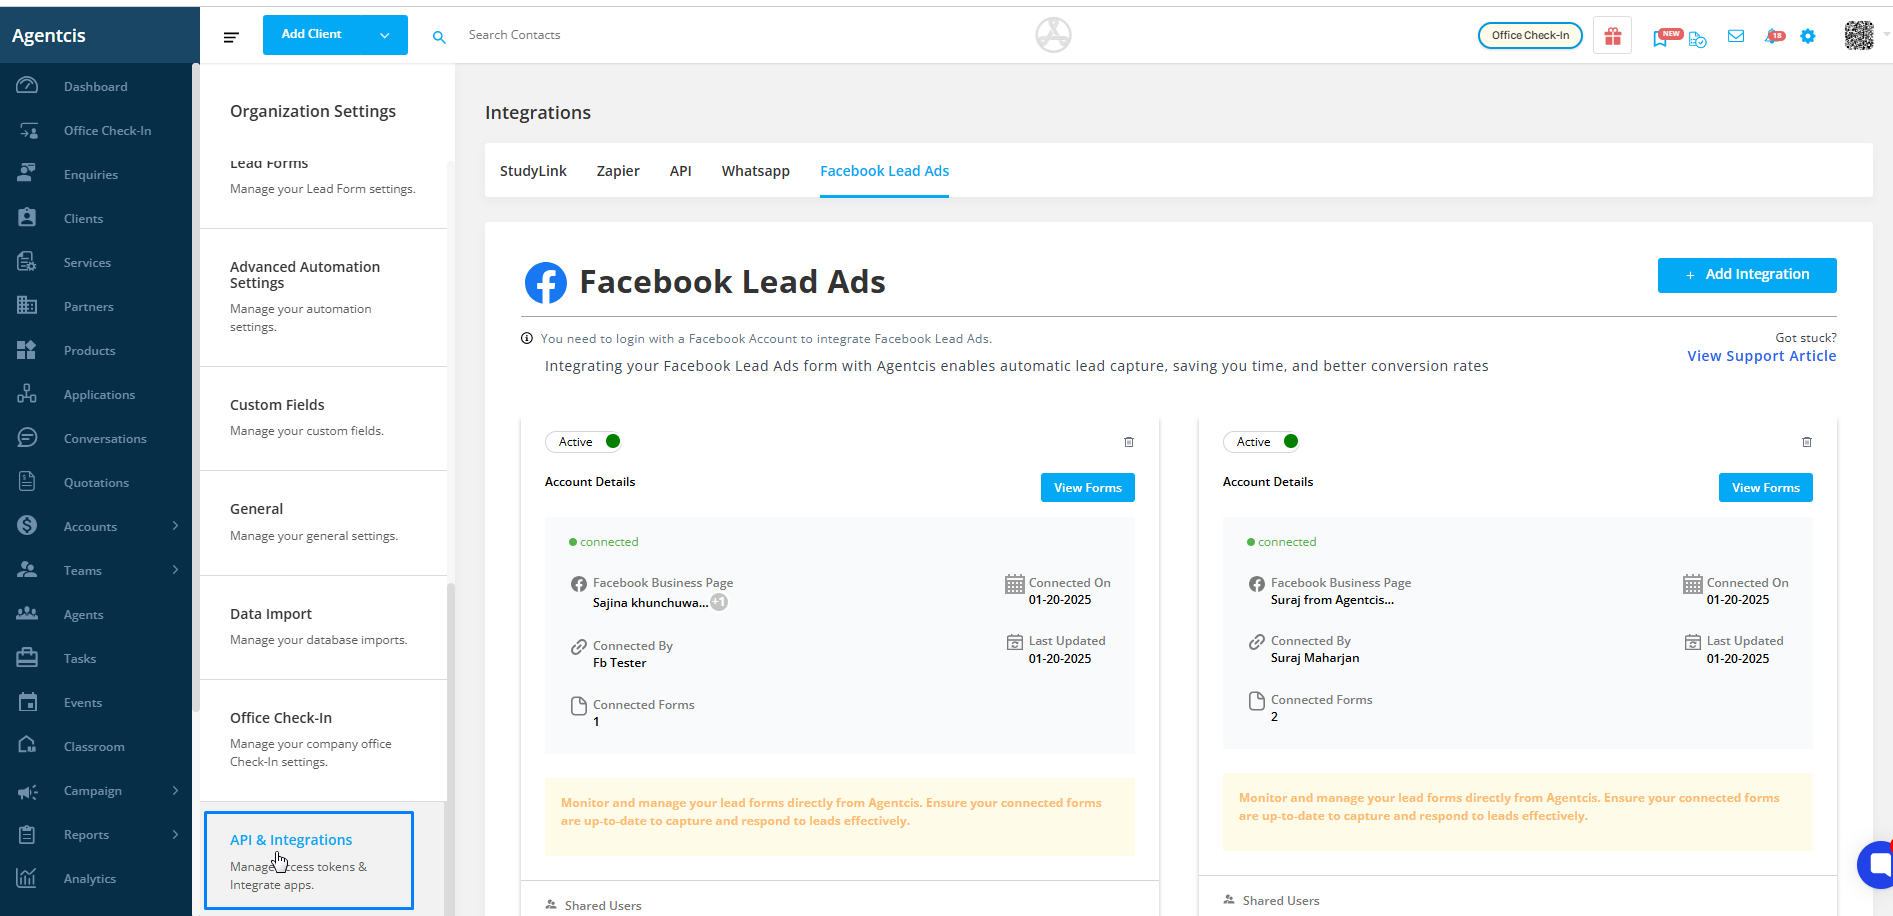
Step 3: Then select Facebook Lead Ads
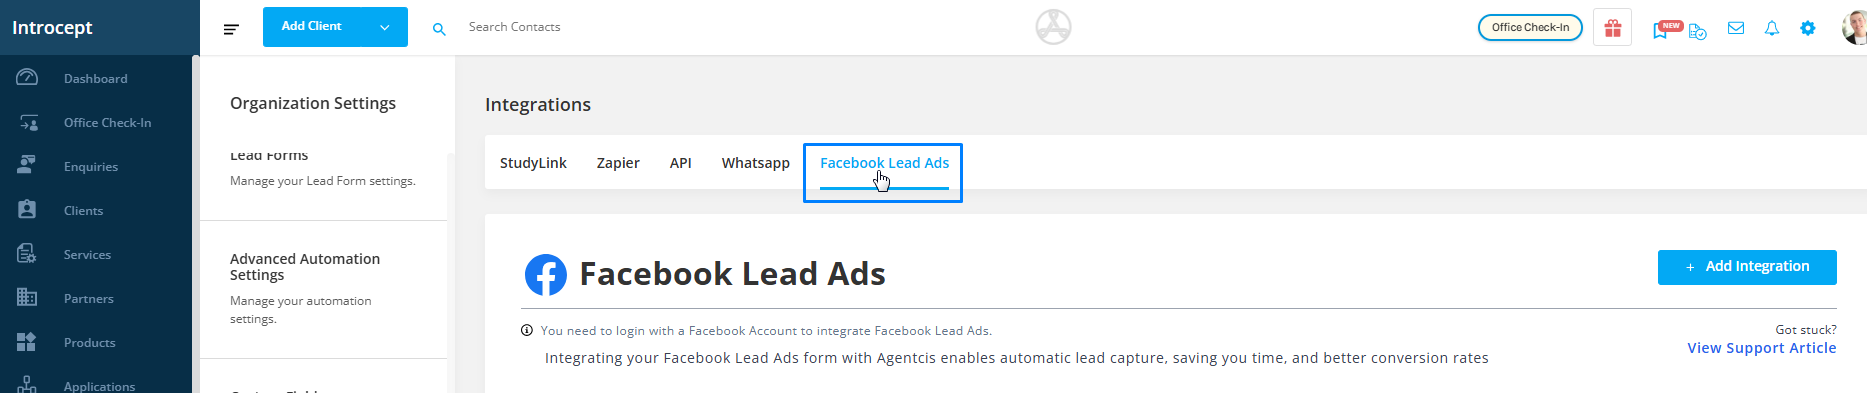
Step 4: Click on Add Integration.
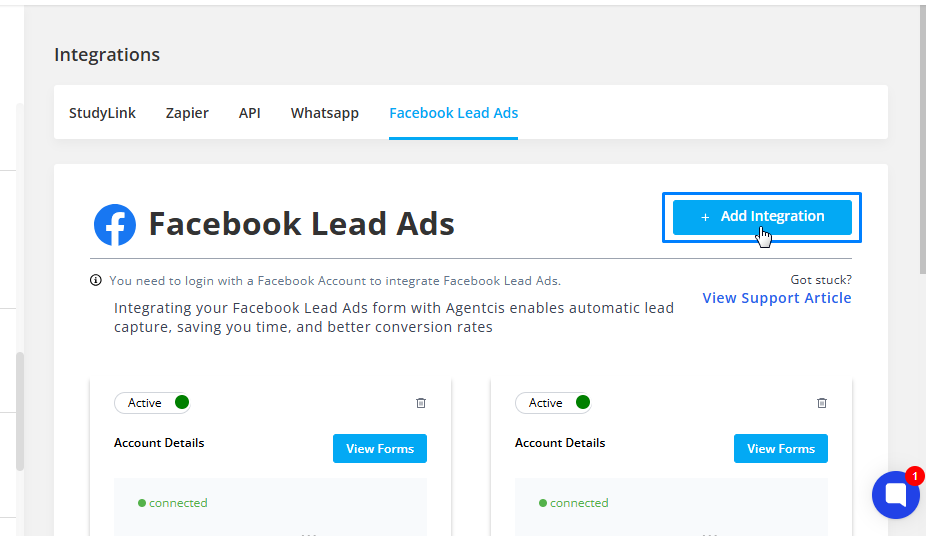
Step 5: Click on Connect with Facebook
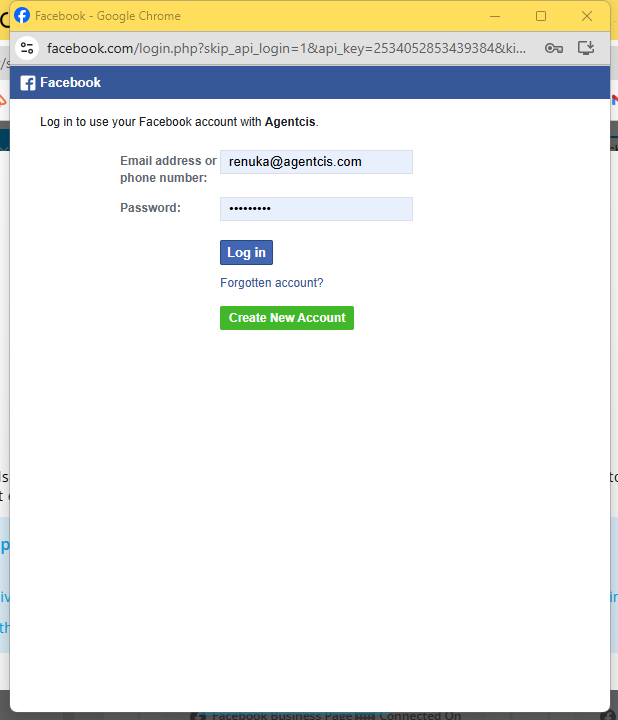
Step 6: Log in to the Facebook account which you want to connect.
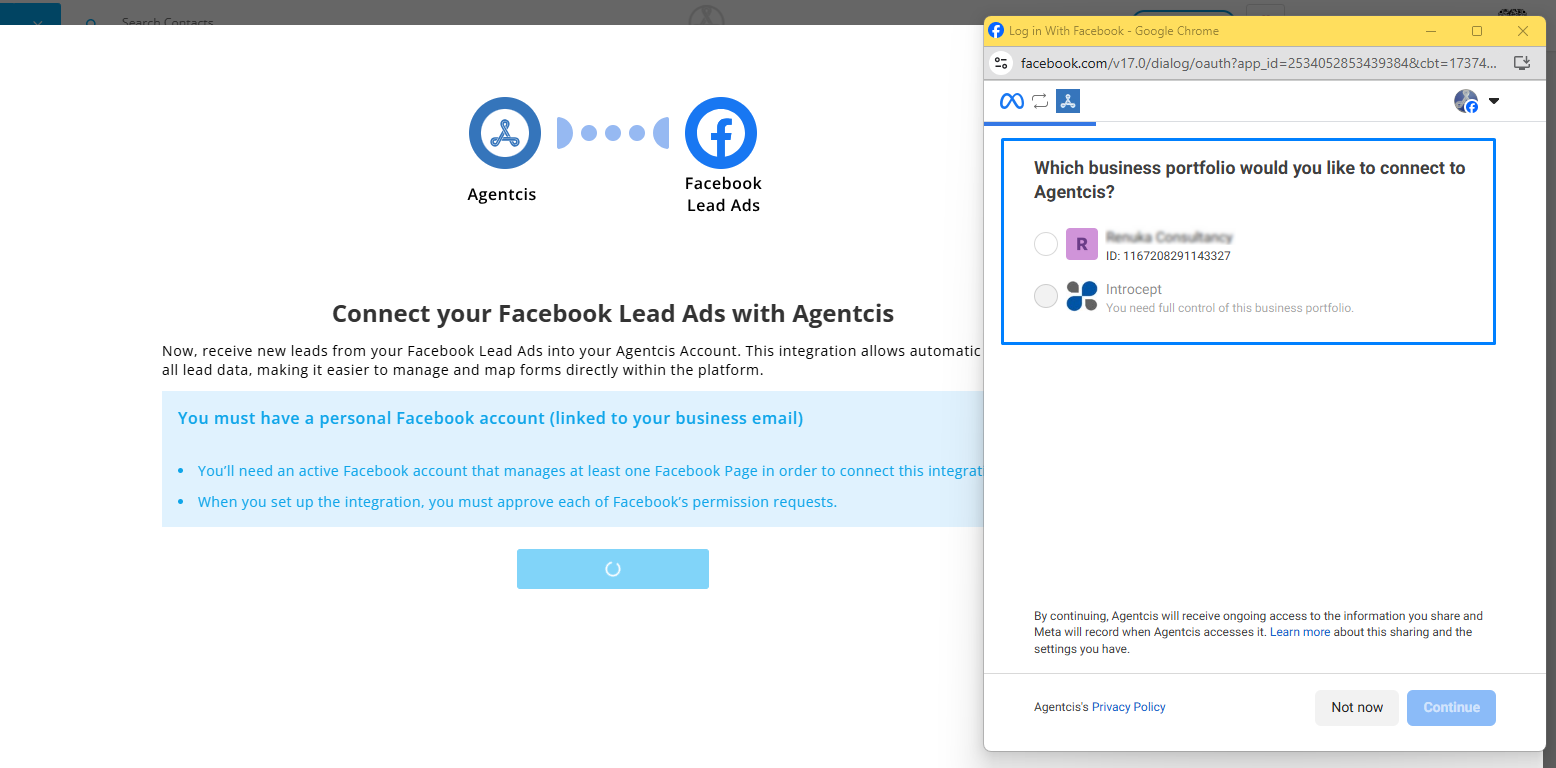
Step 7: Select the Business Account
Step 8: Choose the Facebook Page you want to integrate and then select Continue.

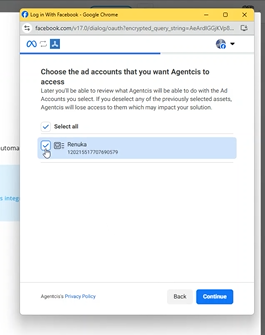
Step 9: Choose the ad accounts that you want Agentcis to access.
Step 9: Review the details of the Integration and click on save.

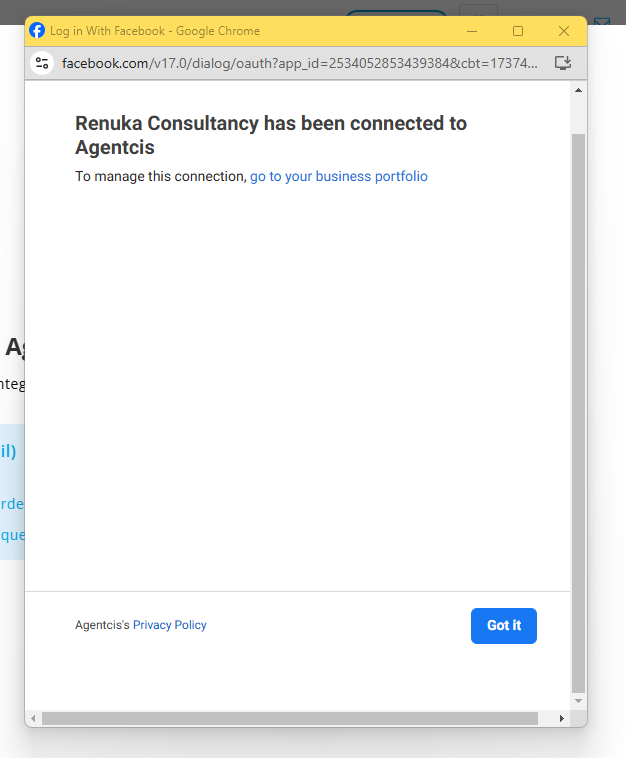
Step 10: A message pop up as you have been connected. Then click on Got it
Step 11: A message pop up as “Facebook Lead Ads Integration Successful”. Click on “Okay, got it”
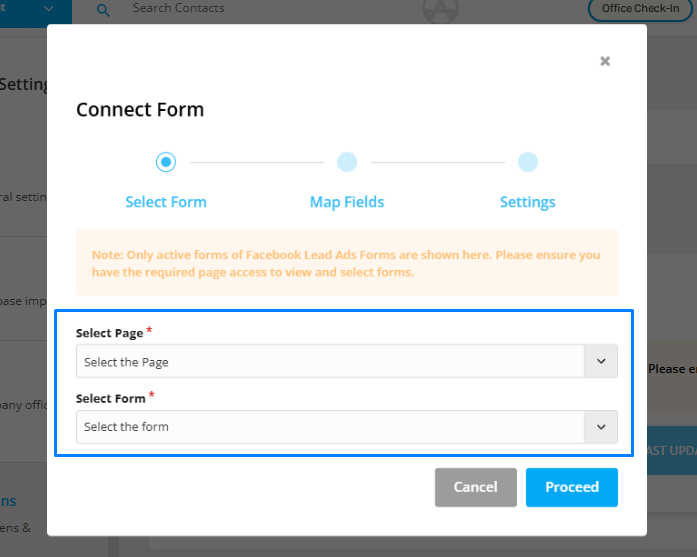
Step 12 Now select Facebook page and form to be connected. Then click on Proceed.
Step 13: Map the Facebook form field with the system field. And then click on proceed.
Please Note: If you miss mapping the Facebook form field with the Agentcis Contact Field, the data filled in the form will not be shown in the Contact details in Agentcis.
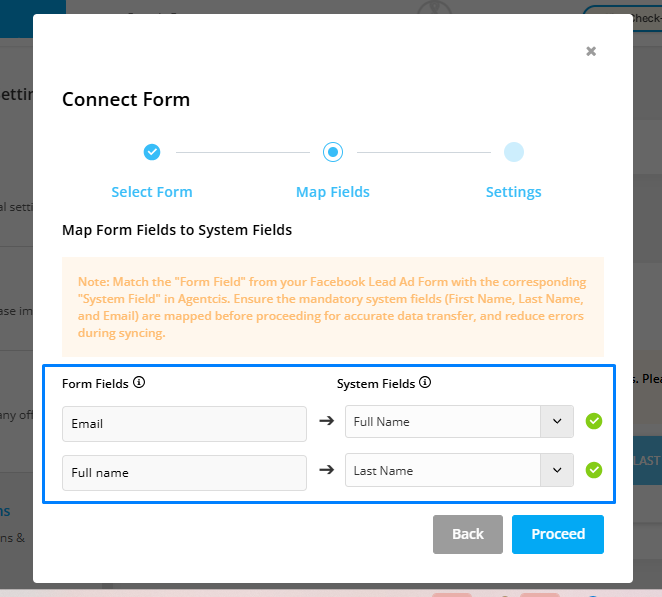
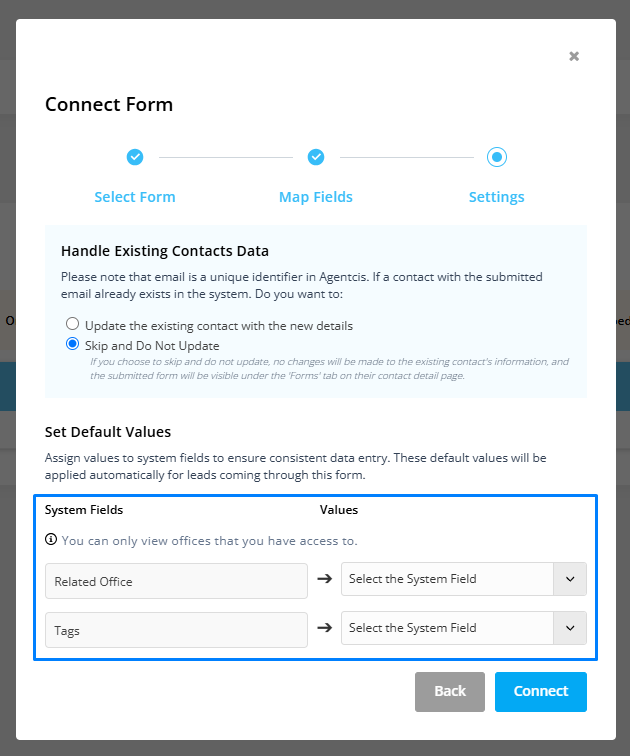
Note: Email is a unique identifier in Agentcis. If a contact with the submitted email already exists in the system, please select the option if to update the existing contact with the new details or skip and do not update.
If you update, the contact's details will be replaced with the new form data. The form will be visible under the 'Forms' tab on their contact detail page.
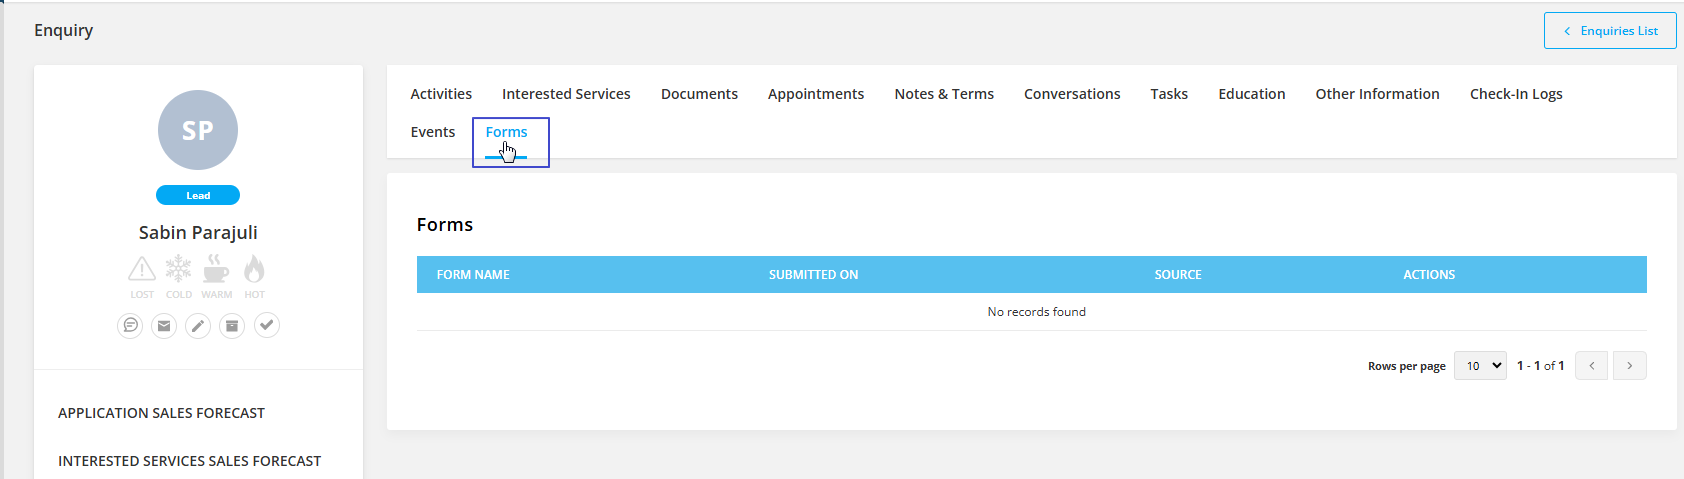
If you choose to skip and do not update, no changes will be made to the existing contact's information, and the submitted form will be visible under the 'Forms' tab on their contact detail page.

Step 14: Select the related office and tag to be added. Then select Connect.
You have successfully connected Facebook with Agentcis.
Note: You can always edit the mapping if required for this please select edit icon.
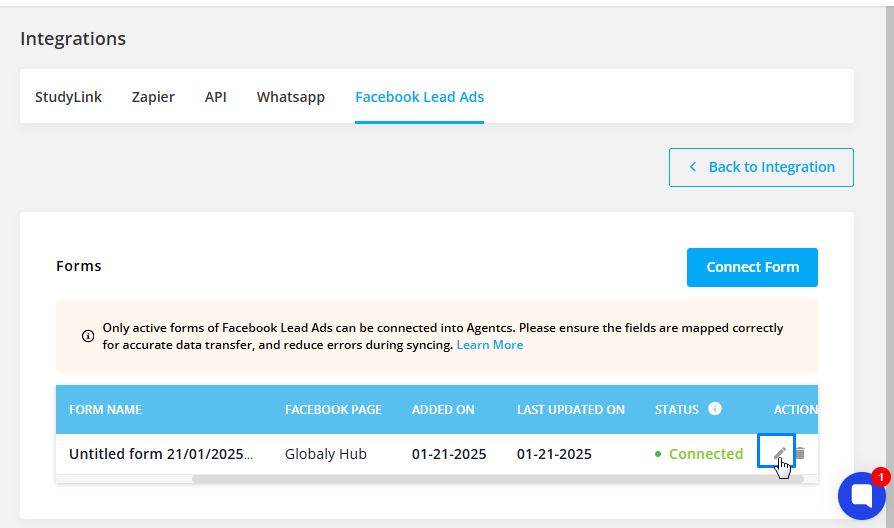
You can also delete the form connection by simply clicking on the delete icon

