Agentcis allows you to bulk tag contacts directly from the contacts listing page, making it easy to apply tags to multiple contacts at once. This feature eliminates the need to update contacts individually, saving time and minimizing manual effort. With bulk tagging, you can quickly organize, categorize, and manage your leads, prospects and cleints more efficiently, ensuring your contact’s database stays structured and up to date with minimal effort.
Want to know more about Tags and it’s management in Agentcis?

Tag Management in Agentcis
Learn how to efficiently organize, filter, and target your contacts in Agentcis using tags. This guide will help you understand how to create and use tags to manage clients, streamline operations, and send focused Email or WhatsApp campaigns effortlessly.
Steps to Bulk Tag:
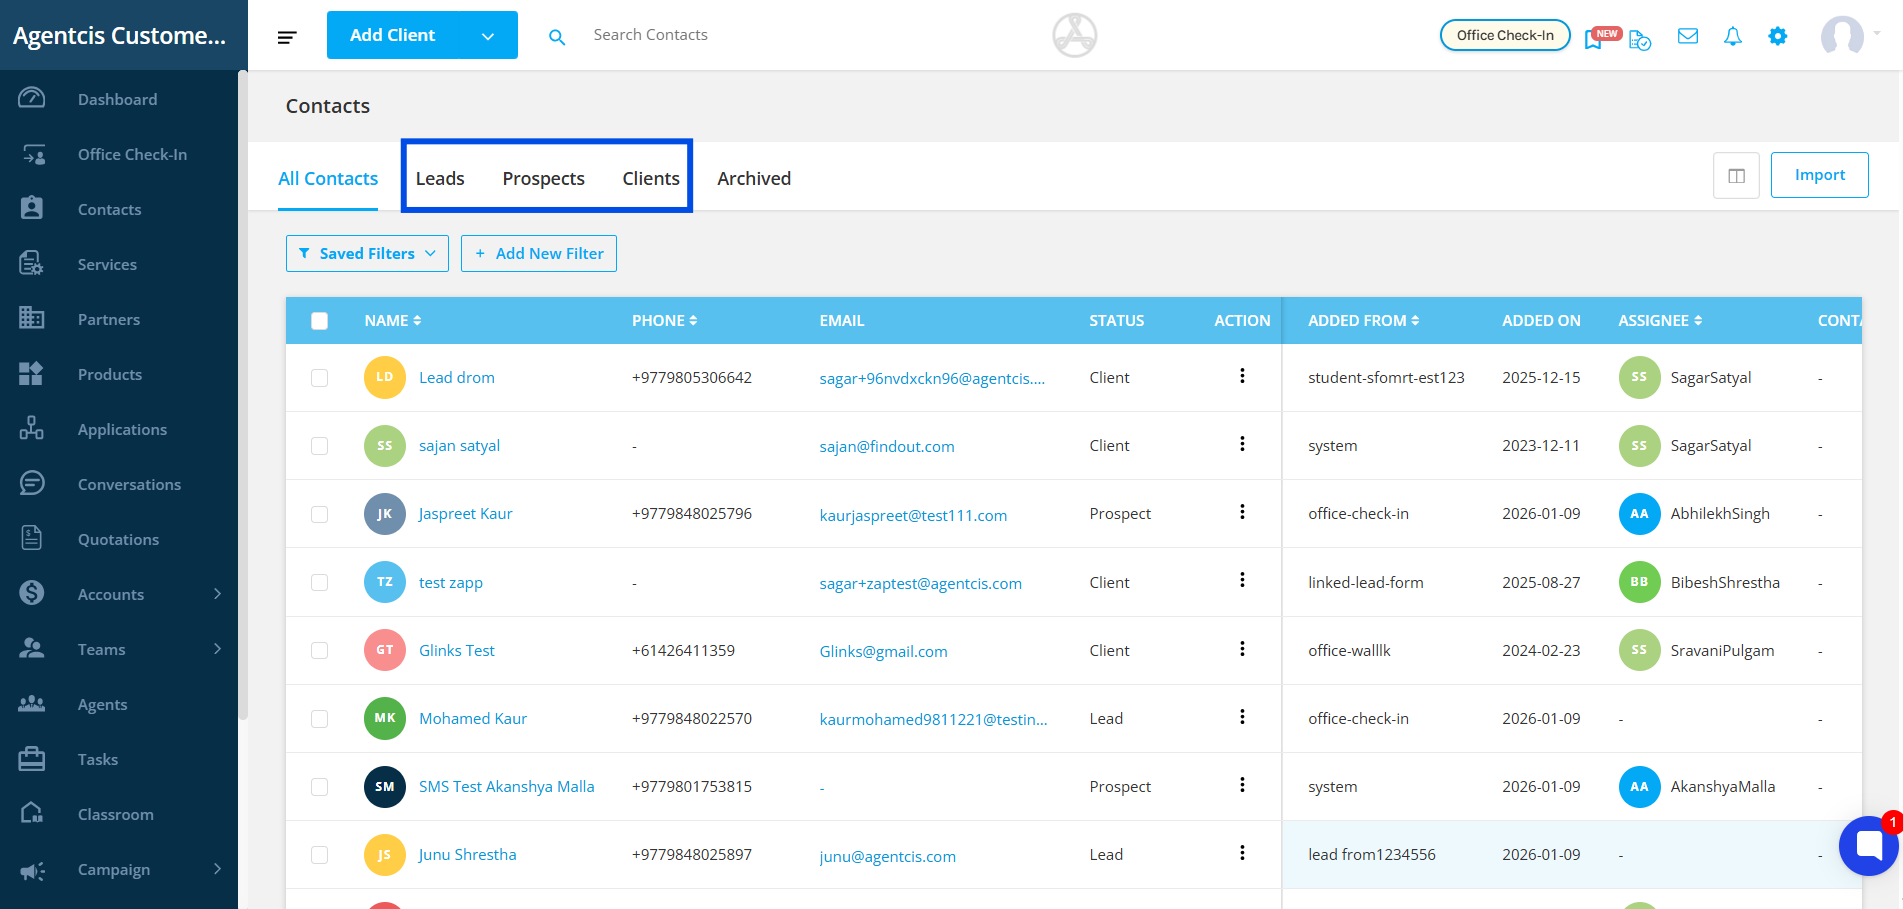
Step 1: Open the Contacts page.
From the side navigation bar, click “Contacts”.

Step 2: Choose the contact type—leads, prospects, or clients—to apply bulk tagging, so tags are added to the right group of contacts.
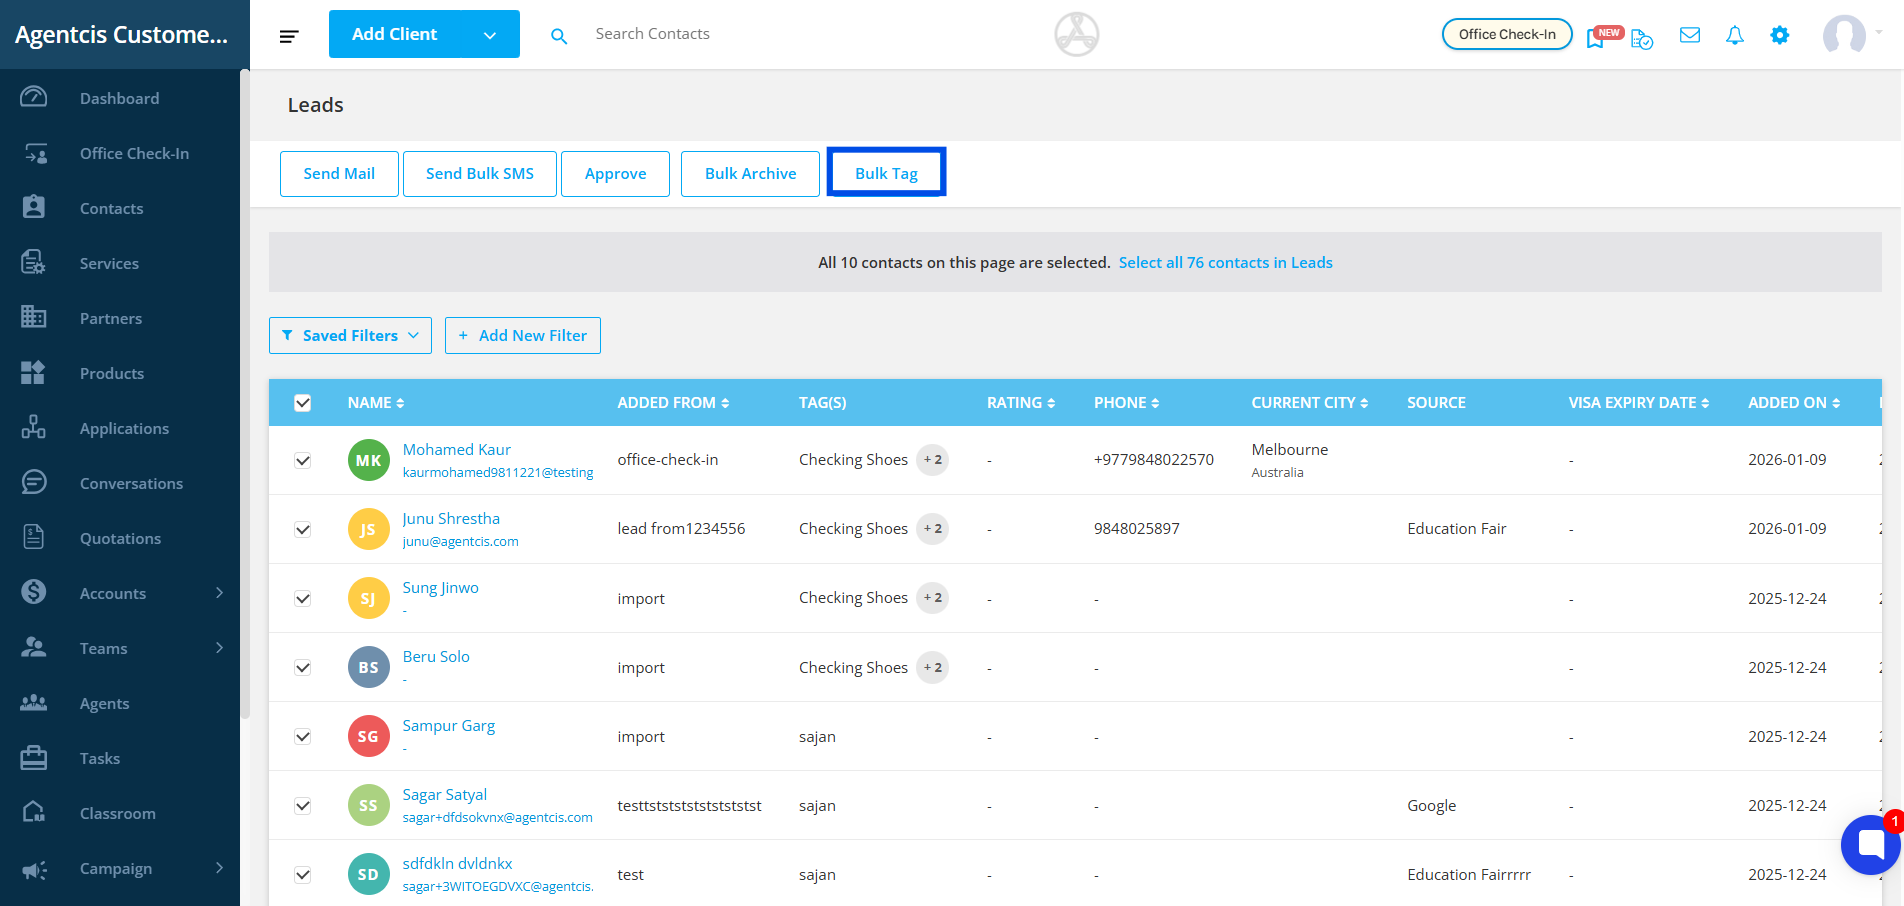
Step 3: Click the top checkbox to select all contacts for bulk tagging, or manually select only the contacts you want to tag.

Here are the ways you can select your contacts for bulk tagging:
i. You can select individual contacts by clicking the checkbox next to each contact.
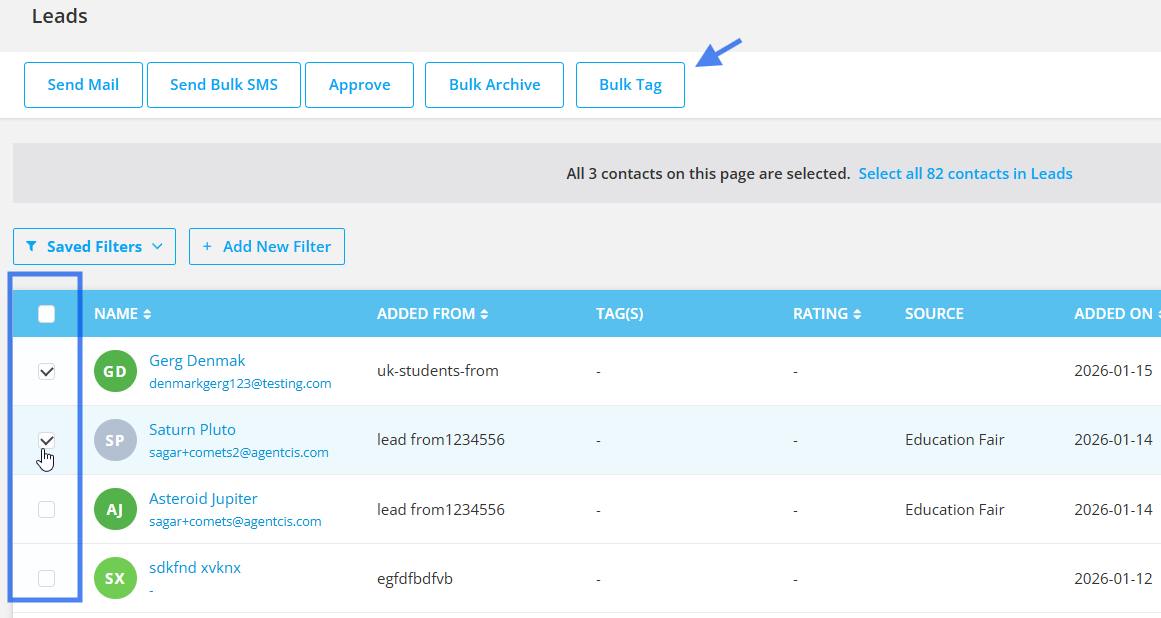
After you select a checkbox, Bulk tag option will appear on top.
ii. Increase rows per page to select more contacts
Agentcis provides a default of 10 rows per page. When you select the checkbox in the header, only the contacts visible on the current page (10 contacts) will be selected
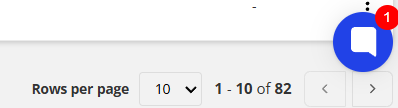
You can increase the number of rows per page up to 50 to select more contacts at once for tagging.
This can be done by selecting the desired number from the Rows per page dropdown.
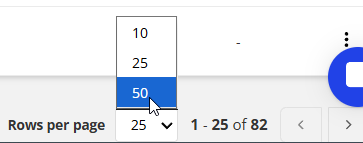
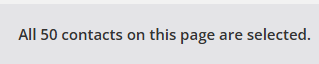
The contacts can now be selected upto 50 from the top row checkbox. You will see this message at the top thereafter.
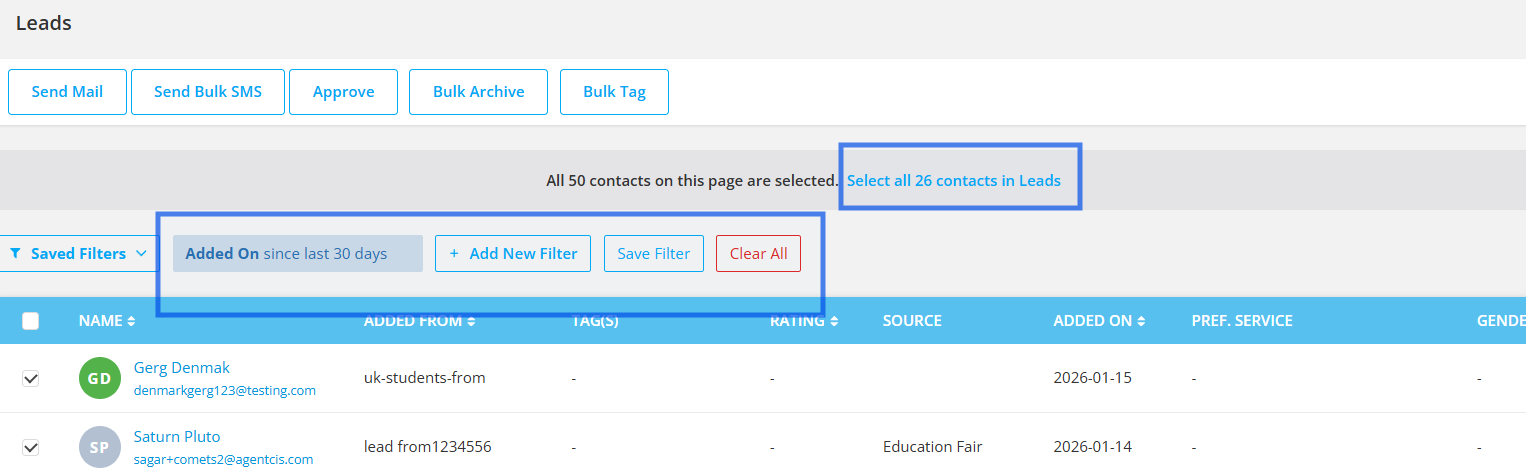
iii. You can select all contacts at once by choosing the Select all contacts option.
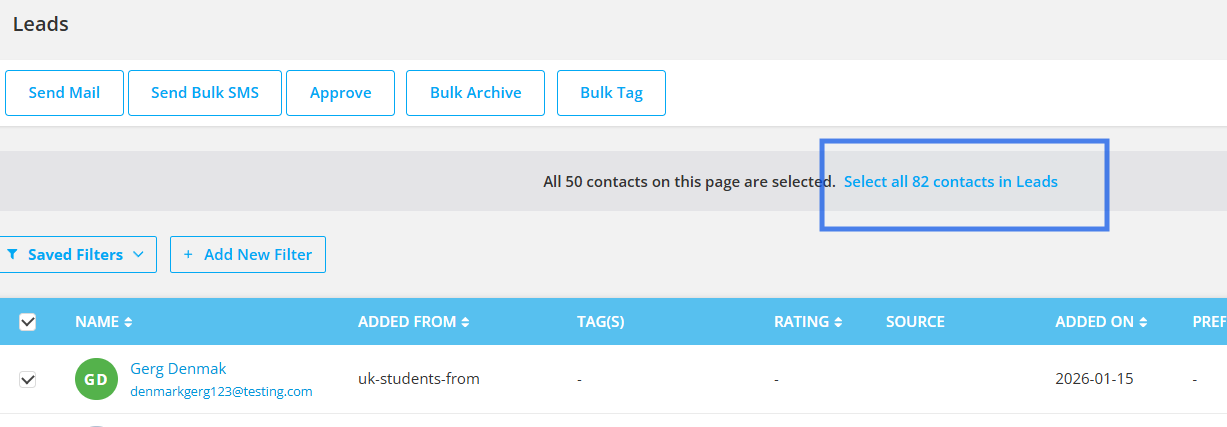
This option is especially useful when applying filters and tagging a specific group of contacts, such as contacts assigned to you or contacts added during the current month etc.
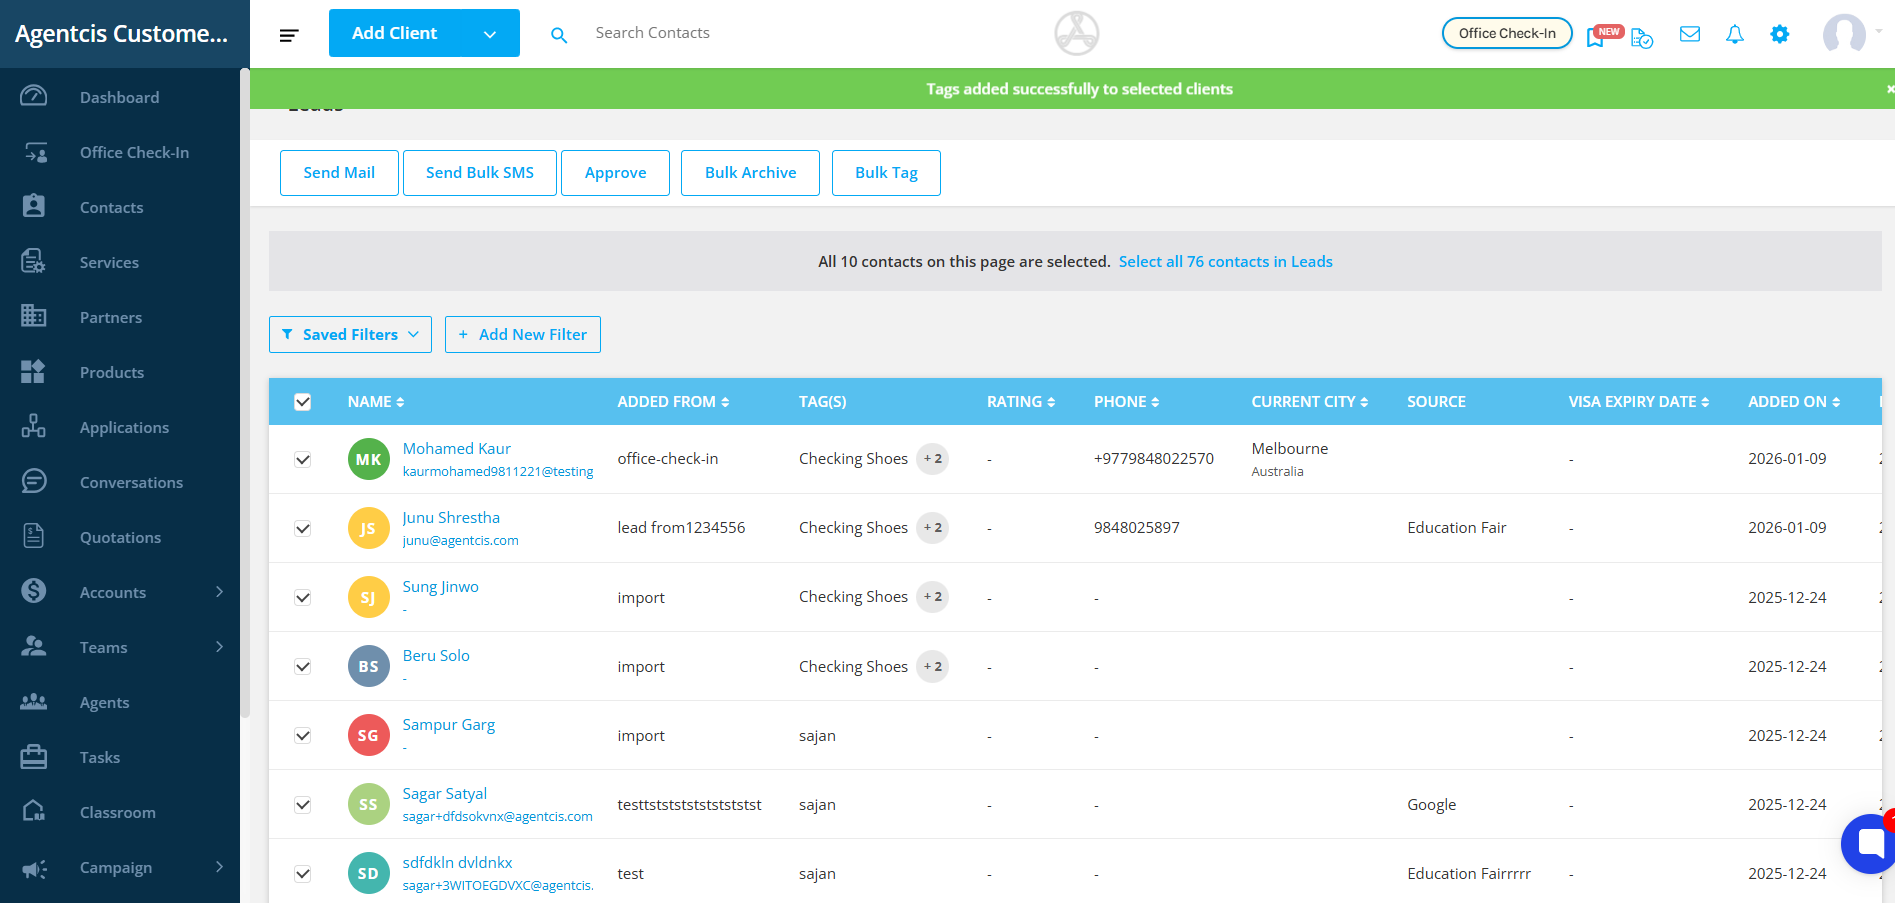
Step 4: After selecting all the required contacts, click on the “Bulk Tag” option to apply tags to all selected contacts at once.
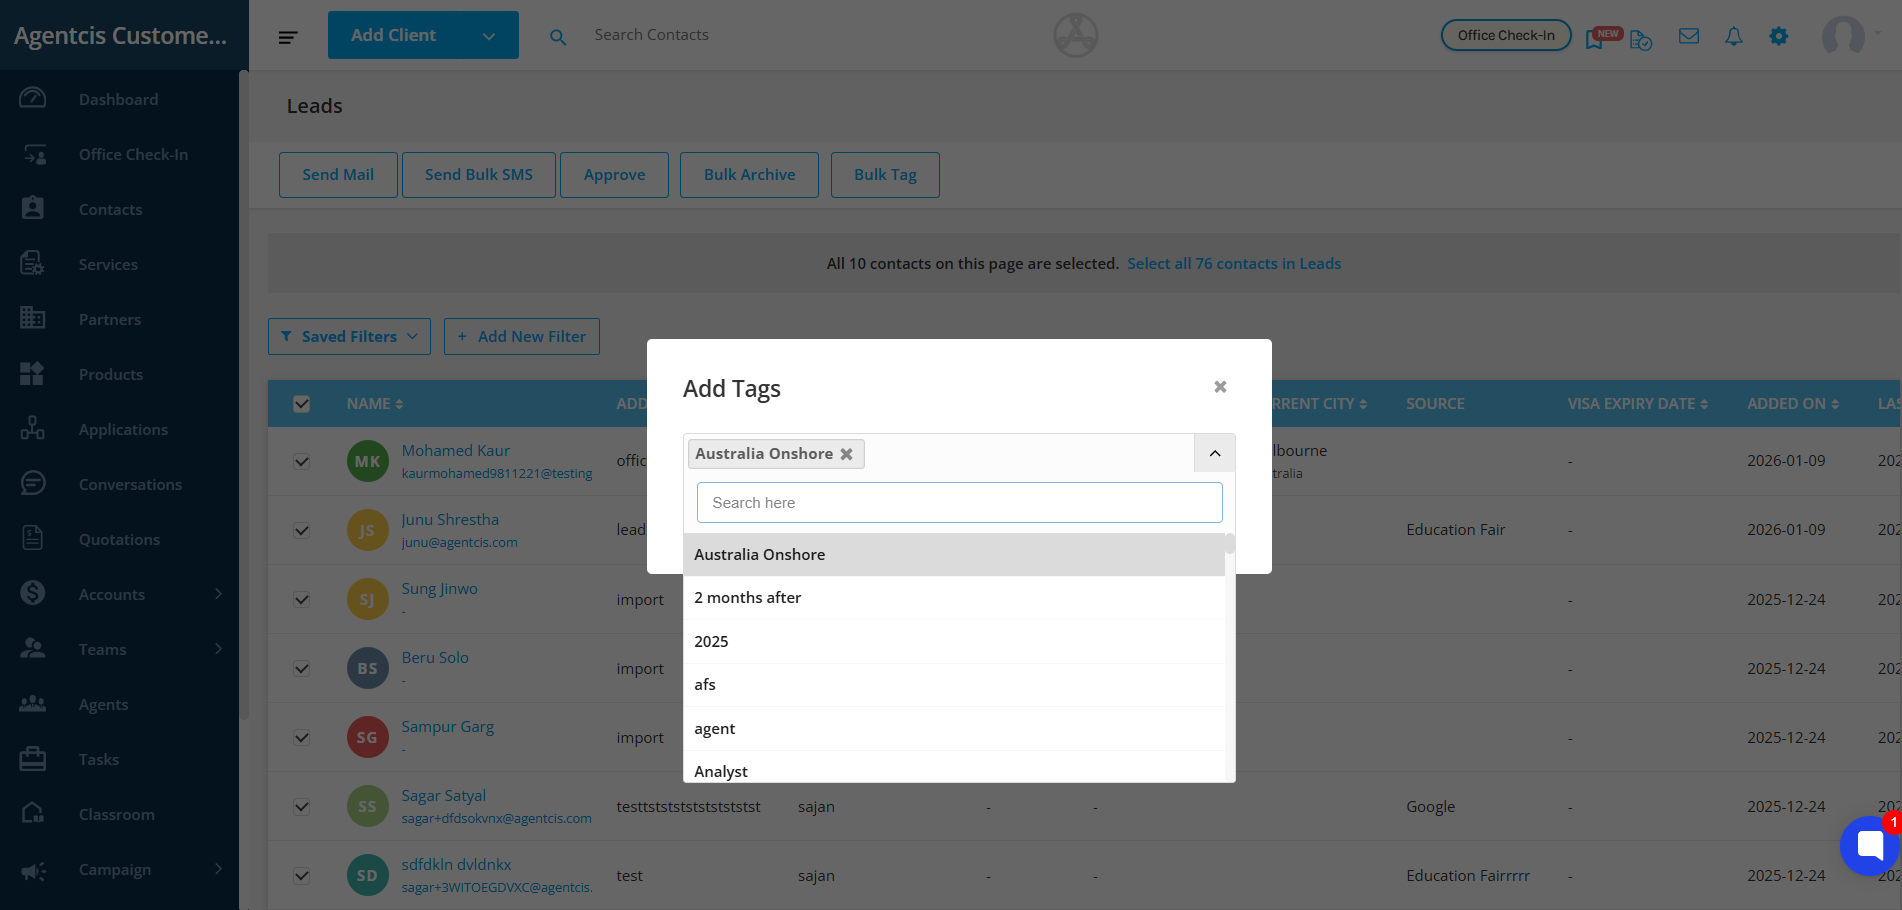
Step 5: Enter the relevant tags that you want to assign to the selected contacts.
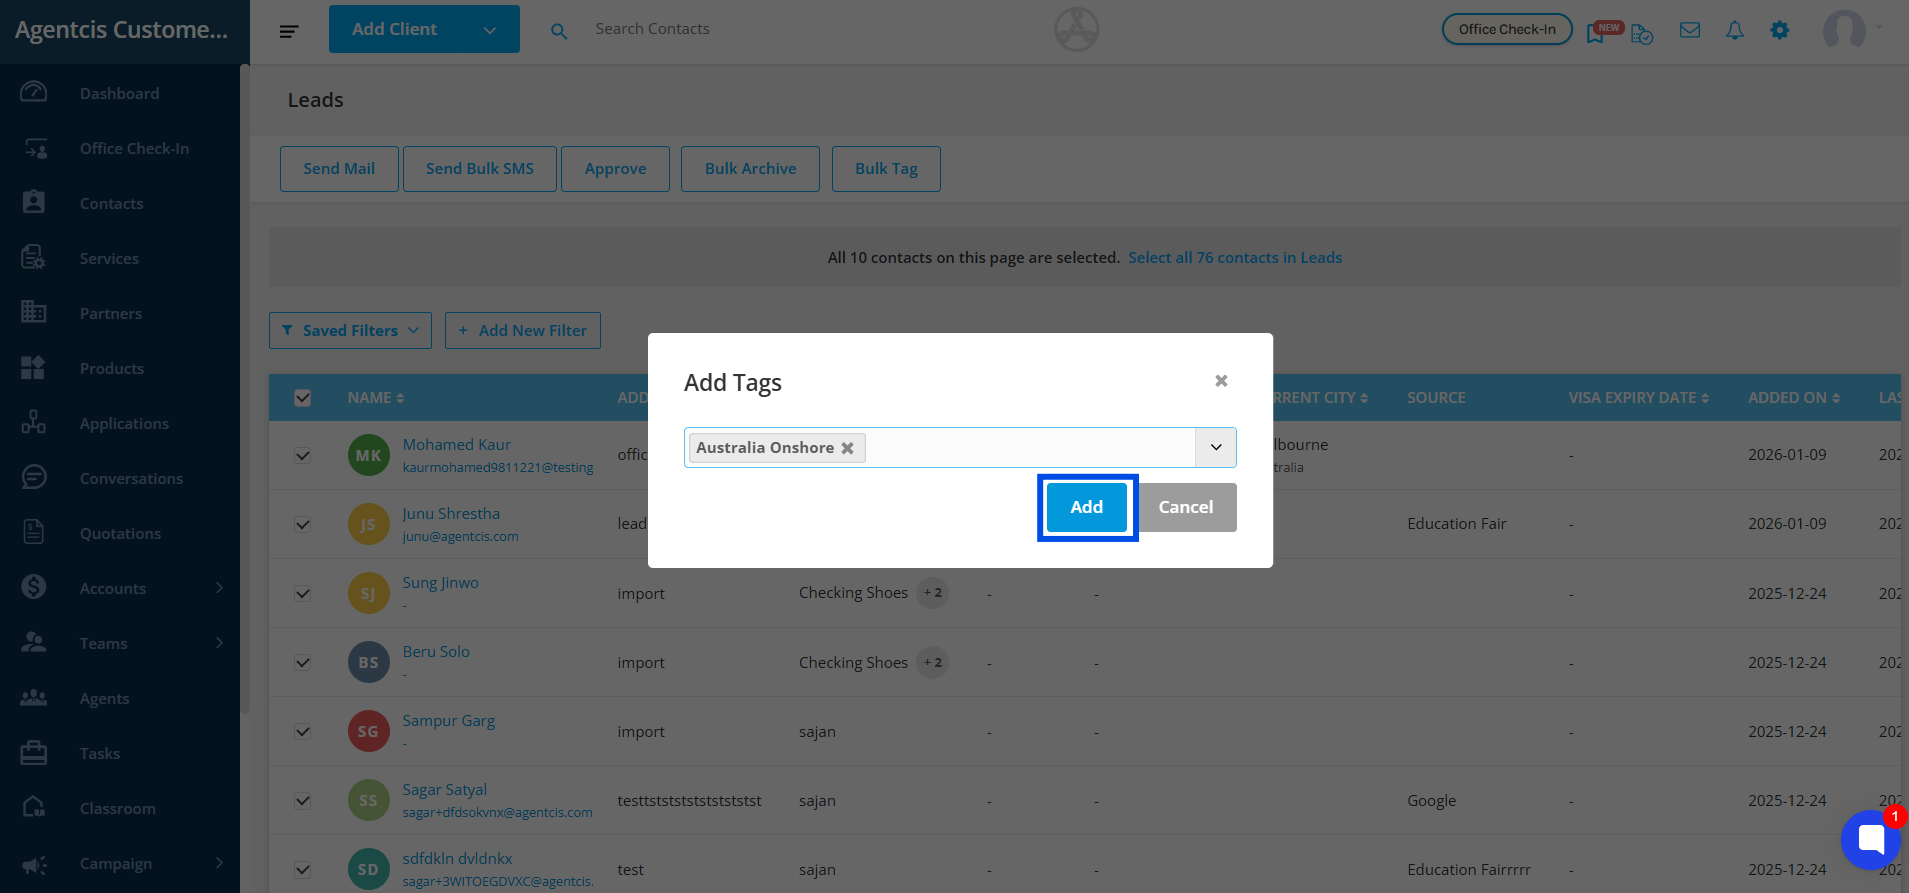
Step 6: Once you have entered the tags, click on “Add” to apply them to all selected contacts.
Step 7: A confirmation message saying “Tags added successfully to selected clients” will appear. Now you can easily filter, organize, and manage your contacts using the newly added tags.