Managing visitor information at a Consultancy or Migration Agency is crucial, but the traditional manual process of entering visitor data can be cumbersome and time-consuming. Recognizing this challenge, we are excited to introduce a streamlined solution to simplify the manual work of entering the visitors details.
Office Check-In feature in Agentcis. Previously, Counselors or Front Desk Officers had to manually input visitor data every time, leading to inefficiencies. With our new approach, we aim to alleviate this burden by providing a more user-friendly and efficient method for tracking office visitors. This enhancement not only saves time but also enhances the overall experience for both staff and visitors. we are committed to making the Office Check-In process more seamless, allowing your team to focus on providing excellent service rather than being bogged down by administrative tasks
This new feature facilitates the following activities:
1. Quick access of office check-in to counsellors in the top info bar
2. Dedicated Office Check-in QR where existing and new customers can check-in
3. Analytic View of Office Check-In with branch, date and host filter
· Office check-in trend over the period
· Average ratings
· Average waiting time
· Average Attending Time
· Total Check-Ins
4. Customers can now rate their office check-in experience via email
5. Added Office Visit category
6. Auto-assign leads to the office check-in host
7. Office check-in Activity Logs with branch, date, client and host filter
Please Note: This feature is available only in the Premium Plan.
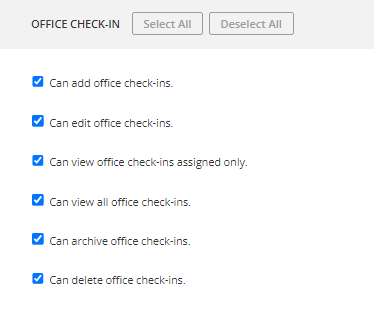
Permission to access the office check is required to add or edit the office check-in.
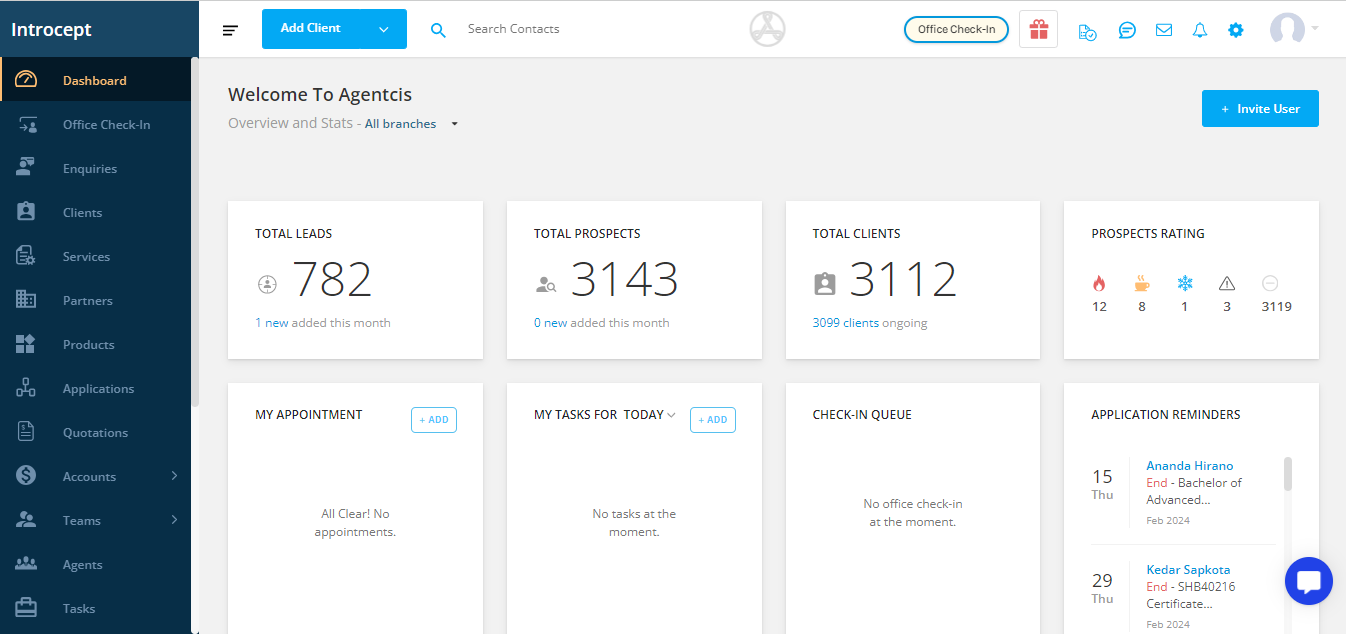
Step 1: Sign in to Agentcis and you will land on the Dashboard.
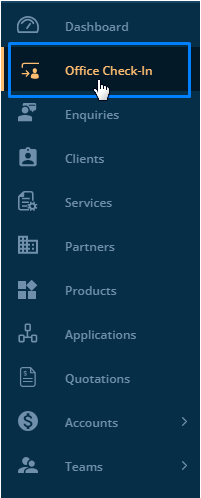
Step 2: Go to office check-in from the side navigation.
Step 3: You will land on the Office check-in listing page. Choose the required office to view the office check-in details.
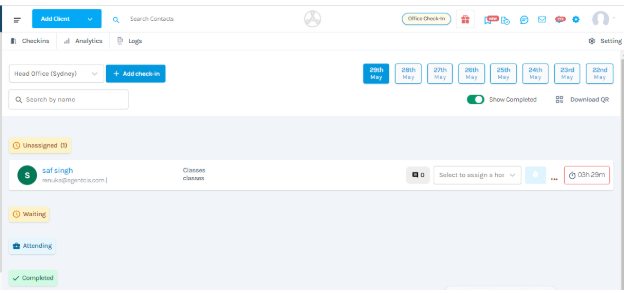
Step 4: Click on the dropdown on the top left corner to change the Office.
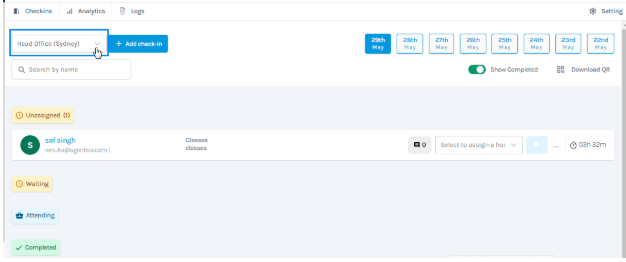
Please note: You can view the Office check-in details of the secondary office if you have access to the secondary offices.
Step 4: Generate and download a Unique QR Code
QR Codes are generated uniquely for each branch office. The user can produce the QR code for the desired branch office by clicking on the ‘Download QR’ button.
By implementing QR code check-ins, Agentcis enhances efficiency and provides a better experience for students seeking counseling.

Step 1: Visitors should scan the QR code through their mobile device

If you want to add the office check in manually, you can click on the “Add Check in” tab on the top left corner.

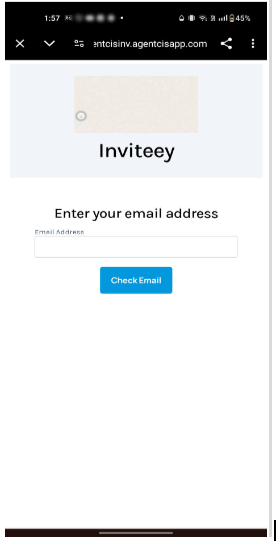
Step 2: After scanning the QR Code, the Visitor will be redirected to the form. Enter the email address in the form.
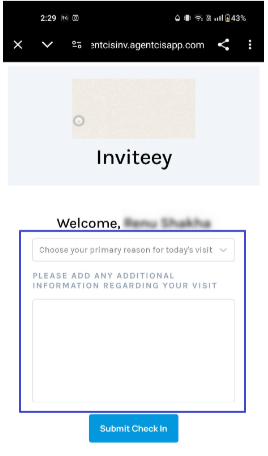
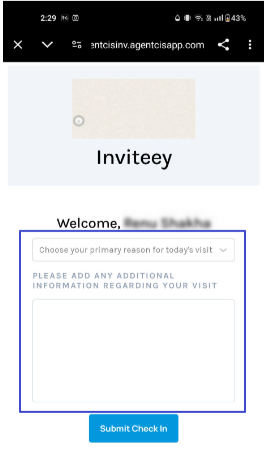
Step 3: If the visitor is an existing contact and the email of the visitor already exists in the system then the visitor will be directed to fill the detail of the visit purpose.
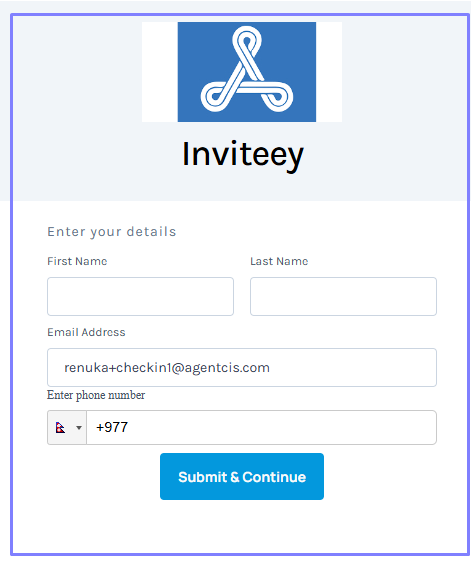
Step 4: If the visitor is a new lead and the email id of the visitor does not exist in the system then the visitor will be directed to fill the details in the form. Once the details is filled by the visitor, the details entered will be used to add the visitor as a new lead in the Enquiries section as well.
Step 5: After the visitor submits the Form, it is listed under a Unassigned List in the Office Check-In Listing Table.

Step 1: On the Listing Page, Click on the drop-down of the “Select to assign a host” to assign the Host to the Visitors.

Step 2: The client will be listed on the waiting list once assigned to the user. The host will be notified after the Visitor is assigned to him in the top info bar.

Step 3: Host should click on the Visitor Waiting Notification on the top info bar to check the waiting time and comment of there is any. Also to attend the visitor.

Note: The Host can also attend the visitor from the waiting list.

To add a new comment Please follow these steps:
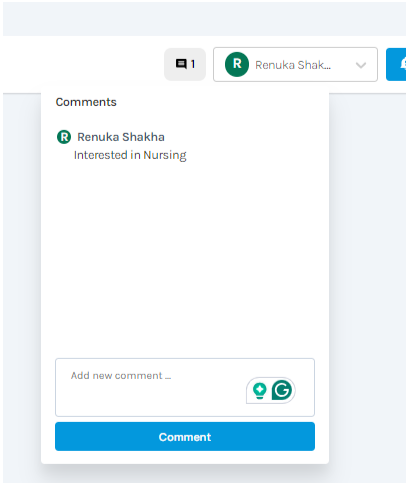
Step 1: Go to the office check-in and you can see the comment icon and click it to add a comment.

Step 2: You can view all the comments by clicking on the comment icon.
Step 1: Click on the "Mark Completed" button to view all the Office Check-In completed list.

Other than QR, the office check-in can also be added directly. For this follow the following steps:
Step 1: In the office check-in detail page, Click on Add Check-in Tab.

Step 2: A pop-up opens up to enter the email id of the visitor. Once the email id is added select "Check Email" (Same step as adding a check-in through a QR code)
Step 3: If the visitor is an existing contact and the email of the visitor already exists in the system then the visitor will be directed to fill the detail of the visit purpose.
Step 5: If the visitor is a new lead and the email id of the visitor does not exist in the system then the visitor will be directed to fill the details in the form. Once the details is filled by the visitor, the details entered will be used to add the visitor as a new lead in the Enquiries section.
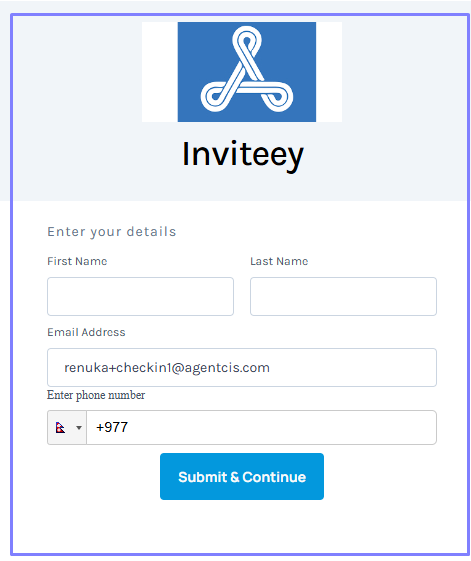
Step 6: After completing the required information you can create the Office check-in successfully.