Running a WhatsApp campaign is all about creating engaging messages, managing your contacts carefully, and tracking how well your campaign performs. This helps you build meaningful connections with your audience and achieve your goals effectively.
Before you start your WhatsApp campaign, it’s important to first complete the step-by-step process of integrating WhatsApp with Agentcis. This integration ensures everything runs smoothly and you can make the most out of your campaign efforts.
Not completed the Whatsapp Integration setup yet?
Click hereAfter WhatsApp is integrated into the system, you can follow the given steps to create and run a WhatsApp campaign:
Step 1: Click on Campaign from the left-side navigation bar and then WhatsApp.
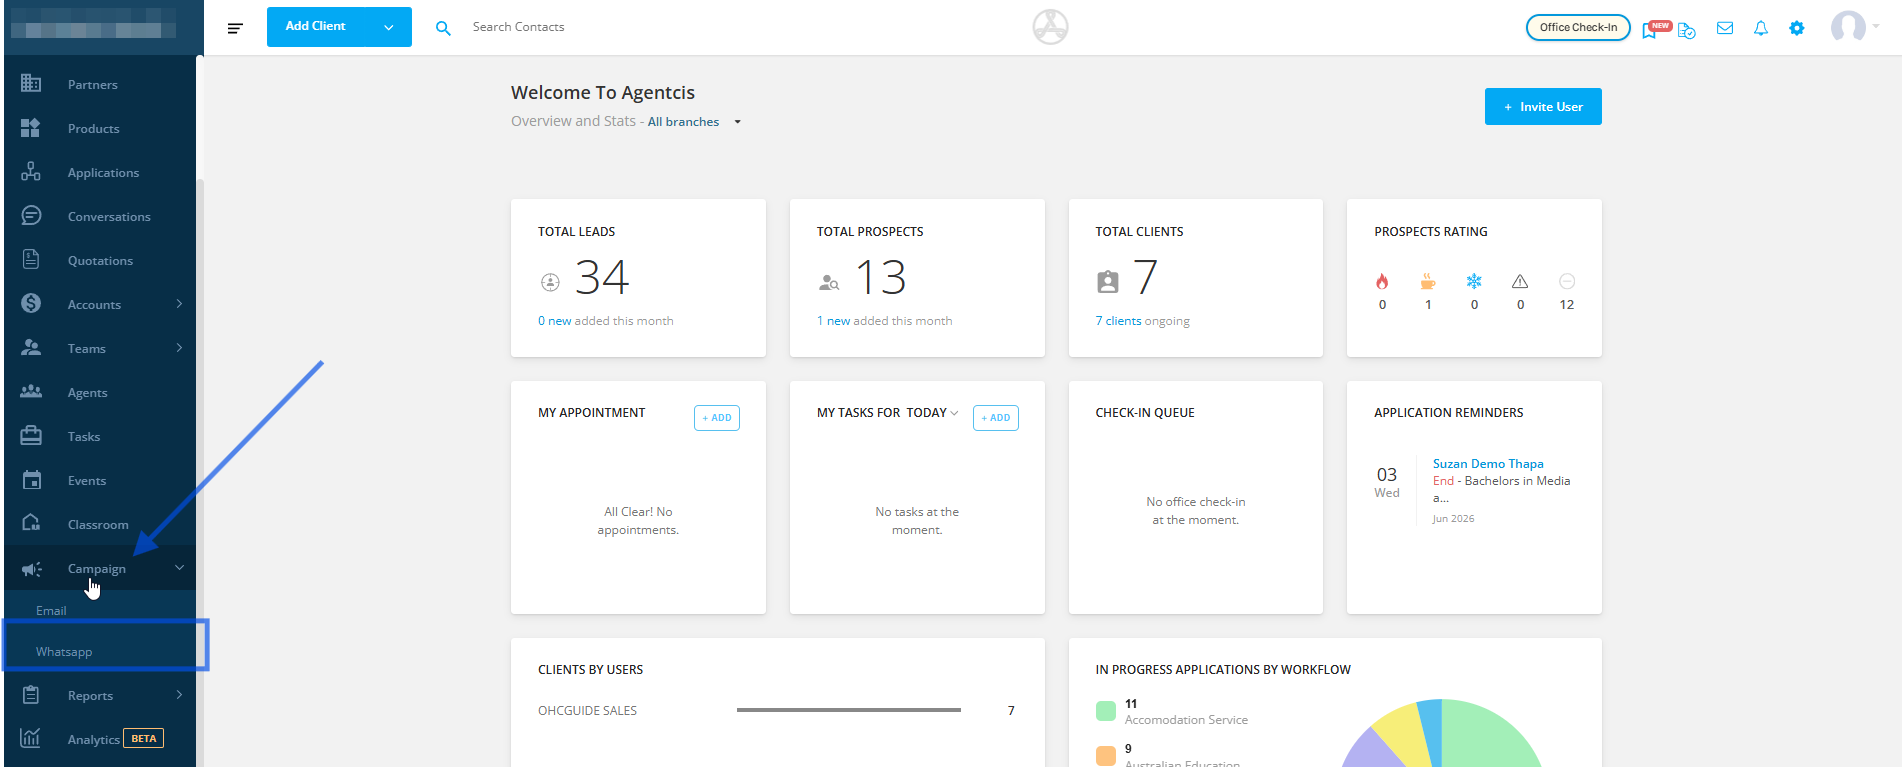
You will land on WhatsApp Campaign Dashboard page.
Step 2: Then, click on 'Create New Campaign' to begin setting up your campaign'.
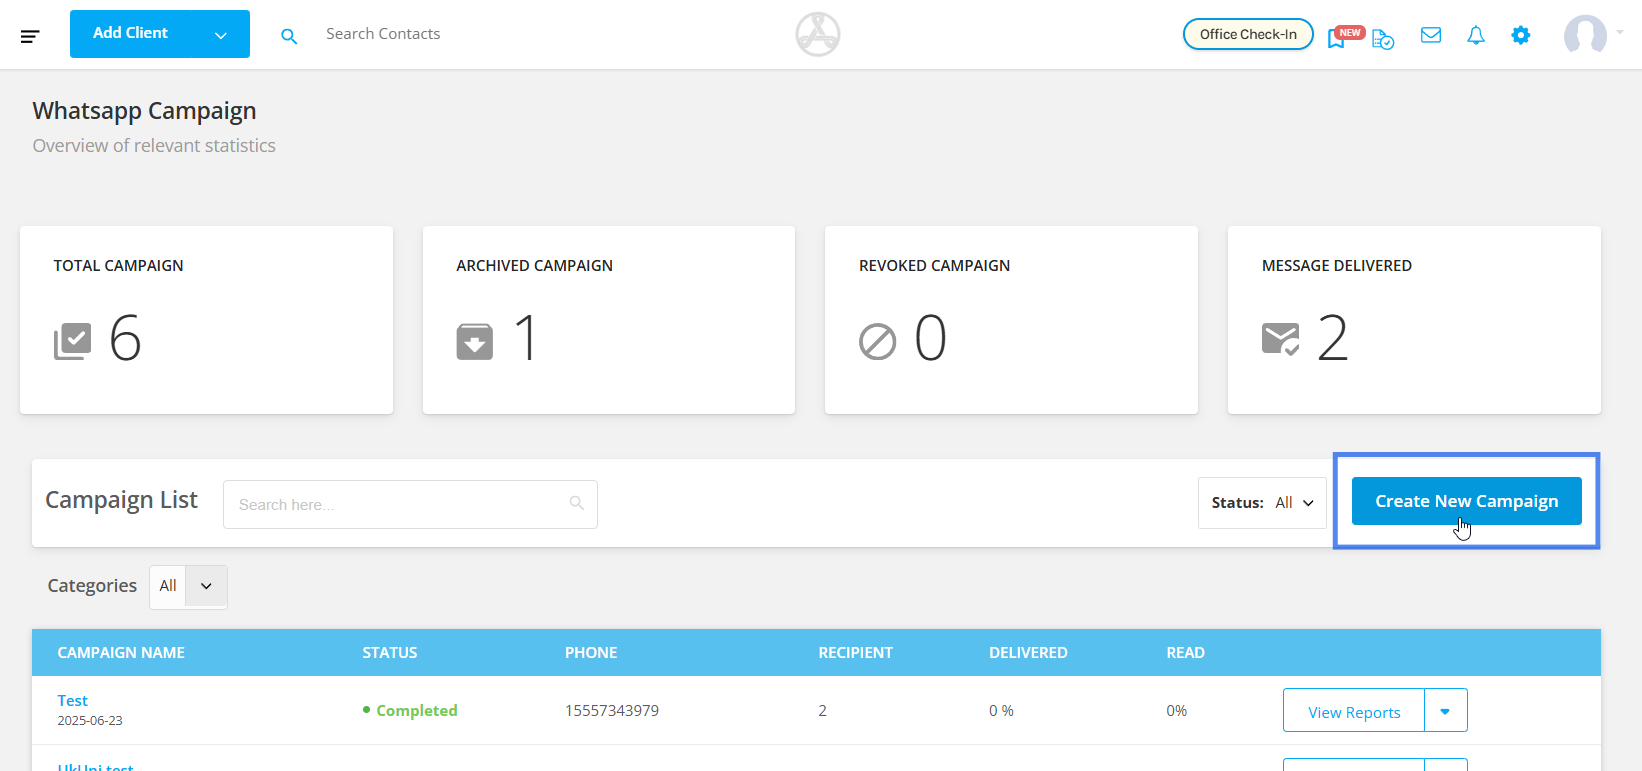
Once you click on "Create New Campaign", you’ll be directed to a page where you need to provide the essential details of your campaign. Here’s a breakdown of each field you need to complete:
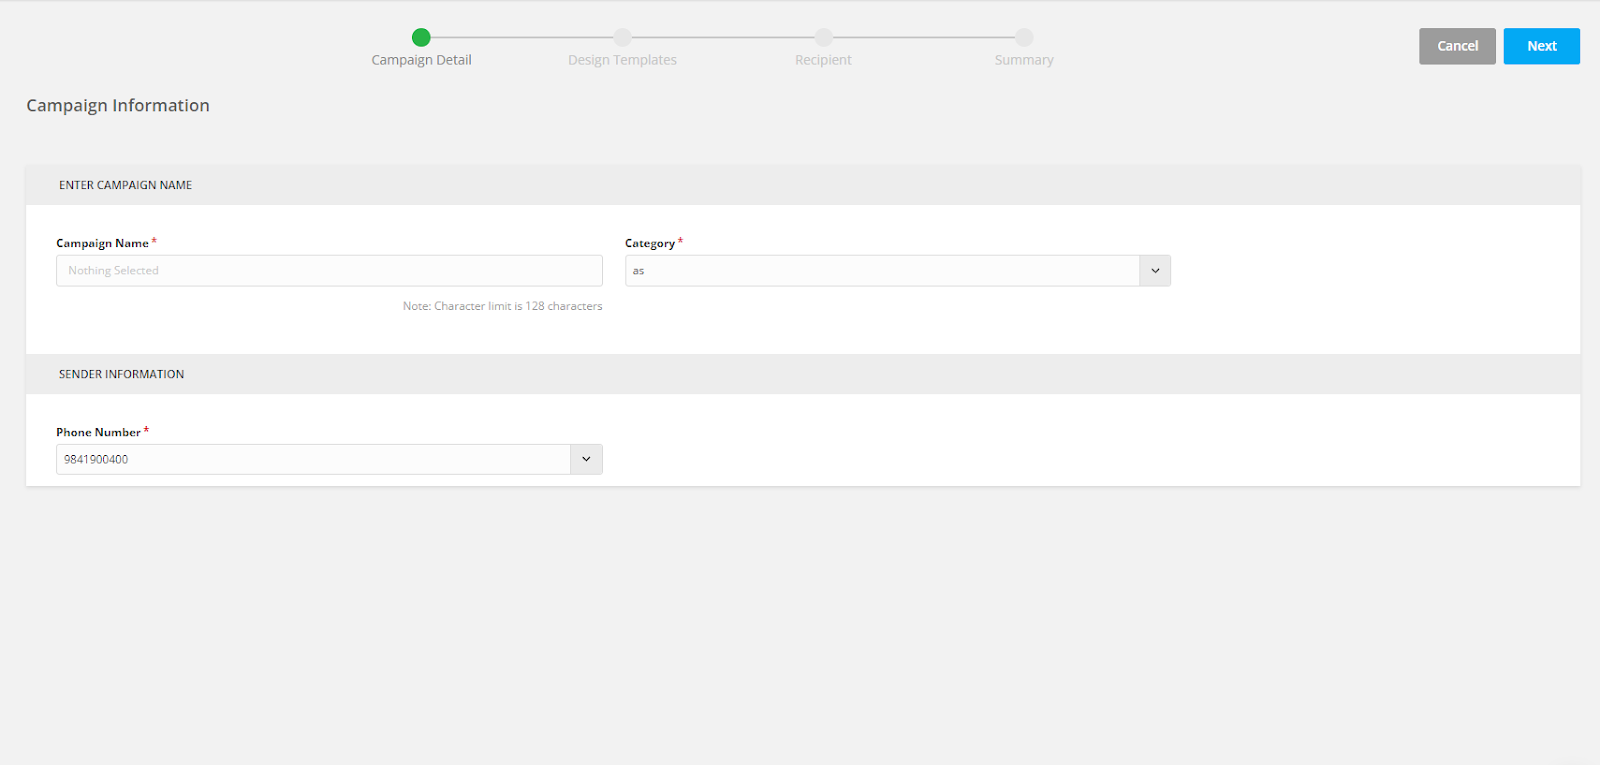
This is the title of your campaign and should help you easily recognize it later.
Choose a name that clearly reflects the purpose or content of your campaign.
Example:
If you're running a promotion for a July intake, you could name it "July Intake Offer 2025
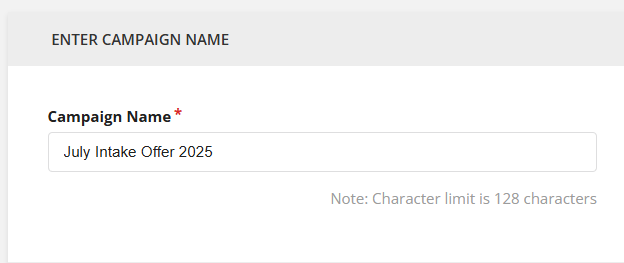
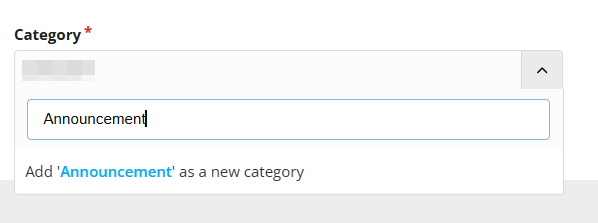
You’ll need to choose a category that best represents the purpose of your campaign.
Categories are not pre-listed, so you'll need to create one first. Simply type your desired campaign category, and the system will prompt you to create it by clicking on the option.
Categories might be:
Education: For updates such as course openings, scholarship opportunities, and application deadlines.
Announcement: For sharing educational content, event invitations, or important academic news.
Education Fair: For details about upcoming events, education fairs, or similar gatherings.
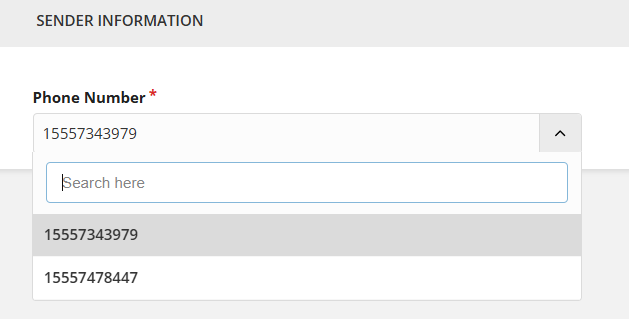
Select the WhatsApp-enabled phone number you want to send this campaign from.
This number should already be connected to your WhatsApp Business account through your integration.
After filling up these details, click on Next from the top right section of the campaign information page.
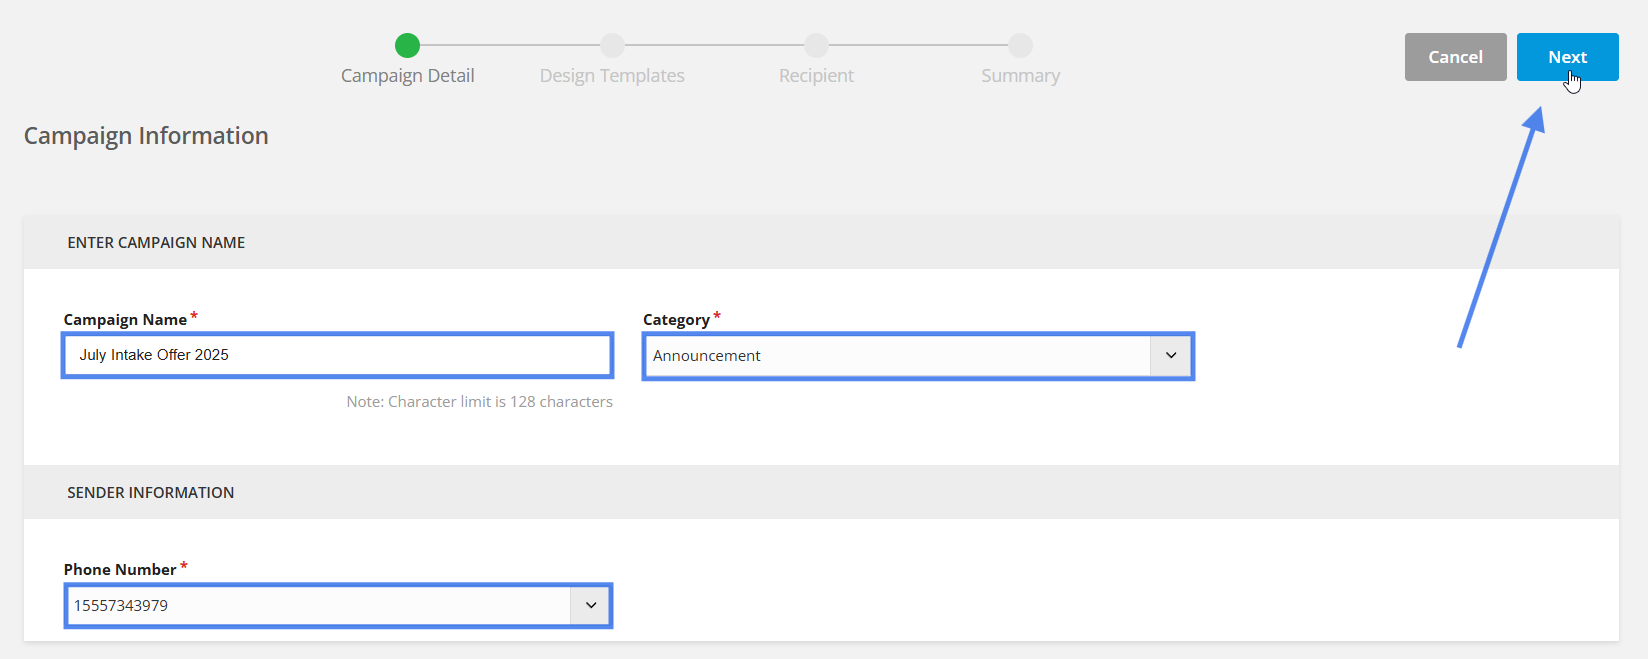
a. You'll be taken to the Design Templates section. Here, you can create custom templates or use the available templates.
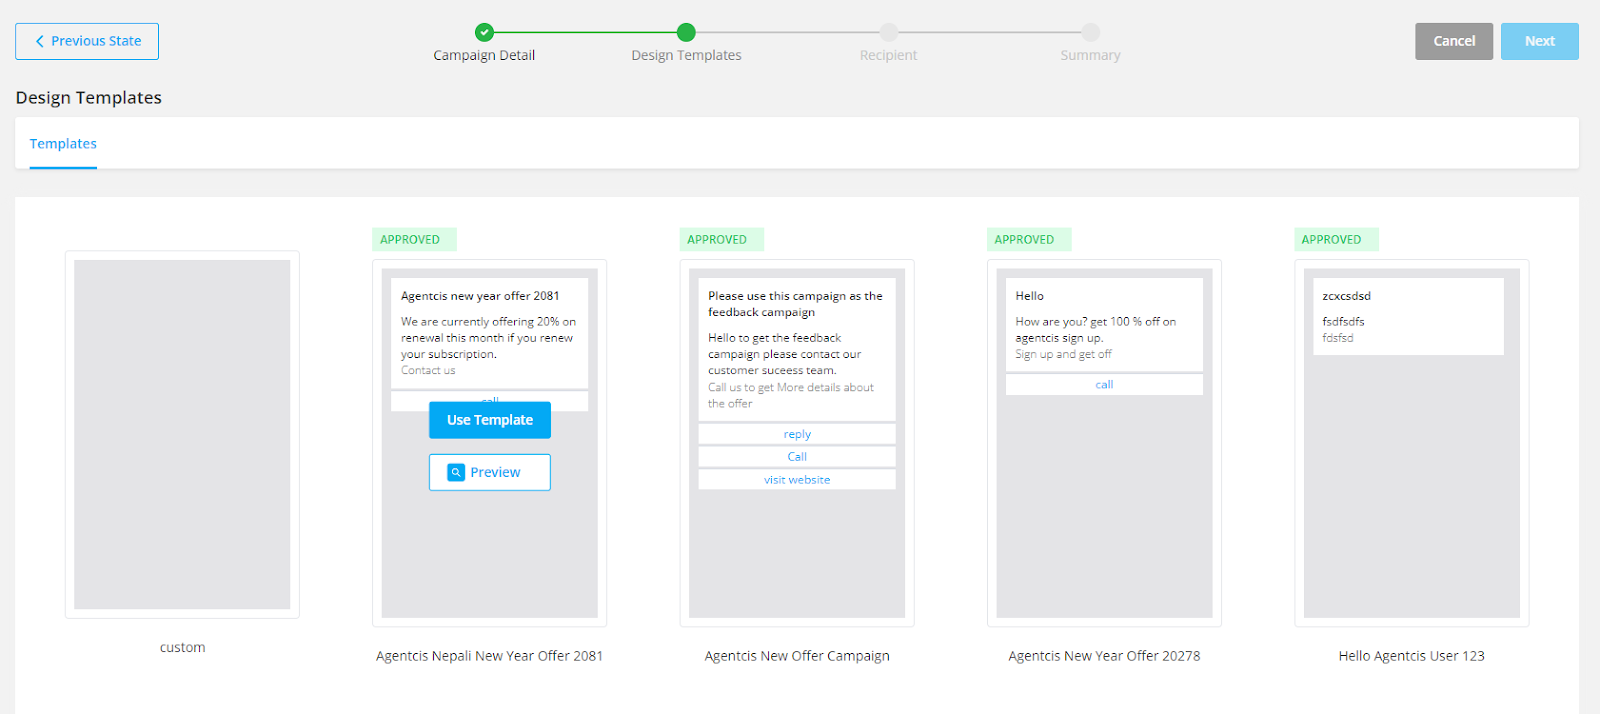
For more info, please visit this link:
Getting started with WhatsApp Template
To start a conversation with a customer via the WhatsApp Business API, you'll need to use a WhatsApp template.
b. If you want to create a new template, click on the, “Create Template” option and create your own design.
Analytics help you to understand how your campaign has performed. A brief insight into the number of recipients, open and click rate, delivered, hard bounces, and soft bounces from the campaign list. You can also filter according to the status of the campaign.
Furthermore, You can view the in-depth Analytics by clicking the view reports button on the right side of the campaign list.

Under Report
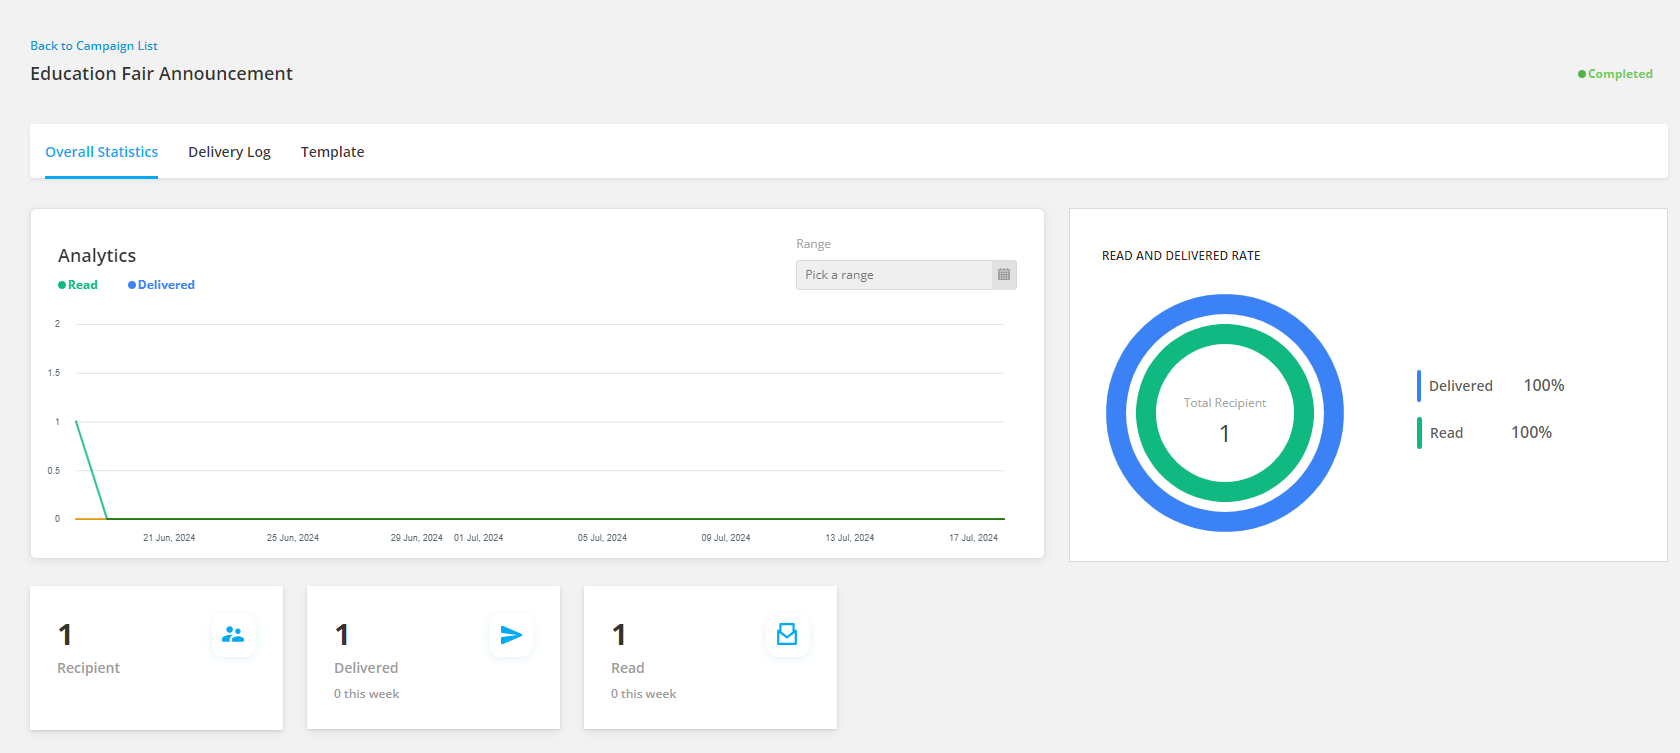
Overall Statistics
The overall statistics give a glimpse of all the metrics of the email campaign. Here, You can also filter the statistics by picking the date range.
Delivery Log
View the delivery log of the whatsapp campaign by clicking on the delivery log tab.
Here you also have the option to retry all failed deliveries

Templates
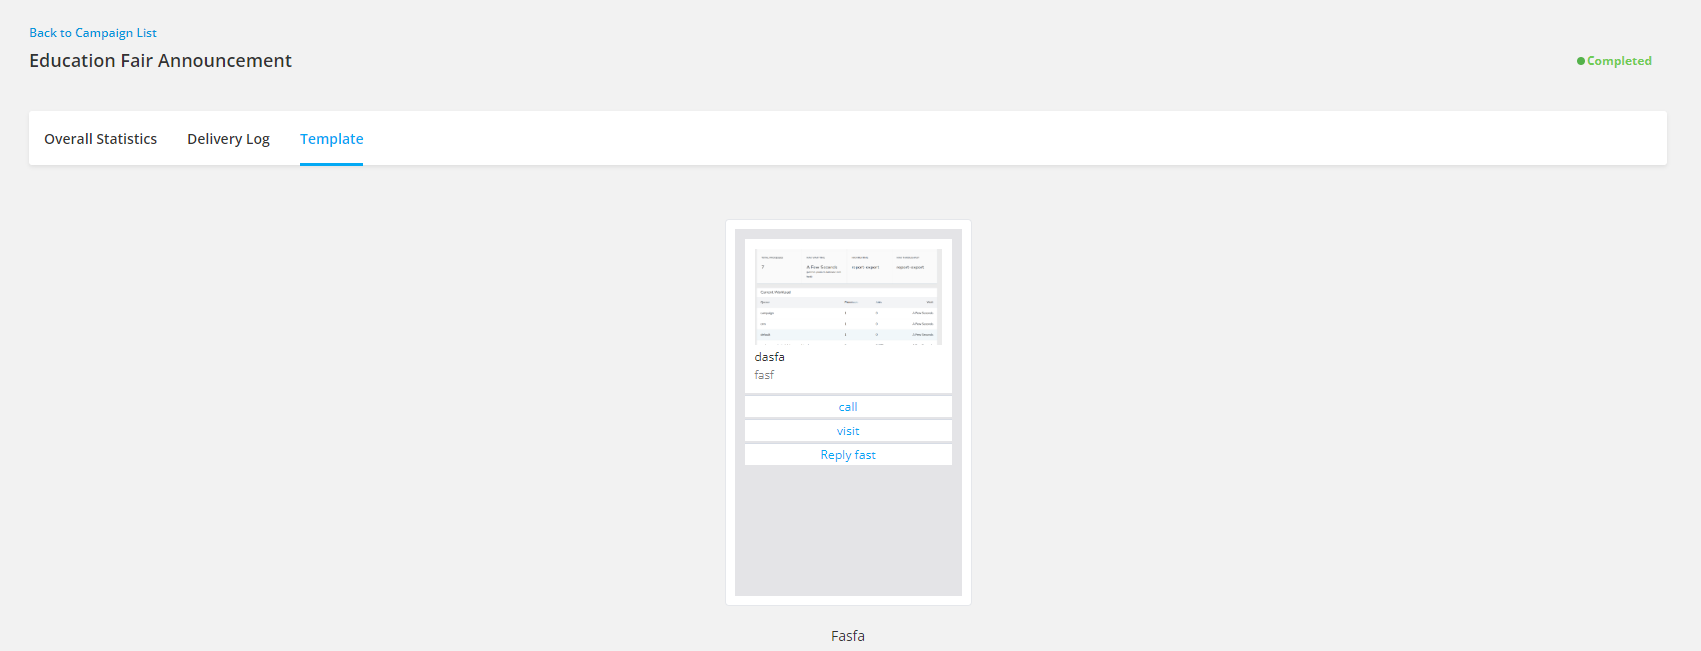
View the template used in the campaign by clicking on the Template tab.
