With the help of the Agentcis Reports feature, you can generate any specific report you require and export it in CSV. This can be achieved by using different filters and combination of these filters to generate the exact information you looking for.
You can find 7 categories of reports in Agentcis
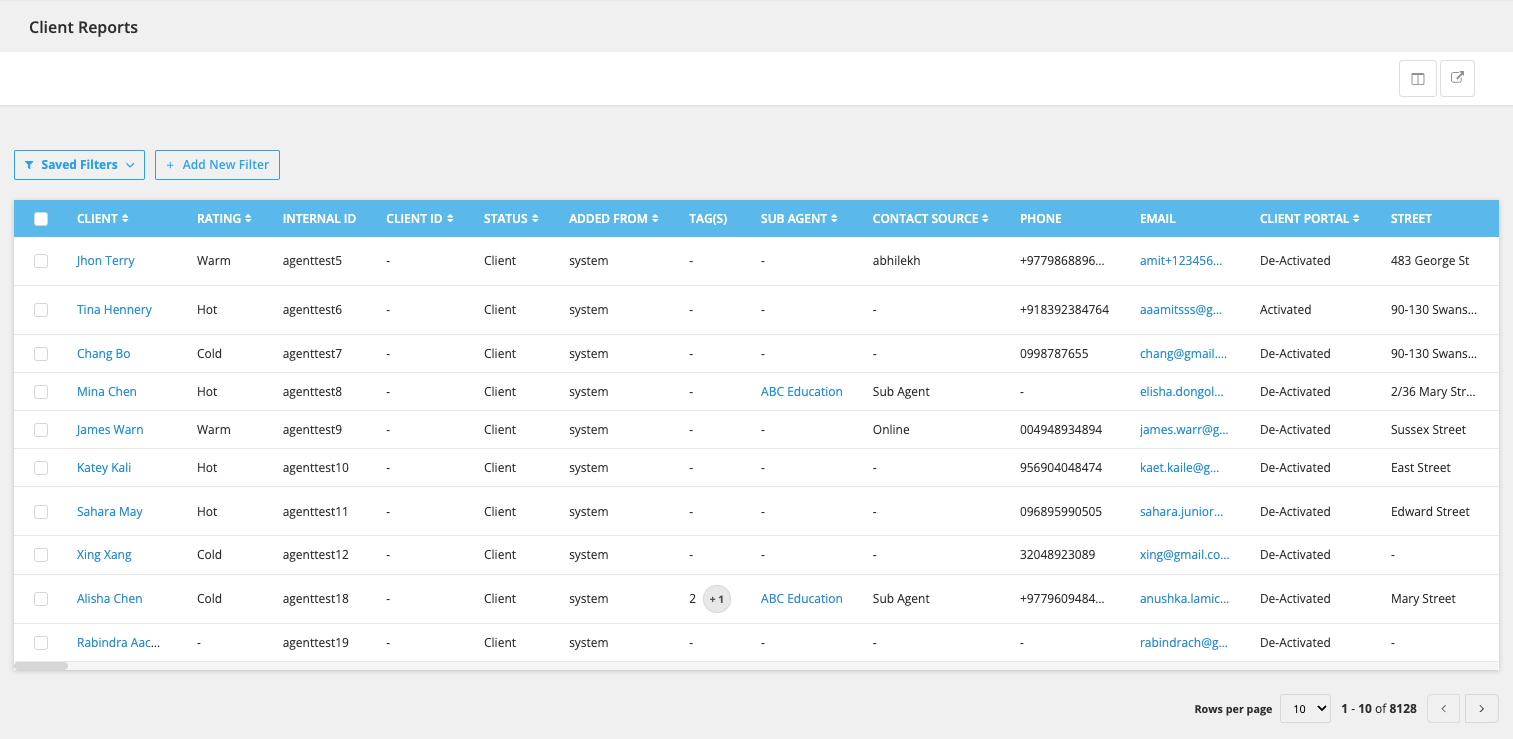
Client Reports (contains leads, prospect and client general information data)
Application Report (contains all client's applications data)
Client by Application Report (contains all client's general information data with application filters)
Invoice Report (contains all created invoices data)
Office Check-In Report (contains all created office check-in data)
Sales Forecast (contains all the revenue forecast data coming from each application and interested services)
Application Sales Forecast Report
Interested Services Sales Forecast Report
Tasks Report (contains divided into 2 sub reports - Personal and Office)
Personal Task Report shows all the tasks assigned to a particular user.
Office Task Report shows all the tasks of all team members of a branch office.
To use the Reports feature in Agentcis, make sure users have the necessary permissions depending on which reports they need access to.
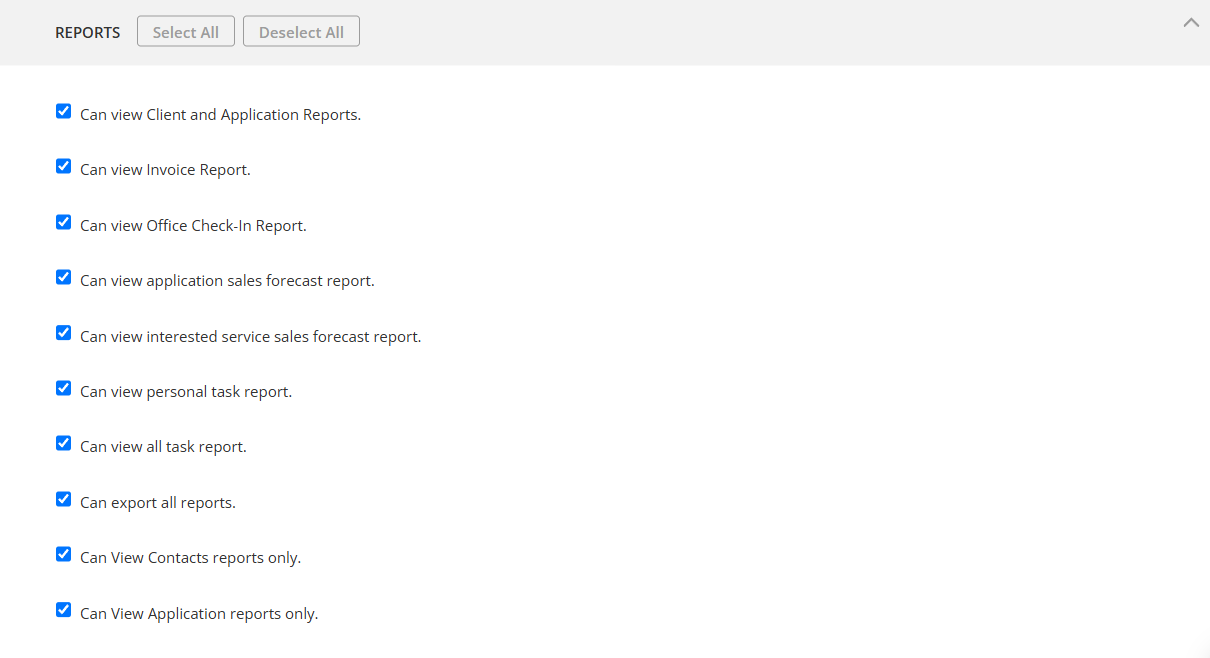
You can refer to this article for guidance on how to check and assign the appropriate permissions:
Permissions and different Roles
Managing users different roles
Then follow these steps:
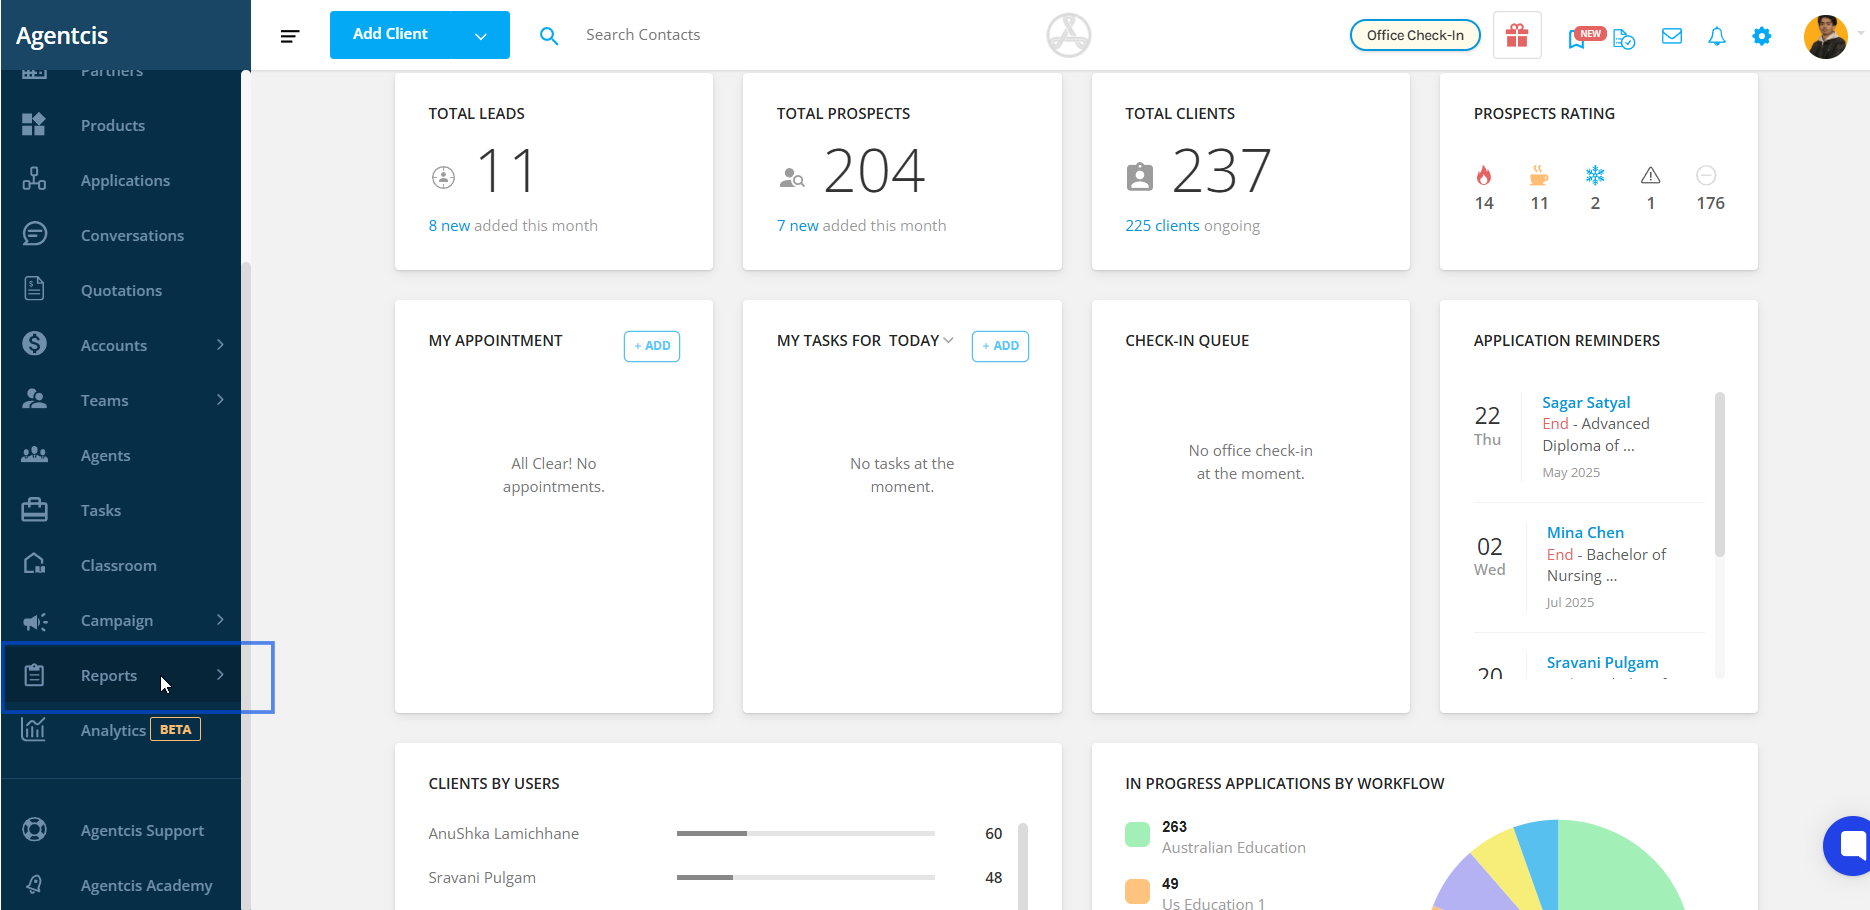
Step 1: Select Report from the side navigation bar.
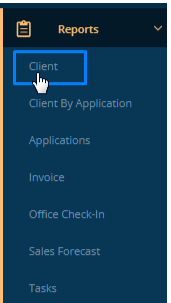
Step 2: Select Client from the drop down.
You can access each report by selecting it individually. All related actions can be done directly from the Reports page.
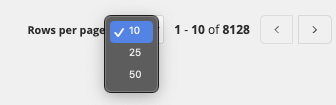
Rows per page and pagination (in all Reports)
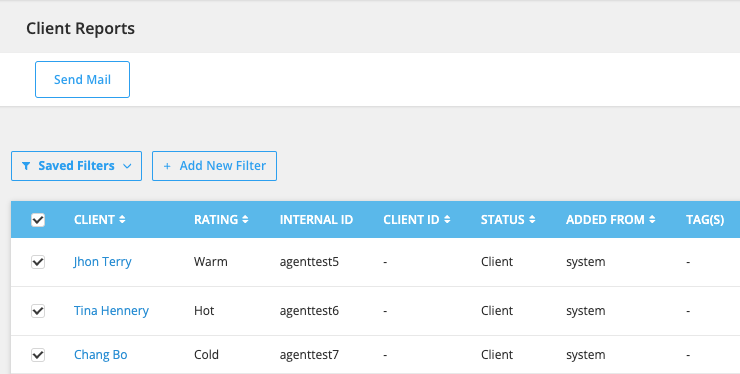
Send Bulk Email to 50 contacts (in Client, Client by Application and Application Reports)
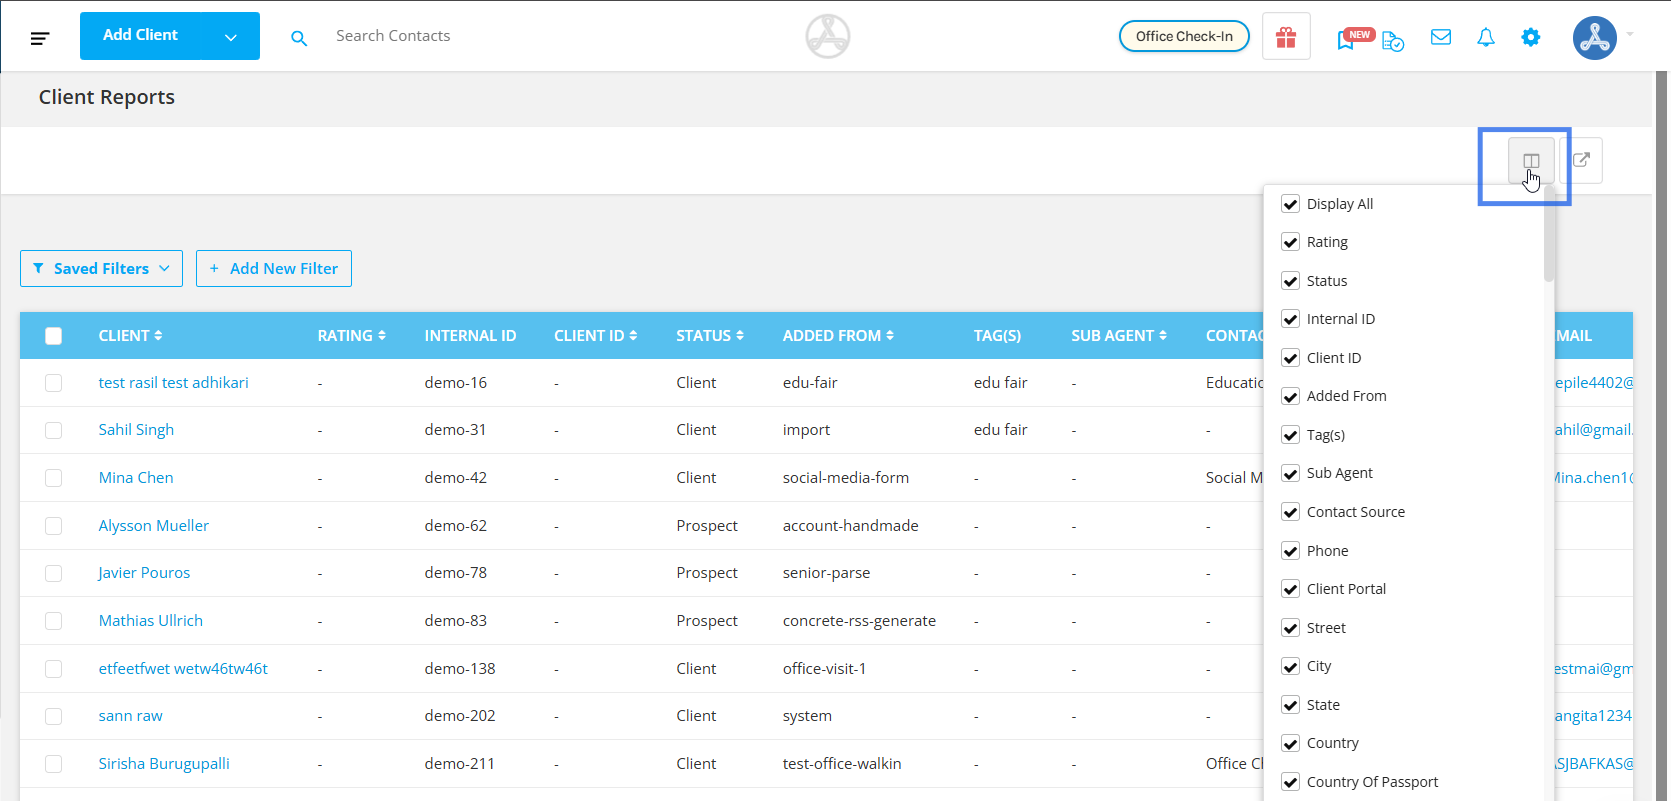
Select Columns for display in reports
Export Reports in CSV format
Use and Save Filters (in all Reports)
By default, the reports show 10 rows at a time. You can change this by adjusting the Rows per page option—up to a maximum of 50 rows.
You can also send bulk email to max 50 contacts from Client Report, Client by Application Report and Application report.
You can select individually or all 50 (max. no of rows per page).
If you don’t want certain columns to appear in the list, you can hide them by clicking the display icon in the top right corner.
You can manually select the ones that you want to display on the list view.

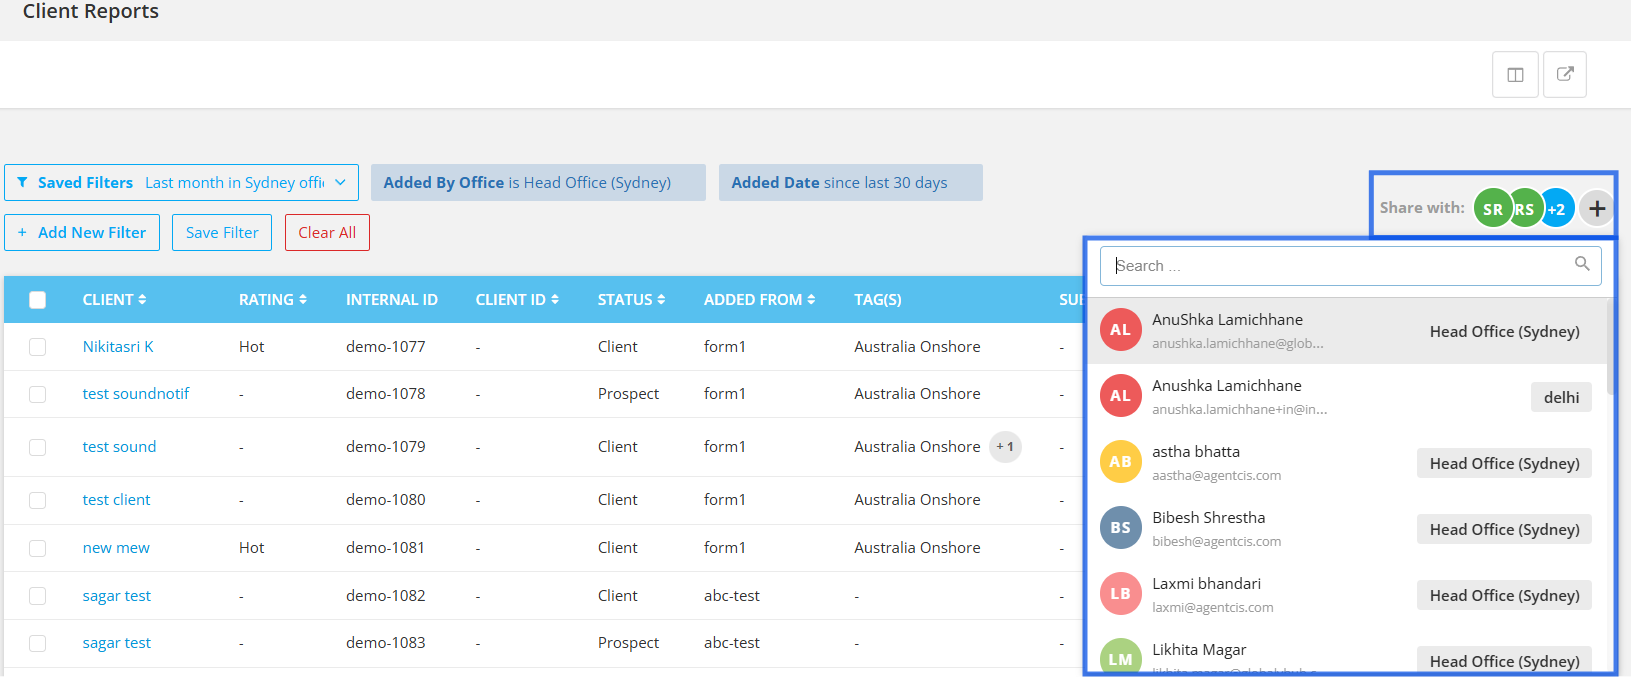
You can also use filters to get the more specific data sets as per your needs. Filters can also be saved for future reference.
For example, if you are willing to generate the reports of your clients who have been added for the last month, then you will need to add a filter named Added date and set date intervals. Follow these steps:
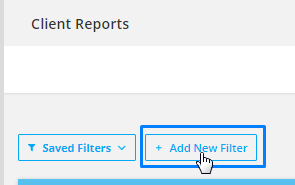
Step 1: In the clients reports section, click on + Add New Filter option.
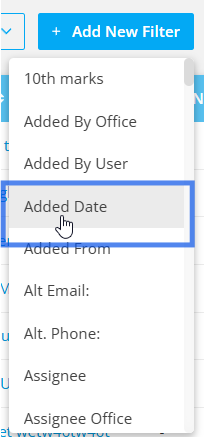
Step 2: Select Added Date Filter and then select last 30 days.
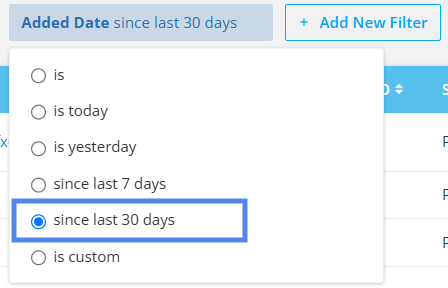
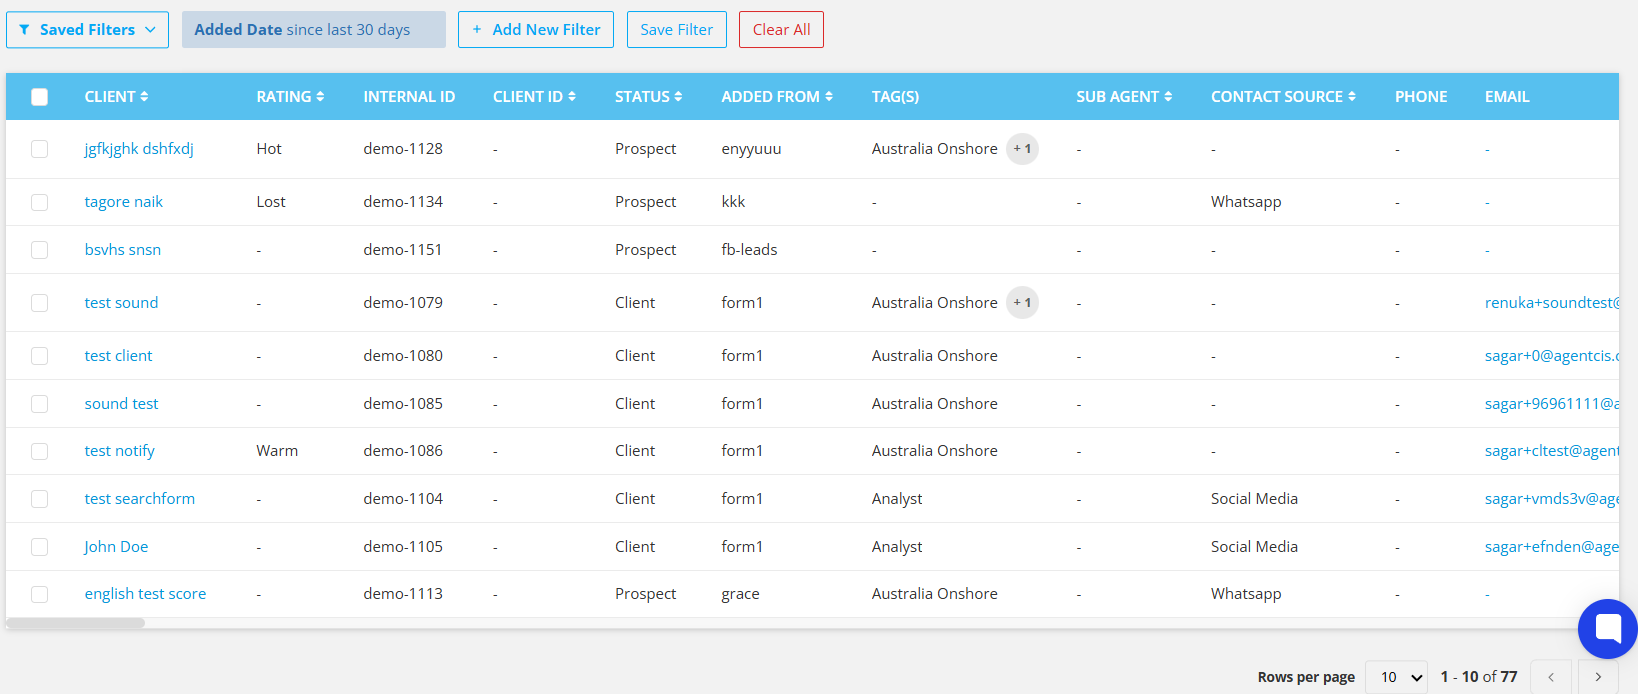
Now the contacts that were added in the last 30 days will be displayed.
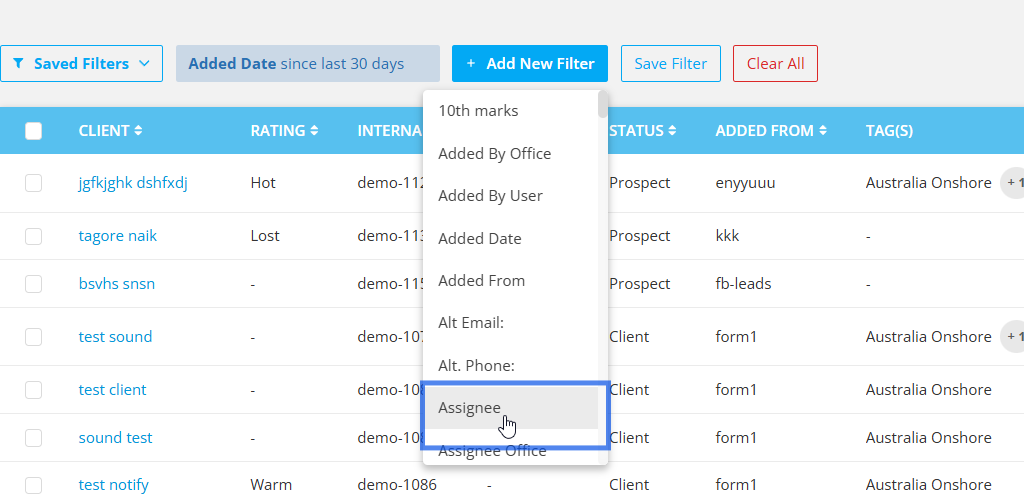
Step 3: Now, click on Add New Filter again. Please note that you can use multiple filters at the same time to get more specific results.
Like if you also want to get the clients report added within the last 30 days and assigned to you.
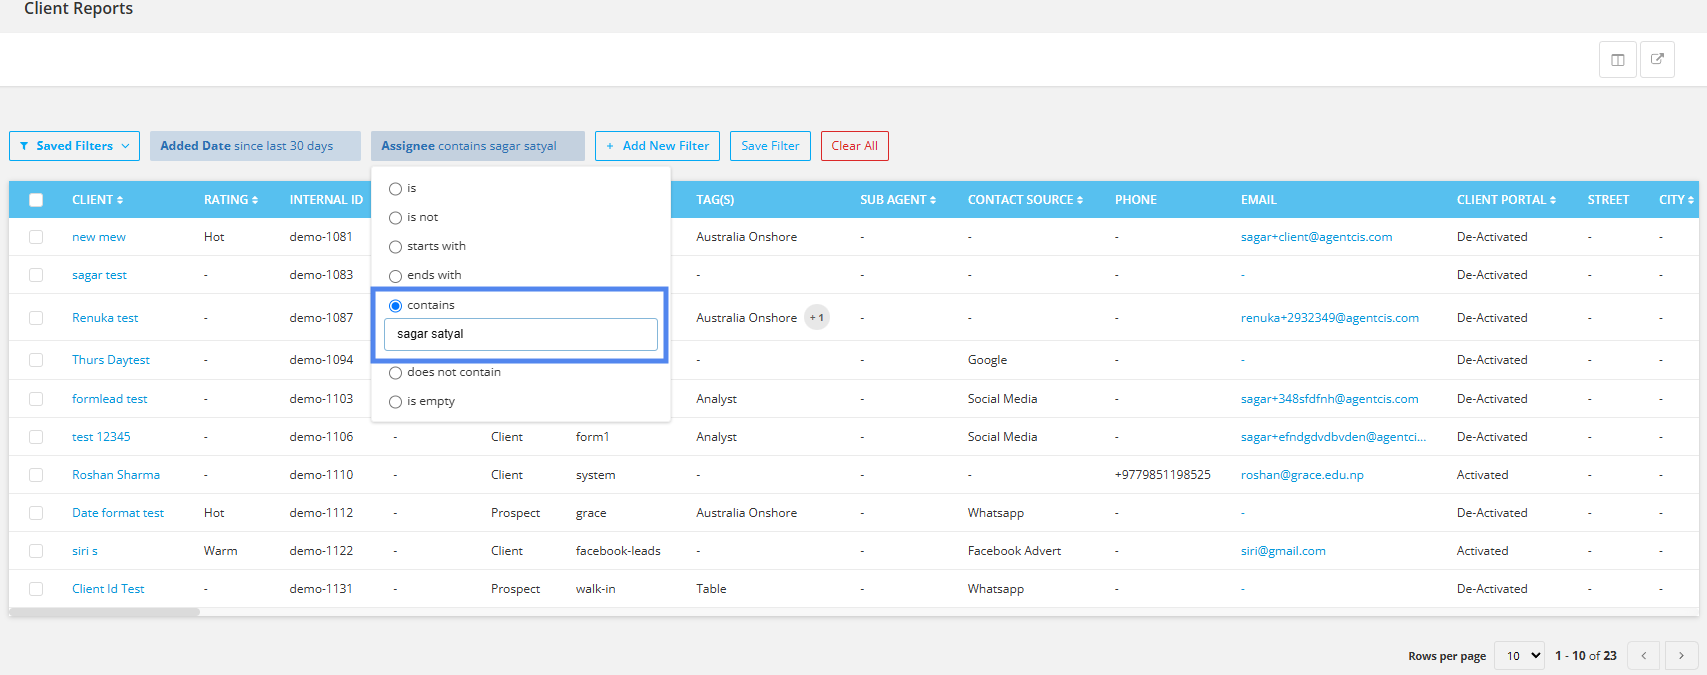
4: Select the Assignee Filter and then select Contains.
Insert the assignee name. Once inserted, the result will be automatically shown if the provided assignee name is accurate.
Once you get the list of the filtered report, you can export these reports in csv format by selecting the export icon on the top right corner.

The report will be sent to your email along with the file; the same email that you use in Agentcis.
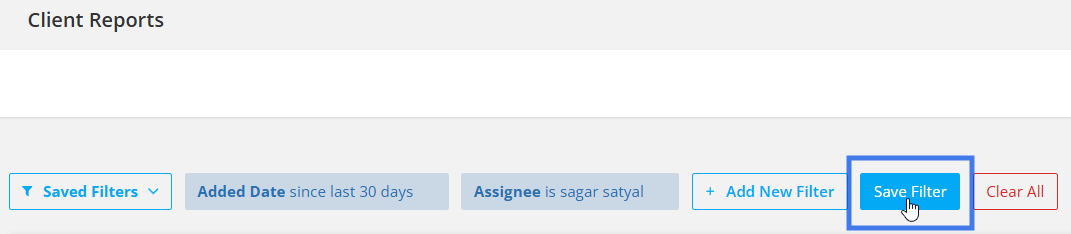
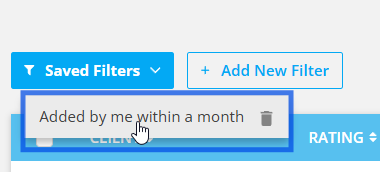
Note: You can save these filters if they are used often. To save the filters that you are currently using, select the save filter tab.
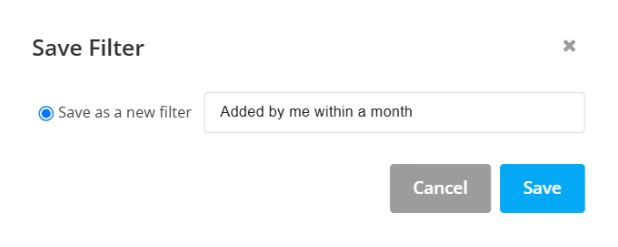
You can give a suitable name and Save it.
You can access the saved filter from the Saved Filters Tab.
You can also share your saved filters for easier access. This ensures that other users can retrieve the same data accurately, without applying incorrect filter criteria.
For example, if other users are working in the same branch or office, you can share a saved filter that includes "Added By Office is" and "Added Date".
Step 1: Click on the Saved Filters tab and select a filter that you want to share.

Step 2: Once you do, a Share with option will appear on the right of the filters section.

Click on it and select the user/s that you want this filter to be shared with. You can select multiple users.