Learn in detail about office check in form the following link: https://support.agentcis.com/en/articles/213-new-office-check-in
In office check-in, you can customize the form to be filled by the visitors while checking in and also you can add the visit purpose of the visitor in the dropdown so that the visitors can select them easily. Also, you can send an email to the visitor for the rating. All this can be done through the setting section.
For this follow the following steps:
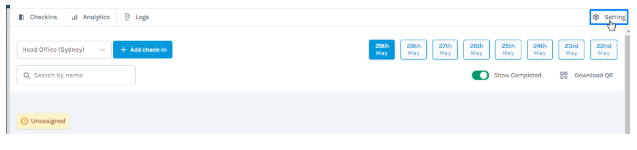
Step 1: Select the setting from the top right corner of the office check-in listing page.
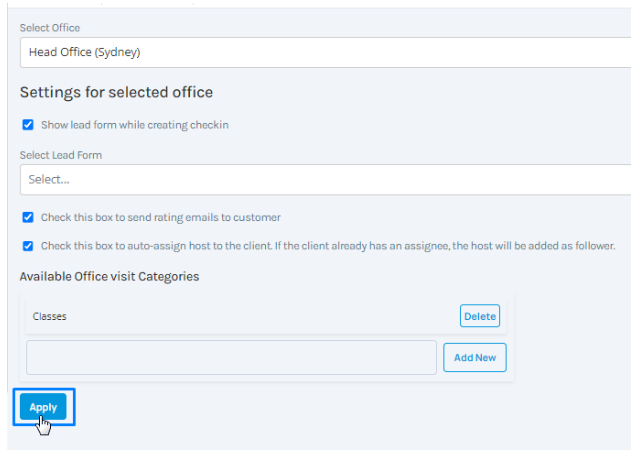
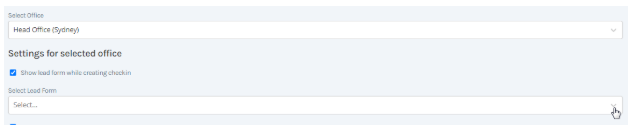
Step 2: You can make the setting based on the branch, select the branch office from the dropdown of the Select Office tab for which you are editing the settings.

Step 3: When checking in an existing client, only the visit purpose needs to be selected. This ensures a quick and seamless process without requiring additional details.
Likewise, When checking in a new lead, a form will appear to capture their details before proceeding.
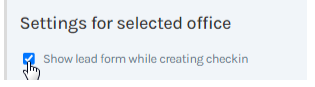
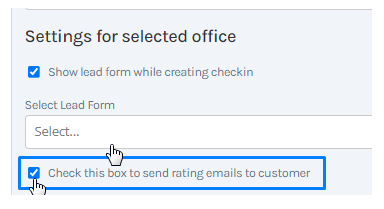
For a more customized approach, you can enable the “Show lead form while creating check-in” option. This allows you to select and display a specific lead form from your pre-created list, ensuring that the right information is collected at the time of check-in.
Learn about lead form and the process to add the lead form from the following link: https://support.agentcis.com/en/articles/204-how-to-create-a-lead-form-with-custom-fields
Step 4: Select the lead form which you want to add from the dropdown of the Select lead form section.
Step 5: To gather feedback on the host’s service during check-in, you can enable an automated rating email to be sent to visitors once their session is completed. Simply select the option “Check this box to send rating emails to customers.” Through the email students can add comment and give rating to the host.
Please Note: The ratings given by the visitors through email can be viewed in the complete session.

Step 6: If you want the visitor that is already registered in the system and has an assignee to be assigned automatically then select the option “check this box to auto-assign host to the client, if the client already has an assignee, the host will be added as a follower.”
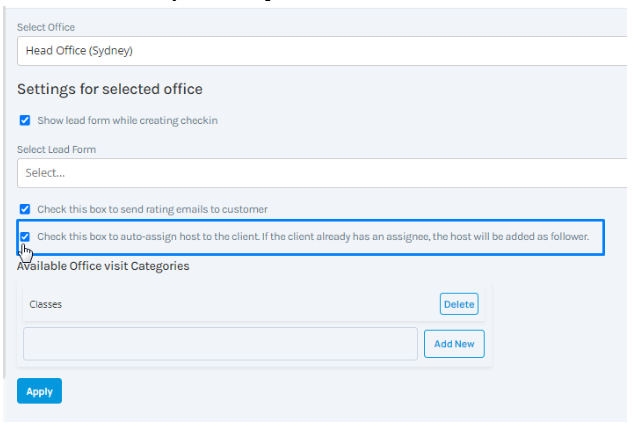
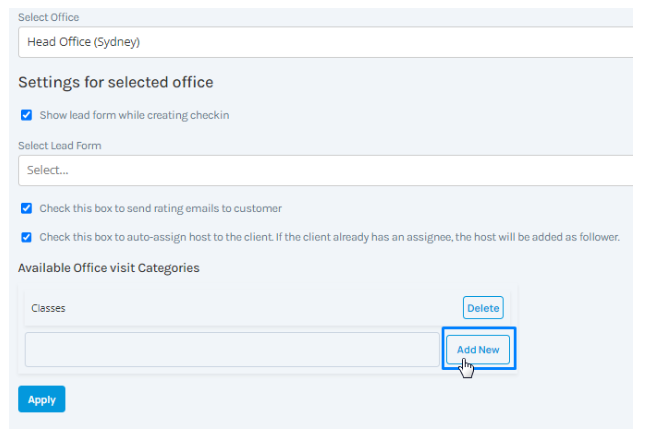
Step 7:You can add predefined visit categories from the settings. The predefined visit categories simplifies the check-in process, improves efficiency, and enhances student support. Some of the examples of the visit categories that you can add are: Counseling Session, Admission Inquiry, Visa Assistance, Document Submission, Follow-up Meeting and so on.
Add the visit categories in the box just below “Available office Visit Categories” and select the Add New tab to add another option.
Step 8: Once you complete select the Apply tab.