As a user, you can easily find out which documents need to be uploaded at each stage of an application.
Once you create a document checklist for a specific process, it will be visible in the connected application.

Before adding documents to the application checklists, please ensure that the relevant document types and document checklists have been created for the required workflow.
Document Type for Document Checklist
Create document checklists for clear and systematic collection of your client's documents
Adding a Document Checklist
Creating a Document Checklist
Then follow these steps:
Step 1: Click on the application detail page from the client’s profile.
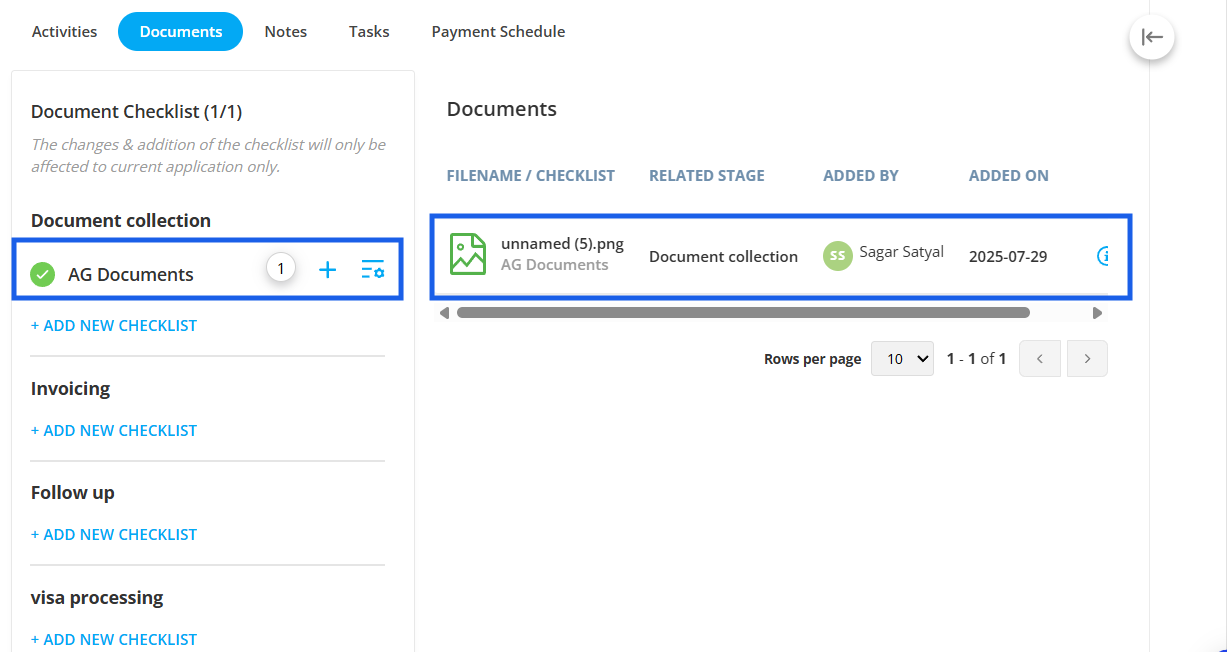
Step 2: Click on the documents sub-tab. In the documents sub-tab, you can see all the checklists in all the stages that are available for this workflow.
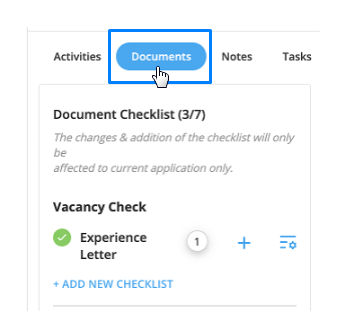
Step 3: Click on the + button beside the document type where you can either select from your device or from the Agentcis document option.
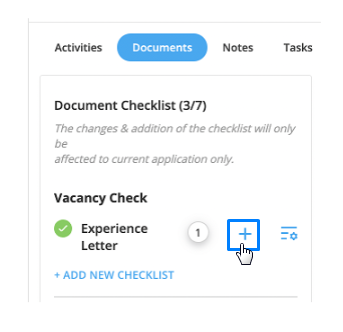
Step 4: A pop-up will appear where you are asked to upload the document from the device or from the system.
Step 5: Upload the document and click on Save button.
Once a document is successfully uploaded, the corresponding checklist item will be marked in green, and the document will appear on the right side of the Documents section within the same tab.
From the action button in the documents, you can do the following:
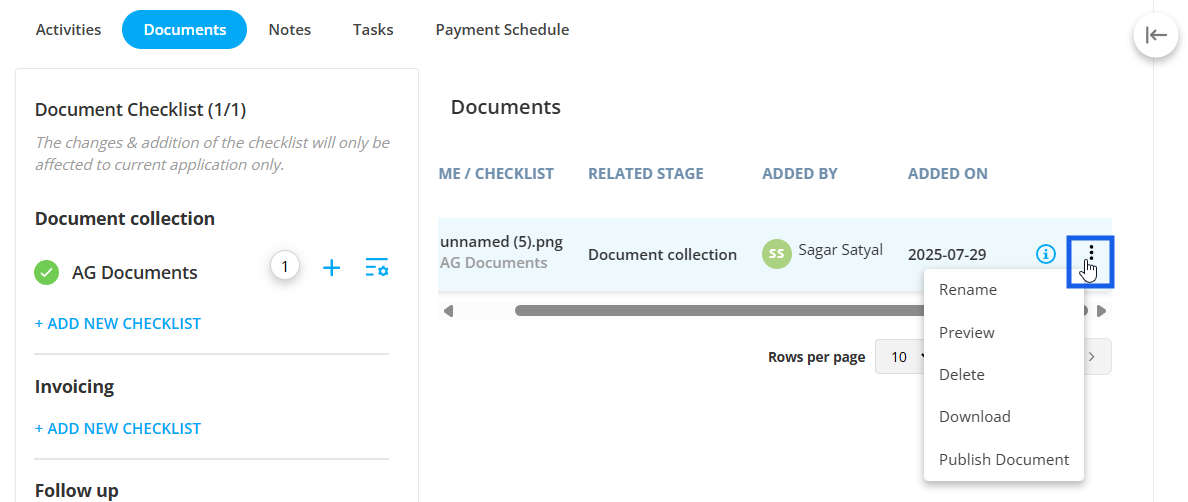
Rename: Rename the document.
Preview: View the document in another tab.
Delete: Delete the document
Download: Download the document to your local device.
Publish Document: Allow client to access the document from client portal.
